


By the end of this guide you will have planned, built, and styled at least three custom DIY bedroom accessories (pillows, a headboard accent, and a small shelf) and learned how to integrate them with furniture accents for a cohesive look. Expect 6–18 hours of hands-on work for the projects here, and the guide assumes a beginner-to-intermediate DIY skill level (basic hand tools, one small power tool like a drill, and comfort with sewing by hand or machine).
Introduction to DIY Bedroom Ideas and Custom Decor
This guide focuses on practical, accessory-first approaches to transform your bedroom: from wall art and lighting to pillows and storage. You’ll learn how to define a personalized bedroom style, choose a color scheme, and execute budget-friendly projects that layer accessories over simple furniture builds. Think of this process like tailoring clothing for your room—each accessory is a stitch that makes the whole ensemble distinctly yours.
Start by deciding the mood you want (calm, cozy, airy, eclectic), then pick two statement accessories to anchor the design. Throughout, I’ll show exact materials (yards of fabric, screw sizes, paint types), safety notes, and maintenance tips so your finished pieces last.
Before you start
- Basic tools: tape measure, straight edge, screwdriver set, power drill with 1/16″–1/4″ bits, staple gun, sewing kit or sewing machine.
- Materials on hand: 2–3 sq. yards of fabric per pillow/headboard, 1 sheet 1/2″ plywood (48″×24″) for shelves/headboard accents, 1 lb wood screws (1″–1½”), wood glue, sandpaper (120 & 220 grit), paint or stain (sample 8 oz), batting for cushions.
- Workspace: a 6×3 ft. clean bench, good daylight or 600 lux workshop light, dust mask and safety glasses for cutting/sanding.
- Time blocks: allocate 2–4 hours per accessory project; longer for complex headboards or combined furniture builds.
- Permissions: check rental rules for drilling or permanently mounting items; consult building codes for electrical projects.
- Plan your theme and palette — Define the core look and three complementary colors.
Decide between the common bedroom decor themes (modern, rustic, bohemian, minimalist). Pick one dominant color, one accent, and one neutral: for example, warm beige (neutral), teal (accent), and charcoal (dominant). Write a list of three accessory types you’ll prioritize—e.g., pillows, bedside lamp, wall art—and sketch placement on a 1:10 scale room diagram (use grid paper or an online room planner).
- Audit existing furniture and measure — Measure bed width, wall heights, and clearance.
Record: bed width (in inches), distance from floor to window sill, and depth of bedside tables. These measurements determine pillow sizes (standard/queen/king), shelf depth (10–12″ for bedside shelves), and headboard height (30–48″ above mattress for visual balance). Note door swing and clearances to keep walkways at least 30″ wide.
- Collect inspiration and prioritize accessories — Use mood boards and prioritize three DIY accessories.
Create a digital mood board (Pinterest or a folder); pick three accessories to DIY that will change the room’s feel the most. Accessories with high visual impact: a textured headboard, layered pillows, and a statement lamp. Low-cost, high-impact options: removable wallpaper behind the bed, a macramé wall hanging, and plant-shelf styling.
- Source materials and tools locally — Buy by quantity and quality grade.
Buy fabric by the yard: 1.5–2 yards for two pillows (18″×18″), 3–4 yards for an upholstered headboard (depending on pattern repeat). Choose cotton-linen blends for durability and easy cleaning. For wooden shelves/headboard accents, select 1/2″ or 3/4″ plywood (birch or pine). For fasteners use #8 wood screws 1¼” for shelves and 1½” for furniture joints. Always buy an extra 10% material as waste allowance.
- Build basic accessories first — Start with two small projects to build confidence.
Recommended starter projects: a sewn pillow and a floating bedside shelf. Both can be finished in 2–4 hours and teach sewing, measuring, drilling, and finishing skills. Use a step-by-step approach: cut, assemble, fit, finish, install.
- Layer lighting and textiles — Combine ambient, task, and accent lighting with textiles.
Design lighting: one overhead or ceiling ambient light, one bedside task lamp per side (400–800 lumens), and one accent light (string lights, 50–200 lumens). Choose warm LED bulbs (2700–3000K) for bedrooms. For textiles, use washable removable covers and test dye samples on scraps before committing.
- Install and style — Mount shelves/headboard securely and style accessories in threes.
Mount floating shelves into studs with 2–3 screws (use anchors if no studs). Hang large wall art centered over the bed so the center of art is ~60″ from the floor or 6–12″ above the headboard. Arrange pillows in odd numbers (3 or 5) for balance. Use plants in 3″–6″ pots on shelves for scale.
- Test, tweak, and document — Live with the changes for 48–72 hours, then tweak.
Assess traffic flow, light levels in the evening, and bedding comfort. Make adjustments: soften lighting with dimmers, add non-slip pads to rugs, or reposition art for better sightlines. Photograph the setup for future replication or sale listings.
Common mistakes and how to avoid them
I once mounted a shelf using drywall anchors that failed because I underestimated load—now I always locate studs or use toggle bolts rated for the expected load. I’ve also over-dyed fabric, so now I test dye on a sample swatch and time the soak exactly per instructions.
Quick verification checklist
- All shelves anchored into studs or rated anchors and tested with 20–30 lb load.
- Pillow covers fit insert with 1–2″ overfill for a plump look.
- Headboard fasteners tightened to recommended torque (hand tight plus 1/4 turn with socket).
- Lighting meets recommended lumen levels: bedside 400–800 lm; accent 50–200 lm.
- Clearance pathways 30″ or more; no sharp corners at hip height.
When to call a professional
Hire a licensed electrician for any new permanent wiring or hardwired lighting. Call a certified carpenter for load-bearing headboards or structural bed modifications. If you find mold, structural rot, or suspect asbestos in older homes, contact licensed remediation pros immediately.
Popular DIY Bedroom Decor Themes and Styles
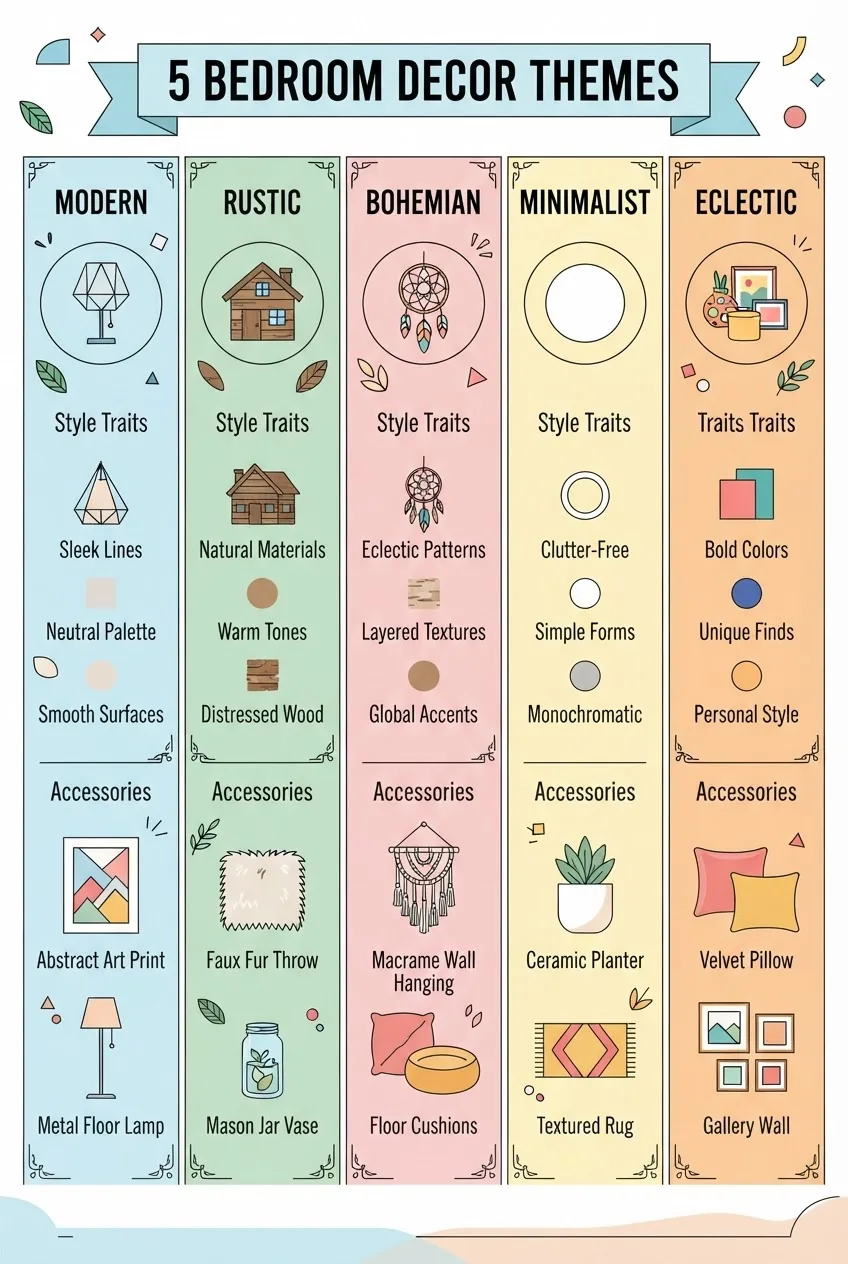
Below are five theme profiles with quick descriptors and accessory ideas—choose one and adapt accessories to reinforce the look.
- Modern — Clean lines, neutral palette, metal or lacquer accents. Accessory examples: geometric wall art, slim metal bedside lamp.
- Rustic — Warm wood tones, textured fabrics, handcrafted details. Accessory examples: reclaimed wood shelves, burlap or wool pillows.
- Bohemian — Layered textiles, mixed patterns, natural fibers. Accessory examples: macramé wall hanging, patchwork pillows with fringe.
- Minimalist — Less is more: monochrome palettes, hidden storage. Accessory examples: single statement lamp, low-profile headboard with integrated storage.
- Eclectic — Mix eras and colors, bold artwork, surprising accents. Accessory examples: mismatched bedside tables, gallery wall of small frames.
Use one dominant theme, then borrow one accessory trait from another theme for uniqueness—e.g., a minimalist bed with a single boho textile drape for warmth.
Transition: With your theme chosen, let’s look at the specific accessory projects that will deliver the most personality per hour spent.
DIY Bedroom Accessories to Enhance Your Space
Accessories layer personality onto furniture—picking the right accessories makes even simple beds and nightstands look custom. Below are projects and short how-to steps with material lists and tips for customization.
1. Handmade decorative pillows (two sizes)
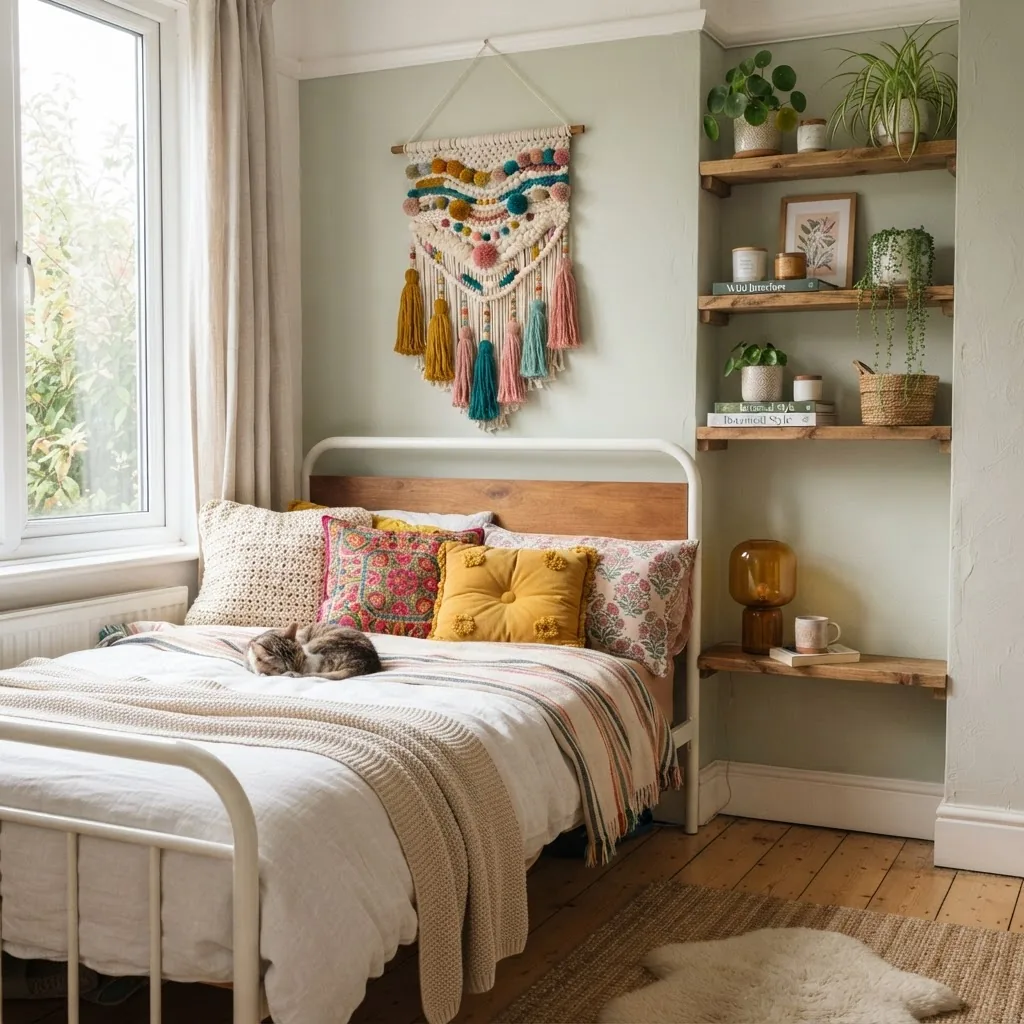
Why: Pillows add color, texture, and scale quickly. Materials: 1.5–2 yards cotton-linen blend, two 18″x18″ inserts, one 12″x20″ lumbar insert, zipper or envelope closure, matching thread, basic sewing tools.
- Cut fabric — Cut two 19″x19″ squares for 18″ pillow to allow 1/2″ seam and slight overfill.
- Assemble closure — Use a 16″ zipper or make an envelope back (two 14″x19″ back panels overlapped by 4″).
- Sew seams — 1/2″ seam allowance, backstitch at start and finish; press seams and turn right side out.
- Insert fill — Stuff insert and adjust to have 1–2″ overfill for a plump look.
- Customize — Add piping, tassels, or hand-stitched embroidery. For dyed or printed patterns, test on a 4″x4″ swatch first.
Tips: Use pre-washed fabric and preshrink with a 10-minute warm machine wash. For machine-sewn seams, set stitch length to 2.5 mm. For stronger corners, use a 0.25″ notch removal for crisp edges.
2. DIY wall art and gallery arrangements
Why: Wall art defines the room’s focal point. Materials: 1 canvas (24″x36″) or 3 smaller canvases, acrylic paints or a printed fabric mounted on foam board, hanging hardware (D-ring, 1½” screws).
- Design layout — Sketch composition; for triptychs, divide a single image into three vertical panels.
- Prepare substrate — Prime canvas with gesso for paint; stretch fabric over foam board if using textiles.
- Create art — Layer paint in thin coats; dry 20–30 minutes between coats under 60–70°F and 40–60% humidity.
- Mount and hang — Use a level and mark studs; hang center piece at 6″–12″ above headboard or 60″ from floor for a standalone piece.
Customization techniques: create a gallery with mixed frames (3–5 pieces) using consistent matting for cohesion.
3. Custom lighting fixtures and shades
Why: Lighting sets mood. Options: plug-in wall sconces, table lamps, string lights. Materials for a simple pendant: 6′ cloth-covered cord, lamp socket kit, drum shade (10″–14″ diameter), and strain relief.
- Choose fixture type — Plug-in or hard-wired (hire electrician for hard-wiring).
- Assemble — Thread cord through shade, attach socket, test with LED bulb (max 60W equivalent; use 2700K for warmth).
- Mount — Use a robust bracket or hook rated 5× expected weight; for wall-mounted lamps use 2 screws anchored into studs.
Safety note: For hardwired projects consult guidance from the U.S. Consumer Product Safety Commission. CPSC provides consumer safety info on lighting and fixtures.
4. Simple shelves and headboard accents from plywood
Why: Shelves and headboard accents create storage and visual interest. Materials: 1/2″ plywood, edge banding or 1″x2″ trim, #8 x 1¼” screws, wood glue, finish (stain or paint).
- Cut to size — Make a 24″×8″ floating shelf (depth 8″–12″). Cut 1/2″ plywood to 24″×8″ for top and 24″×7″ for bottom bracket.
- Assemble — Glue and screw internal braces every 12″ for strength; sand 120 then 220 grit.
- Finish — Apply 1 coat stain or primer and 2 coats of topcoat; dry 2–4 hours between coats at 70°F.
- Mount — Locate studs, pilot drill 1/16″ holes, and secure with 2–3 screws per bracket; test with 25–40 lb load.
creative wood craft ideas and unique woodworking projects provide more wooden accessory inspiration.
5. Upcycled accessories and thrifted makeovers
Why: Upcycling cuts cost and adds one-of-a-kind character. Ideas: repaint thrifted frames, recover a mattress topper as a headboard, refinish a bench as a bed-end seat. Cleaning tip: sanitize textiles at 140°F wash cycle if fabric permits, or steam-clean for delicate items.
Transition: After creating accessories, consider functional furniture accents to make these pieces both beautiful and useful.
Practical DIY Furniture Accents for Bedroom Customization
Furniture accents are small builds that increase usefulness without requiring full furniture construction skills. The projects below are intentionally accessory-focused so they complement built furniture rather than replace it.
Examples include bedside benches, simple nightstands, and integrated storage heads that use the same accessory-first mindset. If you want to go deeper into building your own bedroom furniture beyond accents, check this core resource:
building your own bedroom furniture
Bed-end bench (simple plan)
Materials: 2x pine boards 48″×10″ for top, 4 legs (2″x2″ posts) 18″ tall, wood screws 1½”, 12″×48″ piece of foam (2″ thick) and upholstery fabric 1.5–2 yards.
- Cut and assemble bench frame — Cut top to 48″x10″, attach legs inset 1.5″ from corners with glue and 2 screws per leg.
- Pad and recover — Glue foam to top, wrap fabric with a 1″ overlap underneath, staple at 2″ intervals.
- Seal — Apply one coat of water-based polyurethane to legs and underside to prevent moisture wicking.
Nightstand upgrade with integrated charging
Add a small shelf and routed cable channel to an existing nightstand. Materials: 1/2″ plywood shelf, 1/2″ router bit, USB power strip with mounting options.
- Create shelf — Cut and finish plywood, mount with L-brackets into studs or into the nightstand carcass.
- Route cable channel — Drill 1″ access hole for cords and route behind nightstand using adhesive cable clips.
- Mount power — Secure USB power strip under shelf with screws and cable tie excess cords.
For downloadable blueprints and dimensional drawings for accent projects, see free DIY woodworking plans.
Transition: Now that you know which accents to build, let’s cover the materials and techniques you’ll need to execute them well.
Materials, Tools, and Techniques for DIY Bedroom Projects
Choosing the right materials and mastering a few techniques will determine the durability and finish of your accessories. Below are key materials, the tools you’ll use, and technique notes for painting, fabric dyeing, and woodworking.
Essential tools and why they matter
- Tape measure — Measure twice, cut once; accuracy to 1/8″ matters for fitted covers.
- Power drill — 12V drill-driver with 1/16″–1/4″ bits covers most tasks; torque setting 2–10 for screws depending on material thickness.
- Jigsaw or circular saw — For cutting plywood; use a fine-tooth plywood blade and cut at 2,000–3,000 RPM for clean edges.
- Staple gun — Upholstery staples (3/8″ crown, 1/4″ leg) for securing fabric to wood.
- Sewing kit / machine — Universal needle 80/12; polyester thread for strength; set machine stitch length to 2.5 mm for seams.
Painting and finishing techniques
Use a primer for raw wood (shellac or bonding primer for tannin-rich woods). Sand between coats: 120 grit then 220 grit before final coat. For water-based paints: dry 2–4 hours between coats at 68–72°F and 40–60% humidity. For stains: apply thin coats, wipe off after 2–5 minutes depending on desired darkness.
Fabric dyeing basics
Types: fiber-reactive dyes for cellulose fibers (cotton, linen) give durable color; acid dyes for silk and wool. For cotton using fiber-reactive dye: pre-wash fabric, mix dye with soda ash per 1% weight of fiber rule (e.g., 10 g dye for 1,000 g fabric), soak 30–60 minutes with agitation, rinse until clear, then machine wash. Always test on a 4″x4″ swatch.
Woodworking notes for accessory builds
Use cabinet-grade plywood for visible surfaces (birch or oak veneer). For joinery in small accents: use pocket screws or 1¼” biscuits for alignment and strength. Pilot holes: for #8 screws use a 1/8″ pilot hole in softwood and 3/32″ in hardwood to prevent splitting.
For readers interested in a deeper furniture-making primer, see the complete furniture making guide.
Safety and standards: follow basic electrical safety for lighting and consult guidance from the Occupational Safety and Health Administration and the U.S. Consumer Product Safety Commission for tools and product safety. OSHA and CPSC offer authoritative safety practices.
Transition: Armed with tools and techniques, now follow precise step-by-step projects you can complete this weekend.
Step-by-Step Guide to Creating Your Own DIY Bedroom Accessories

This section contains four complete, hands-on projects with measurable steps, material lists with exact quantities, and expected times. Each project is crafted so a beginner can finish it in a weekend.
Project A — Sewn decorative pillow with piping (Skill: Beginner, Time: 2–3 hours)
Materials: 2 yards cotton-linen blend fabric, 2 pillow inserts 18″x18″, 2 yards piping cord, 60″ zipper (optional), polyester thread.
- Cut panels — Cut two 19″x19″ squares per pillow for 18″ insert. For two pillows, repeat.
- Create piping — Wrap fabric strip 1.5″ wide around 0.25″ piping cord, stitch at 0.25″ from cord edge using zipper foot.
- Pin and sew — Pin piping along the right side of one panel, sew with 0.375″ seam allowance; align second panel and sew around leaving a 4″ opening if not using a zipper.
- Trim and turn — Clip corners at 0.25″, turn right side out, insert pillow and hand-stitch or insert zipper panel.
Tool notes: Use a universal needle 90/14 for thick fabrics; set machine stitch length to 2.8 mm for decorative stitching.
Project B — Floating bedside shelf (Skill: Beginner, Time: 2–4 hours)
Materials: 1 sheet 1/2″ plywood (cut to two 24″x8″ pieces), 4 #8 x 1¼” screws, wood glue, sandpaper, finish of choice.
- Cut and sand — Cut plywood to 24″x8″ top and 24″x5″ inner bracket; sand edges with 120 then 220 grit.
- Assemble bracket — Glue bracket flush to underside and screw from top to secure (pre-drill 1/16″ pilot holes).
- Finish — Apply one coat stain or primer; dry 2–4 hours, then 2 topcoats with light sanding between coats.
- Mount — Use a stud finder, mark two studs, pilot drill 1/8″ holes, and attach shelf with #8 x 1¼” screws into studs; test with 30 lb load for 10 minutes.
Safety tip: Always wear safety glasses when drilling and a dust mask when sanding. For heavier loads, use toggles rated for 50+ lb if no stud is available.
Project C — Simple upholstered headboard panel (Skill: Intermediate, Time: 5–8 hours)
Materials: 1/2″ plywood 48″x30″, 2″ high-density foam 48″x30″, batting 60″x36″, fabric 3 yards, adhesive spray, staple gun and 3/8″ staples, mounting cleat (1″x2″ wood), 4 small wood screws.
- Cut panel and foam — Cut plywood and foam to 48″x30″.
- Glue foam to plywood — Spray adhesive evenly (60% coverage), press foam onto plywood, allow 5–10 minutes to set.
- Add batting and fabric — Wrap batting around edges with 2″ overlap; then wrap fabric with 3″ overlap and staple underneath at 2″ intervals.
- Attach cleat and mount — Screw the cleat to the wall into studs at the desired height, hang headboard on mating cleat. Use 2–3 screws at 2″–3″ from ends to prevent rotation.
Notes: For tufting, plan button locations before stapling; use a long upholstery needle and 10″ upholstery thread. Expect total material cost around $75–$150 depending on fabric choice.
Project D — DIY pendant lamp from drum shade (Skill: Beginner, Time: 1–2 hours)
Materials: 1 drum shade 12″ diameter, lamp socket kit with 6′ cloth cord, 60W equivalent LED bulb, ceiling hook or bracket for plug-in option.
- Assemble socket — Thread cord through shade center, attach socket per kit instructions, secure strain relief.
- Test — Plug in and test with an LED bulb; ensure no flicker and secure mounting.
- Mount — For plug-in, hang from decorative hook and hide cord with a cord cover; for hardwired, hire electrician.
Electrical disclaimer: Hardwiring should be performed by a licensed electrician; follow CPSC guidance for lamp safety.
Transition: After building, upkeep ensures longevity—see maintenance and refresh strategies below.
Tips for Maintaining and Updating Your DIY Bedroom Decor
Maintenance keeps your handmade pieces looking fresh and protects your investment. Below are cleaning, seasonal update ideas, and durability considerations.
Cleaning and care
- Fabric accessories: machine-wash removable covers on gentle, cold cycle; air dry or tumble low. Spot-clean non-removable fabric with a mild detergent diluted 1:20 and blot—do not rub.
- Wood finishes: dust weekly; clean with a damp microfibre cloth and dry immediately. Reapply liquid wax or topcoat every 12–24 months depending on wear.
- Lighting: dust shades monthly; replace bulbs with same lumen and color temperature.
Seasonal refreshes
Swap pillow covers, add a throw blanket in contrasting texture, and change plants or artwork to refresh color without major expense. According to a 2023 home decor survey by industry researchers, 62% of homeowners prefer seasonal textile swaps over large furniture purchases, making accessories the most cost-effective update strategy.
Durability considerations
Trade-offs: natural fibers feel premium but stain easier; synthetic blends resist stains but can pill. Choose foam density of at least 1.8 lb/ft³ for cushions to keep shape longer. Use stainless or zinc-coated hardware in humid climates to avoid corrosion.
When to replace vs. repair
Repair textiles if seam failures are under 2″ and foam is not compressed beyond 50% thickness loss. Replace if fabric is thinning across >20% of its surface area or if structural integrity of a shelf is compromised.
Final transition: Below are short FAQs and a JSON-LD block for search engines summarizing the key questions readers ask.


