


By the end of this hands-on guide you will have completed a small, practical wood build (a 12″ x 8″ utility box or wall shelf), learned core measurements and joinery, and acquired a repeatable process you can finish in 2–4 hours. Skill level: beginner — no prior woodworking required beyond measured cutting and safe tool handling.
Introduction to Simple Woodworking Projects
This guide focuses on simple woodworking projects you can finish with a modest tool set and inexpensive materials. You’ll find easy wood projects, woodwork ideas, and woodworking crafts that balance usefulness, quick build-times, and gentle learning curves. Expect small wood projects like boxes, shelves, and frames, plus quick DIY wood crafts that teach measuring, cutting, sanding, joining, and finishing.
Transition: Before you pick a plan, set realistic expectations — projects that teach a single technique (a glued box or nailed shelf) make better first projects than attempting a dresser or full-size furniture build.
Essential Tools and Materials for Easy Woodworking Projects
To keep your first builds fun and fast, collect a compact kit that covers cutting, drilling, fastening, clamping, and finishing. Below I list the essentials, recommended beginner options, and approximate cost ranges.
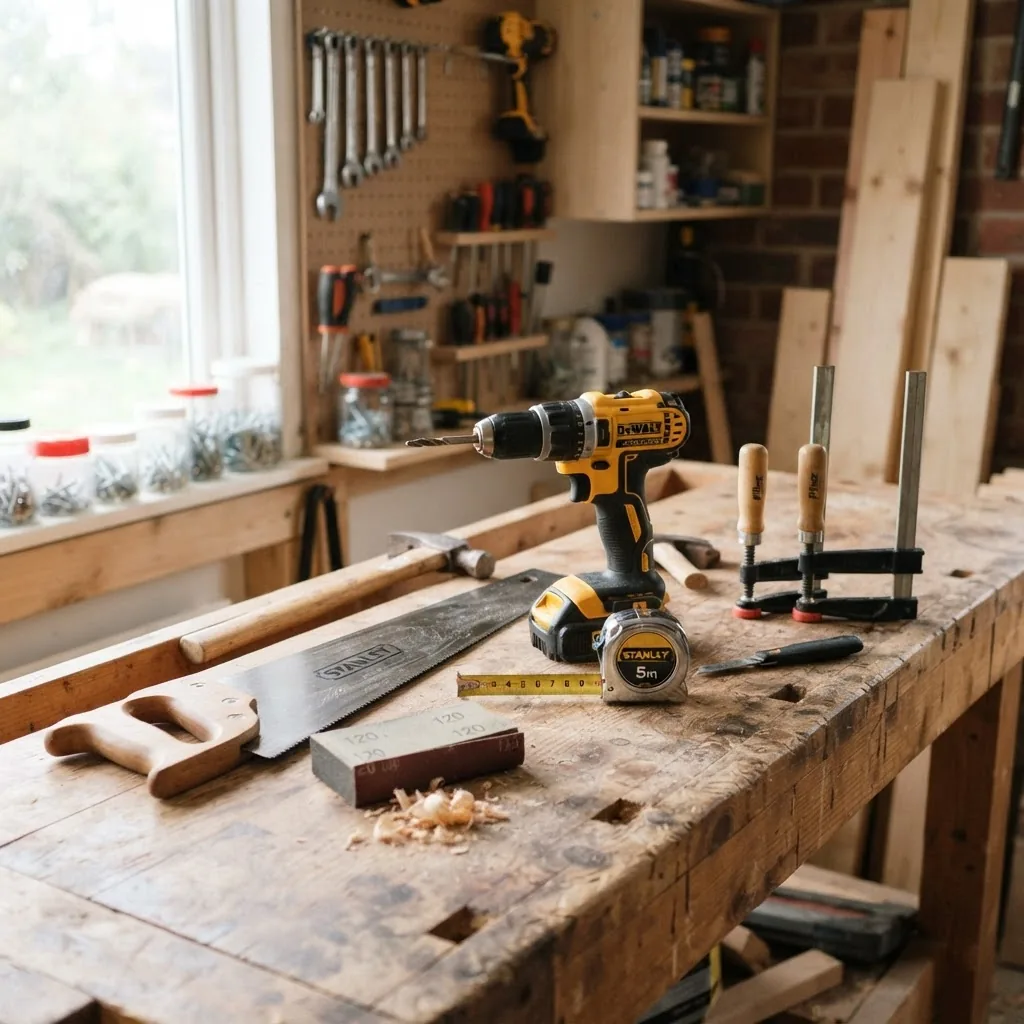
Start by assembling the following:
- Woodworking tools — essential hand and power tools (see list below).
- Measuring supplies — 25″ tape measure, 6″ combination square, pencil, marking gauge.
- Clamping — two 12″ bar clamps + two 6″ spring clamps.
- Sanding/finishing — 120 & 220 grit sandpaper, sanding block, foam brush, wipeable tack cloth.
- Fasteners & adhesive — 1¼” wood screws (box of 50), 1″ brad nails (100), wood glue (8 oz PVA), wood filler.
- Materials — 1×8 or 1×6 pine boards (common), 1 sheet of 1/4″ or 1/2″ plywood for box bottoms or shelves.
- Safety — safety glasses, hearing protection, dust mask (N95), small first-aid kit.
Numbered checklist of basic tools (buy or borrow):
- Handsaw or circular saw — handheld circular saw is faster for straight cuts (expect to spend $60–$100 for an entry-level model).
- Cordless drill/driver — 12V or 18V drill/driver, with a set of Phillips and flat bits ($60–$120).
- Sander — random-orbit palm sander (120–240 grit used) speeds finishing ($40–$80).
- Clamps — bar clamps and spring clamps as above ($20–$50 total).
- Combination square and speed square — for square cuts and angle checks ($10–$25 each).
- Measuring tape and marking tools — see above ($10–$20).
- Work surface — sturdy workbench or temporary sawhorses and a 2′ x 4′ sacrificial board.
Material notes: pine and plywood are beginner-friendly — pine is easy to cut and sand; plywood offers stable flat panels for boxes and shelves with fewer joins. For sustainable wood sourcing guidance, refer to the Forest Stewardship Council’s recommendations and certification programs.
Transition: With the right tools and materials ready, the next step is mastering a handful of basic techniques that determine whether a project looks homemade or handmade.
Basic Woodworking Techniques to Master Before You Start
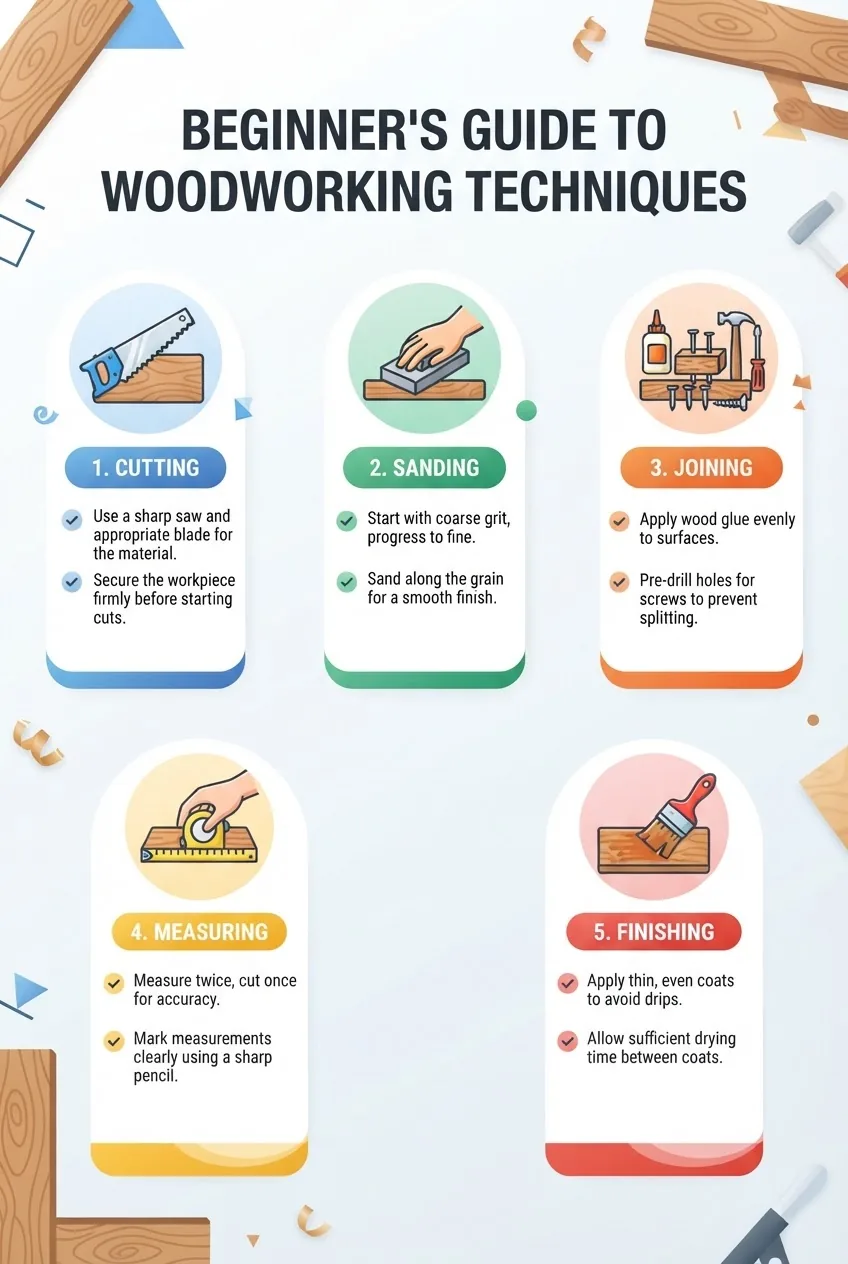
Before you begin projects, learn cutting, sanding, joining, measuring, and finishing. Practice each on scrap wood until you hit consistent, repeatable results — this saves time and reduces waste. The following how-to steps break techniques into manageable practice tasks.
-
Cutting: Practice straight rip and crosscuts.
- Mark two test pieces 12″ long on 1×6 pine. Set a circular saw depth to just 1/8″ deeper than board thickness (for a 3/4″ board set 7/8″).
- Clamp a straightedge guide and cut slowly at 40–50 ft/min feed speed; let the blade reach full speed before contact. Expect 2–3 minutes per crosscut.
- Tip: Use the saw’s left-hand side to see the layout line if your saw cuts on the left. Clean the blade every 5–10 cuts for pulp-free edges.
-
Sanding: Move from coarse to fine in stages.
- Start with 120 grit to remove saw marks; use 150–180 for smoothing; finish with 220 for a soft hand. Sand with the grain, not across it.
- When sanding large flat panels, use a random-orbit sander at 12,000–14,000 OPM and keep the pad moving to avoid sanding through the veneer.
-
Joining: Glue, nails, screws—choose the right one.
- Glue joints: apply a 1/16″ bead of PVA along the mating surface, clamp at 100–150 psi across the joint for 30–60 minutes. Remove squeeze-out with a damp cloth before it fully cures.
- Screws: pre-drill using a bit 70–80% of screw shank diameter; countersink for flush finishes. Use #6–#8 screws for small projects (length = board thickness x 1.5).
- Nails/brads: best for lightweight trim or temporary holds. Use a 23-gauge brad for 1/4″ plywood trim; finish with wood filler for a smooth look.
-
Measuring: Build accuracy with simple habits.
- Rule of thumb: measure twice, cut once. Use a combination square for 90° checks and a speed square for repeatable angle setups.
- Mark with a sharp pencil or a marking knife for thin lines. When replicating parts, use a stop block clamped to a saw fence for identical lengths.
-
Finishing: Protect and highlight the grain.
- Apply a single thin coat of a wipe-on polyurethane or diluted varnish: 2–3 thin coats, sanding with 320–400 grit between coats after 2–4 hours of dry time at 68°F.
- For painted pieces prime with an oil-based primer, sand lightly with 220 grit, then apply two finish coats. Always test finishes on scrap wood first.
Safety essentials: always wear eye and hearing protection, and use a dust mask when sanding. According to a 2024 industry report on workshop injuries, dust exposure and improper tool handling are leading causes of DIY incidents — follow basic PPE steps and check local safety guidance from OSHA for specifics.
Resources: For best-practice technique standards, see the Woodworkers Guild recommendations for tool use and joinery.
Transition: With these fundamentals in your toolbox, you’re ready to pick a project. The next section lists ten approachable builds that teach one or two techniques each.
Top 10 Simple Woodworking Projects for Beginners
Below are ten small woodworking projects, each with a short description, core skills practiced, estimated time, cost, and difficulty rating. These small woodworking projects and beginner wood projects scale well: tweak sizes or materials as your confidence grows.
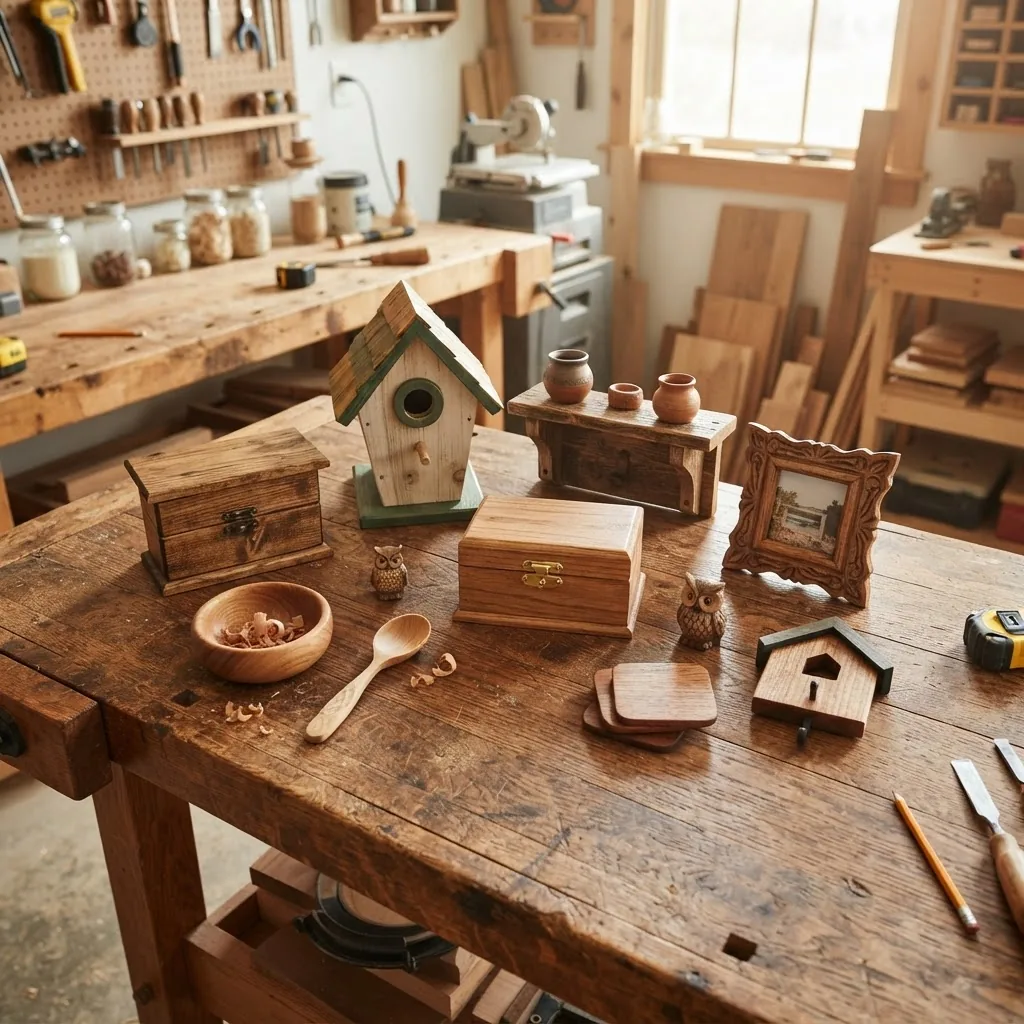
- Simple Utility Box — Skills: cutting, glue joints, sanding. Time: 1.5–3 hours. Cost: $8–$20. Difficulty: Easy. A 12″ x 8″ x 4″ box using four 1×4 sides and a 1/4″ plywood bottom; ideal for practicing square glue-ups and clamping.
- Floating Shelf (8″ deep) — Skills: measuring, screw joinery, finishing. Time: 2–4 hours. Cost: $12–$30. Difficulty: Easy. Build a shallow wall shelf from a 1×8, reinforce with a 1×2 internal cleat. Teaches wall-mounting and anchor selection.
- Picture Frame — Skills: miter cuts, sanding, finishing. Time: 45–90 minutes. Cost: $6–$15. Difficulty: Easy. Use a miter box or miter saw; practice 45° cuts and glue with corner clamps.
- Birdhouse — Skills: cutting, drilling, basic joinery. Time: 1–2 hours. Cost: $5–$15. Difficulty: Easy. A forgiving project that teaches small scale joins and exterior finish choices.
- Simple Picture Ledge — Skills: routing or dadoing (optional), sanding. Time: 1–2 hours. Cost: $8–$20. Difficulty: Easy. A small ledge with a 3/4″ lip holds frames and small objects.
- Spice Rack (Wall-Mounted) — Skills: shelving, screw and glue combo joints. Time: 2–3 hours. Cost: $15–$35. Difficulty: Moderate. Multiple small shelves teach repeated, identical cuts.
- Planter Box — Skills: plywood bottom, glue and screw joinery, finishing for outdoor use. Time: 2–4 hours. Cost: $20–$40. Difficulty: Moderate. Use exterior-grade glue and finish with an exterior poly or paint.
- Small Jewelry or Keepsake Box — Skills: fine sanding, hinge installation, finishing. Time: 2–3 hours. Cost: $10–$25. Difficulty: Moderate. Teaches precision and small hardware installation.
- Simple Bench (2-ft seat) — Skills: mortise-and-tenon alternative (screws + glue), sanding, finishing. Time: 3–5 hours. Cost: $30–$60. Difficulty: Moderate. Reinforces structural joining and weight-bearing considerations.
- Decorative Wall Panel (inlay or routed detail) — Skills: routing, finishing. Time: 2–4 hours. Cost: $15–$35. Difficulty: Moderate. A low-risk way to practice decorative woodworking and finishes.
Transition: Pick one project from above that teaches the technique you most want to master — the next section walks through a full case study and step-by-step plan for a first build.
Step-by-Step Guide: Building Your First Easy Wood Project
This hands-on walkthrough uses a 12″ x 8″ utility box as a case study: it teaches cutting, glue-up, screw reinforcement, sanding, and finishing. Follow each step, and you’ll complete a clean first project with a lasting, functional result.
Before you start (prerequisites and quick checklist):
- Work space: stable bench or sawhorses, 3′ x 2′ clear area.
- Tools: handsaw or circular saw, cordless drill/driver, random-orbit sander, clamps, measuring tape, pencil, combination square.
- Materials: (1) 1×8 pine board, 1/4″ plywood sheet (for bottom), wood glue (8 oz), 8 x 1¼” screws, 8 x 1″ brad nails, 120/220 sandpaper, wood filler, 2 coats polyurethane.
- Safety: safety glasses, hearing protection, dust mask.
Tools and materials list (detailed):
- 1×8 pine board, select two 8′ lengths to supply sides, ends, and lid — you will cut: 2 x 12″ sides, 2 x 8″ ends, 1 x 12″ bottom panel (from plywood).
- Cordless drill/driver with 1/8″ and countersink bits. Use 18V for reliable torque; set clutch to 3–4 for driving 1¼” screws into pine.
- Sander: random-orbit set to medium speed; sand each face 30–45 seconds for fine results.
- Clamps: two 12″ bar clamps to hold sides during glue-up at ~100–150 psi distributed across the joint.
Case study snapshot: I built this box in 2 hours using a handheld circular saw and a workmate clamp—my cuts were within 1/16″ accuracy and the glued corners held after 24-hour cure. The finished box took two thin coats of wipe-on polyurethane with 2 hours dry between coats.
-
Measure and mark all parts.
Measure twice. Mark two side boards at 12″ and two end boards at 8″. Mark the plywood bottom at 11½” x 7½” so it sits recessed 1/8″ inside the box perimeter.
Time: 10–15 minutes.
-
Cut the boards to size.
Clamp a 1/4″ sacrificial fence to your bench, set a circular saw to 7/8″ depth for 3/4″ stock, and cut each piece. For miter-free joints keep ends square with a combination square check (<1° variance).
Time: 15–25 minutes.
-
Pre-fit the dry assembly.
Assemble the four sides without glue. The plywood bottom should sit flush in the recess. Confirm the box is square by measuring diagonals — they should match within 1/16″. Adjust by sanding or trimming as needed.
Time: 5–10 minutes.
-
Prepare joinery: pre-drill and glue.
Apply a 1/16″ bead of PVA along mating surfaces. Pre-drill two 1/8″ holes on each end piece, countersink gently. Push glue into joints, clamp, and drive two 1¼” screws per end from the outside into the side boards. Wipe excess glue immediately with a damp cloth.
Clamping pressure: 100–150 psi across joint; cure time: clamp 30–60 minutes, full glue strength 24 hours.
-
Fit and fasten the bottom panel.
Set the plywood bottom into the recessed slot. Use 1″ brad nails every 6″ around the perimeter (or #6 x 3/4″ screws if you prefer). If you want a removable bottom, omit glue and use small screws or figure-eight fasteners on the outside.
Time: 10–15 minutes.
-
Sand all surfaces smooth.
Start with 120 grit to remove machine marks and glue squeeze-out; progress to 220 grit for a soft finish. Sand with the grain. Pay special attention to edges and corners — round them slightly (1–2 mm) to prevent splinters.
Time: 15–25 minutes.
-
Fill holes and prepare for finish.
Fill screw holes with wood filler; when dry (15–30 minutes depending on product), sand flush with 220 grit. Remove dust with a tack cloth or vacuum with brush attachment.
Time: 30–45 minutes including cure.
-
Apply finish coats.
For a quick, durable finish use wipe-on polyurethane: apply a thin coat with a lint-free cloth, allow 2 hours dry at 68°F, sand lightly with 320 grit between coats, and apply a second coat. Dry time: 2–4 hours between coats; light use after 24 hours, full cure 72 hours.
Time: 2–4 hours (includes dry intervals).
Practical notes and standards: For workshop safety practices consult OSHA guidance on power tool usage and PPE before attempting power-tool steps — follow local rules and the safety sections of trade associations.
Furniture Blueprints Guide for Free DIY Woodworking Plans
How to Make Your Own Furniture Guide for Building Projects
Common mistakes and how to avoid them
I’ve made these mistakes with beginners: I once cut pieces before measuring the plywood bottom and ended up with a 1/4″ gap — that taught me to always pre-fit before gluing. I also over-clamped a thin panel and crushed the edge; use evenly-distributed pressure (100–150 psi) and cauls to protect faces.
Other common errors: driving screws without pre-drilling (causes split ends), sanding too aggressively off edges (weakens glue surfaces), and rushing finish drying (tacky surfaces). I now wait full cure times and keep a test scrap for finish trials.
Checklist to verify your work
- Box is square: diagonal measurements match within 1/16″.
- Joint strength: lightly tug after 24 hours — no movement at glue lines.
- Surface finish: no dust nibs; two even coats of finish, light sanding between coats.
- Edges rounded 1–2 mm to avoid splinters.
- Screw heads filled and sanded flush.
When to call a professional
Call a professional if your project requires structural load-bearing capacity (benches for heavy use), complex joinery like true mortise-and-tenon under high load, or if you lack safe access to tools like table saws or routers. Also seek pros for chemical finishes in poorly ventilated areas.
Transition: If you want creative inspiration beyond these basics, the next section offers unusual and decorative ideas to stretch your skills.
Creative Ideas for Small and Unusual Wood Projects
Once you’re comfortable with basic builds, try projects that incorporate small creative elements: inlays, mixed materials (metal/wood), or repurposed wood. These projects remain small but introduce new techniques and visual impact.
- Resin wood coasters: use scrap hardwood veneers, a 3″ circular mold, and clear epoxy to seal. Teaches mold prep and resin handling.
- Reclaimed pallet wall hooks: cut a 12″ pallet plank, route slots for metal hooks, and finish with a dark stain. Great for rustic accents.
- Geometric wooden candle holder: cut repeating small triangles and glue into a honeycomb pattern — practice consistent angle cuts and small-scale sanding.
- Floating bedside caddy: a curved plywood pocket that hooks over a nightstand — combines bending plywood technique and neat edge banding.
- Mini folding step stool: compact, practical, and teaches hinge alignment and load testing to 200–250 lb if built with 3/4″ plywood and proper bracing.
If you want to integrate woodworking decoration into a room, see the DIY Bedroom Ideas Guide with Accessories for Custom Decor for ideas on scale and placement.
For extra inspiration, explore these compendiums of ideas and crafts:
Stuff to Make Out of Wood Guide with Cool Craft Ideas
Things to Build with Wood Guide for Unique Woodworking Projects
Tips for Successful Simple Woodworking Builds
- Plan cuts on paper first — reduce waste; layout on board before cutting.
- Invest in one good measuring tool (combination square) — accuracy compounds across cuts.
- Work in stages: cut, dry-fit, glue, clamp, sand, and finish. Rushing steps causes rework.
- Use scrap wood to test finishes and settings before you touch your project piece.
- Watch your budget: small projects can be under $25 if you reuse scraps and select pine/plywood.
- Prioritize safety: consult OSHA guidance on tool-specific PPE and safe operation: OSHA.
Conclusion and Next Steps for DIY Woodworkers
You now have a repeatable path for simple wood projects: gather the right tools, practice five core techniques, pick a beginner-friendly plan, and follow step-by-step glue-up and finish routines. Start with the utility box, then scale to shelves or a small bench as confidence grows.
Ready to take the next step? For deeper furniture-building skills and full-size plans see How to Make Your Own Furniture Guide for Building Projects — it’s the natural progression after mastering simple woodworking projects.


