


Bedroom dimensions you can trust: by the end of this hands-on guide you will have a complete, measured room plan with wall lengths, ceiling height, and door/window locations recorded. Realistic time: 45–90 minutes for a single bedroom; skill level: beginner to confident DIYer.
Before you start
- Clear floor access and a helper for long walls (optional but recommended for >4.5 m / 15 ft distances).
- Tools: tape measure (5 m / 16 ft or 8–10 m / 25–33 ft), laser distance measurer, pencil, notebook, masking tape, step stool.
- Printed floor plan template or graph paper and a scale (1:50 or 1:100) if you plan to draw to scale.
- Phone or camera to photograph corners and architectural features for reference.
- Time block: undisturbed 45–90 minutes; wear comfortable shoes and keep a flashlight available for closets.
Before we dive into methods, the sections below explain why precise room measurement matters and then give standard size references, tool-by-tool technique, a detailed step-by-step measuring workflow, handling irregular shapes, and practical planning tips.
Importance of Accurate Bedroom Dimensions
Accurate dimensions create the foundation for every successful bedroom plan: they convert ideas into buildable layouts, prevent costly returns when furniture doesn’t fit, and ensure safety and circulation meet expectations. Precise measurements reduce errors downstream when ordering beds, wardrobes, or custom cabinetry and are the essential input for scale drawings and 3D modelling.
Think of measuring a room like measuring fabric for a garment: if you cut incorrectly you can’t uncut. Measurement accuracy helps you determine usable floor area, align furniture to avoid blocked doors, and verify that openings comply with clearance requirements. For example, when you record a floor-to-ceiling height you confirm whether a built-in shelving unit will fit vertically without trimming.
A common framing for measurement accuracy is to set a measurement tolerance — the acceptable range for small errors. For furniture planning, a ±6 mm (±1/4 in) tolerance on wall lengths is usually adequate; for built-ins a tighter ±3 mm (±1/8 in) tolerance is safer. Establish your target tolerance before you measure so you choose the right tool and technique.
Measurement errors often originate from incorrect start/end points (e.g., measuring to plaster edge vs. stud face), faulty tool zero points, or failing to account for recesses like skirting or moldings. Recording how you measured each dimension — the reference point and unit — saves time later when translating measurements to scaled plans.
Transition: With that measurement mindset in place, next we’ll review common bedroom size ranges so you can contextualize your measurements against standard dimensions and building guidance.
Standard Bedroom Dimensions by Type and Purpose
Standard size ranges help you evaluate whether your room meets typical expectations for comfort and function. Below are commonly used dimensions for three bedroom categories: master, guest, and kids’ bedrooms. These ranges account for bed sizes, circulation, and minimum furniture clearances.
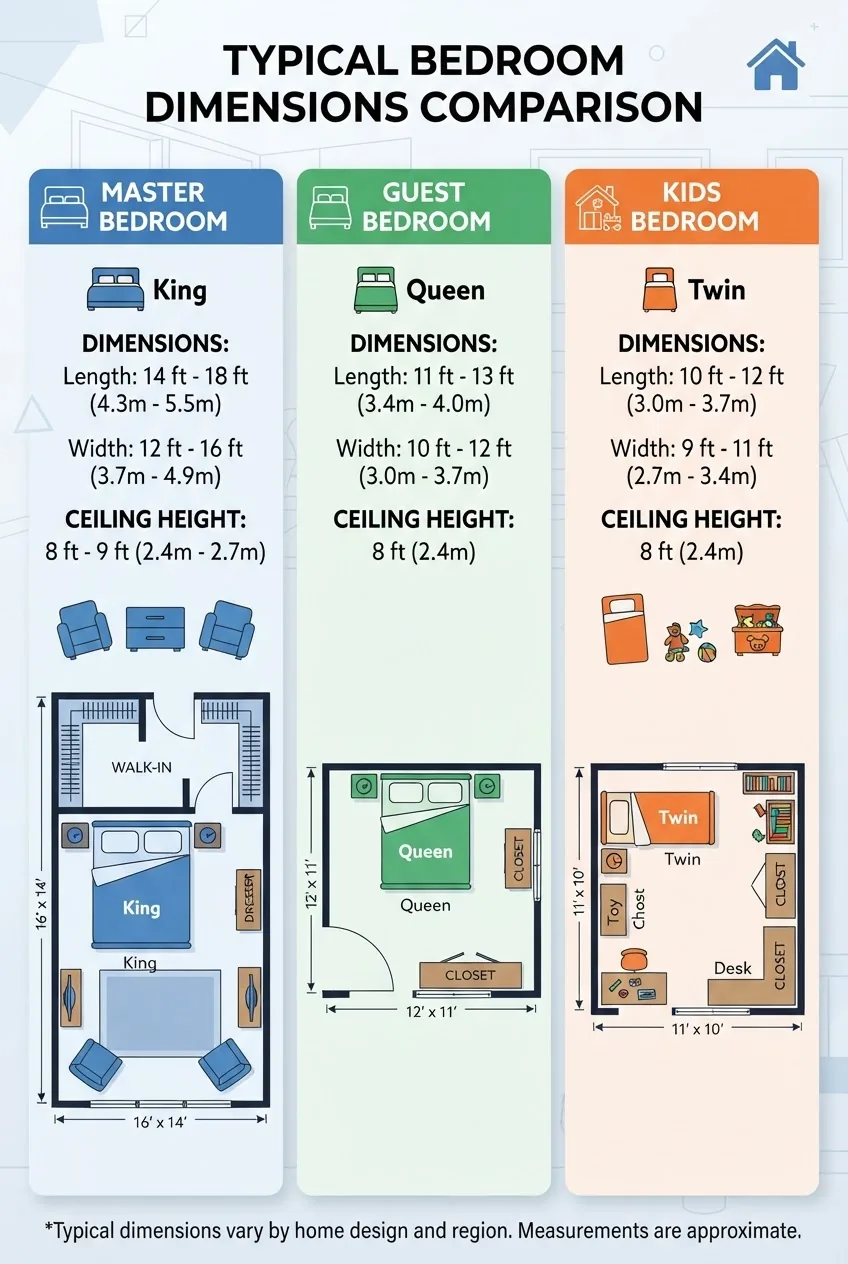
| Bedroom Type | Typical Floor Area (m² / ft²) | Typical Dimensions (L × W) | Recommended Ceiling Height |
|---|---|---|---|
| Master bedroom | 14–25 m² / 150–270 ft² | 3.6–5.0 m × 3.6–5.0 m (12–16 ft × 12–16 ft) | 2.4–2.7 m (8–9 ft) |
| Guest bedroom | 9–14 m² / 95–150 ft² | 2.7–3.6 m × 2.7–3.6 m (9–12 ft × 9–12 ft) | 2.4 m (8 ft) |
| Kids’ bedroom | 7–12 m² / 75–130 ft² | 2.4–3.3 m × 2.1–3.0 m (8–11 ft × 7–10 ft) | 2.4 m (8 ft) |
For code-based guidance, many jurisdictions publish minimum space standards. For example, national housing standards set minimum sizes for bedrooms in new developments; according to a 2023 national housing authority guideline, a single-occupancy bedroom should not be smaller than 7.5 m². Refer to your local authority for binding rules.
Ceiling height relevance: ceiling height affects perceived space and vertical storage options. Standard dwellings typically use 2.4 m (8 ft) as the minimum; 2.7 m (9 ft) is common for master bedrooms. If your ceiling is lower than 2.4 m, factor this into wardrobe and headboard planning.
Practical note: when measuring small bedrooms, record clearances around the bed: allow at least 60 cm (24 in) on one side for basic access and 75–90 cm (30–36 in) for comfortable circulation on both sides. These allowances determine whether a bed plus bedside tables fit without obstructing doors or windows.
Transition: With standard size ranges in mind, pick the right tools and techniques to record your actual room dimensions with the precision your project requires.
Essential Tools and Techniques for Measuring Bedrooms
Choosing the right tool depends on room size, tolerance requirement, and feature complexity. For most bedroom projects use both a precision tape measure for short runs and a laser distance measurer for long walls or ceiling heights. Below are recommended tools and how to use them effectively.
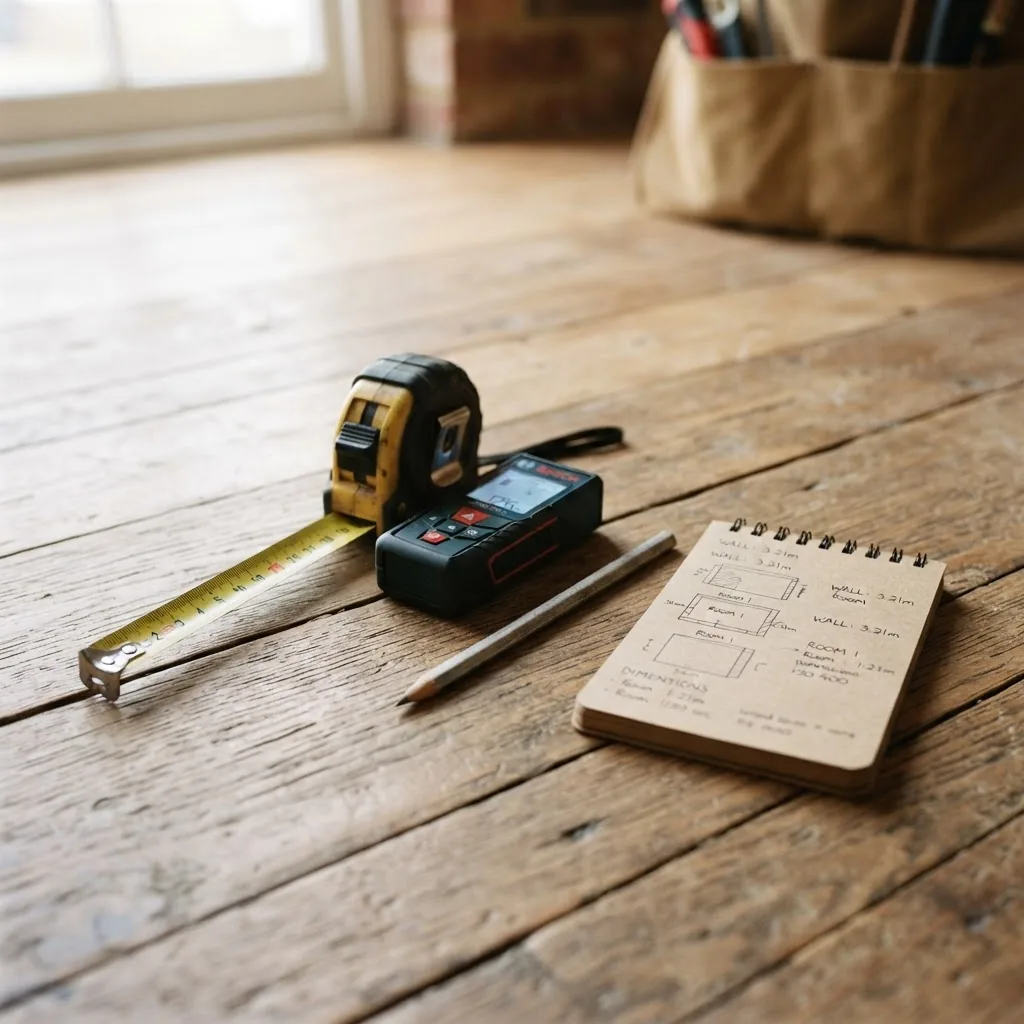
- Tape measure (5–10 m / 16–33 ft) — Use for baseboard-to-baseboard wall runs, window reveals, skirting offsets, and door jamb widths. Verify the zero end is flush and not bent; start from the same trim face each time.
- Laser distance measurer — Quick, accurate for long diagonals and ceiling height. Choose a device with ±1.5 mm accuracy for indoor work. According to a 2022 manufacturer guide, held steady at chest height and aimed at a flat target, a laser gives repeatable results.
- Folding rule or carpenter’s rule — Handy for small clearances like depth of recessed closets or built-ins where tape sag is a problem.
- Plumb bob or laser level — Use to transfer ceiling points to the floor (for accurate ceiling height measurement over uneven floors) and to check wall plumb.
- Pencil, masking tape, notebook / phone camera — Record each measurement with a reference note (e.g., “North wall: measured plaster face to plaster face, excludes skirting”). Photograph each corner and feature to cross-check later.
- Scale and graph paper or drawing software — Transfer measurements to a scaled drawing (1:50) so you can evaluate furniture clearance precisely.
Technique tips: when using a tape measure on long walls, anchor the tape to the opposite wall with masking tape and measure twice. For lasers, aim at a matte surface to avoid scatter; if the target is weak, use a piece of cardboard as a target and measure to it, then subtract its thickness.
Tool trade-offs: tapes are inexpensive and tactile but subject to sag and edge-bending error on long runs. Lasers are faster and precise but need a clear line of sight and may read differently on glossy surfaces. Use both where possible and adopt the measurement that matches your tolerance target.
For additional tool guidance, see the manufacturer’s usage pages for calibration and accuracy specs — for example, Leica Geosystems provides device accuracy references and best-practice tips.
Transition: those tools and techniques set you up for the full measuring workflow. The next section walks through a step-by-step method you can follow start-to-finish to map your bedroom precisely.
Step-by-Step Guide to Measuring Your Bedroom Dimensions Accurately
This numbered workflow is the practical core. Each step begins with an action-first phrase in bold — follow them sequentially. Expect 45–90 minutes for a 12 m² room; allow an extra 20–40 minutes for irregular rooms or built-ins.
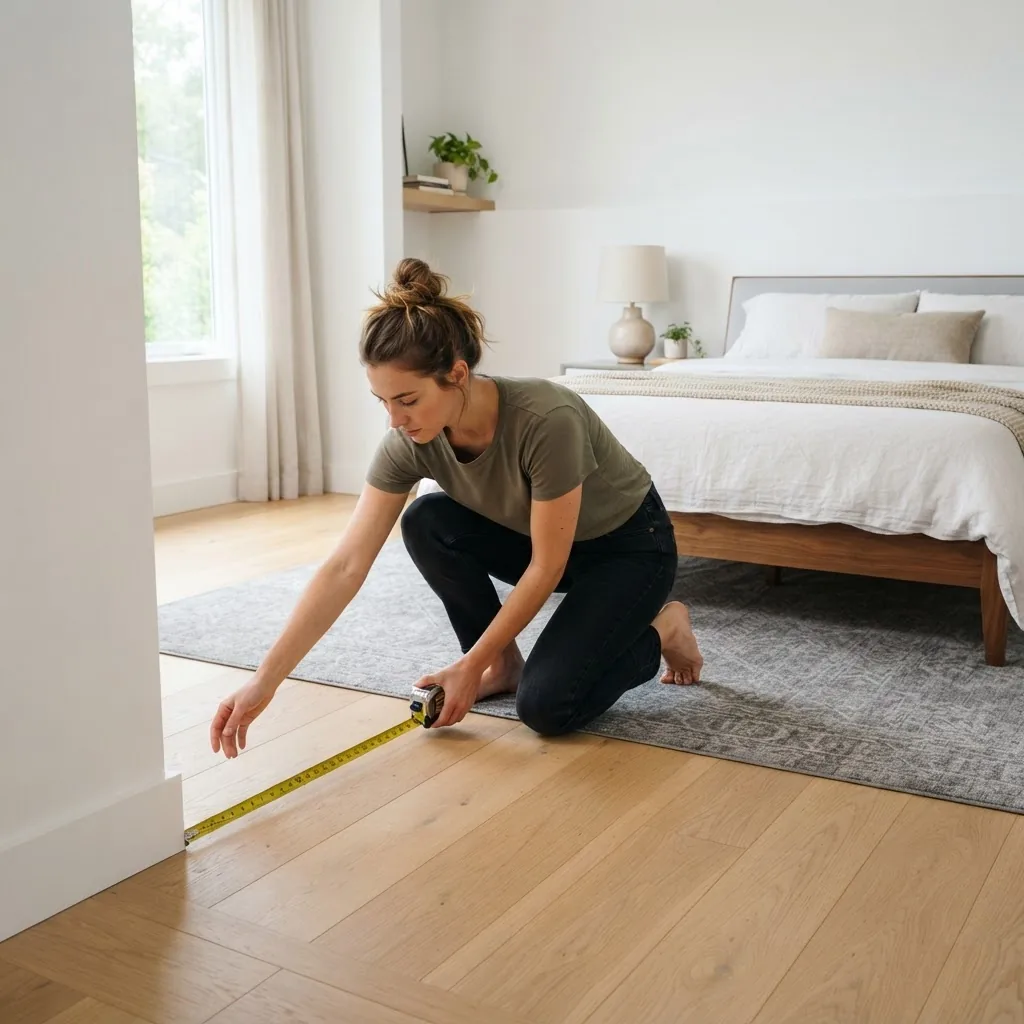
- Clear the floor and note obstructions. Remove loose items or furniture if possible. Photograph the room from two opposite corners. Time: 5–10 minutes. Reason: unobstructed sight-lines let you measure from baseboard to baseboard and prevent false diagonals.
- Establish measurement reference points. Decide whether you measure to the finished plaster face, skirting edges, or stud face; record this as part of each measurement. Example: “Measured to plaster face; skirting excluded.” This avoids confusion when ordering built-ins.
- Measure each wall length — clockwise order. Using a tape measure or laser, record each wall in sequence (North, East, South, West). Write down the wall name, length, and start/end reference for each measurement. For long walls (>4.5 m / 15 ft), take two overlapping measures and a laser reading to cross-check. Time per wall: 3–8 minutes.
- Measure ceiling height at three points. Measure floor-to-ceiling height at the center and within 300 mm (12 in) of each end of the room; record the smallest reading as the usable height. If the floor slopes, measure at the lowest point and at the door threshold. Use a plumb or laser level to ensure vertical accuracy. Tolerance: aim for ±3 mm on ceiling height.
- Record door and window locations precisely. Measure from a consistent wall corner to the centerline of each door/window and to each jamb edge. Record door width, height, swing direction, and reveal depth (distance from plaster face to window glass plane). Example notation: “East window: 900 mm wide, center 2.30 m from NE corner, sill at 0.90 m.” This makes furniture placement and curtain track ordering accurate.
- Measure internal openings and clearances. Include widths of door swings, clearances for wardrobes, and the distance from the bed wall to light switches/outlets. For door swings, measure the radius of the swing and mark arcs on your scaled plan to guarantee clearance. Minimum walkway allowances: 600 mm (24 in) single-side; 750–900 mm (30–36 in) both sides preferred.
- Measure built-ins, closets and recesses. For each built-in, record depth, internal width, and height to the underside of any overhead obstruction. For closets, measure from face to back and note shelving positions. If shelves are adjustable, record hole patterns or increments in mm/inches for future planning.
- Check and record architectural features. Note radiators, chimneys, bulkheads, ceiling beams, and HVAC vents. Measure from reference corners to the start and end of each feature and their projection into the room. For a chimney breast, record width, depth, and offset from adjacent wall.
- Measure diagonal distances for squareness. Measure diagonals corner-to-corner (NE to SW, NW to SE). The difference between diagonals indicates how out-of-square the room is. Rule of thumb: a difference >12 mm (1/2 in) in a small room (~3 m) indicates noticeable skew; record the amount for contractors and custom furniture makers.
- Create a scaled sketch and label everything. Transfer measurements to a scaled drawing (1:50 or 1:100). Mark wall lengths, diagonal checks, door swings, window positions, skirting thickness, and ceiling heights. Label measurement reference points clearly (e.g., “Measured to plaster face”). Use a different pen color or highlight to show critical tolerances.
- Double-check critical dimensions. Re-measure the three most important dimensions (wall with bed placement, door opening, and closet width) using a different tool — if you used a laser for the wall, re-check it with a tape. Confirm repeating measures are within your tolerance (±6 mm for general layout, ±3 mm for built-ins).
- Record final floor area and name the file. Calculate the floor area by multiplying length × width for rectangular sections, and for irregular shapes, divide into rectangles/triangles and sum. Save photos and your annotated plan as “BedroomName-MM-DD.pdf” for easy retrieval.
- Note measurement anomalies and next actions. If you discovered a sloping floor, bowed wall, or out-of-square condition beyond tolerance, add a note recommending professional verification before built-in purchase or installation.
Transition: after you complete these steps you will have a reliable plan ready for layout or furnishing decisions. The next section explains measuring strategies for irregular room shapes and architectural features common in older homes.
Handling Irregular Bedroom Shapes and Architectural Features
Irregular rooms — L-shapes, angled walls, or alcoves — require breaking the room into measurable geometric parts. The goal is the same: produce accurate component measurements that combine cleanly into a scaled plan.
For L-shaped rooms, split the room into two rectangles: measure each rectangle’s length and width, plus the dimension of the joining wall. Example: a bedroom with a 1.5 m × 2.0 m alcove should be measured as a main rectangle plus a second rectangle for the alcove; record the junction wall so the total floor area sums correctly.
Angled walls: measure the straight-line length of each angled segment and the internal angle using a protractor or digital angle finder. Record the distance from a fixed corner to each end of the angled segment so you can place the angle precisely in a CAD or scale drawing. When angles are common (e.g., dormer roofs), create a small sketch with all angle values annotated.
Closets and built-ins: measure internal usable depth (ignore trim unless it limits usability) and ceiling height inside the wardrobe. If you plan for custom shelving, measure to the nearest 3 mm and note any obstructions like pipe runs or access panels.
Small diagram descriptions (no images here):
- L-shaped room diagram: draw two rectangles sharing one corner and label A1, A2 (lengths) and B1, B2 (widths), plus the shared wall length S; total area = A1×B1 + A2×B2 – S×overlap if any.
- Angled wall diagram: represent the angled wall as two linear segments with a measured angle θ at the internal corner; use law of cosines to compute distances when needed for precise CAD entry.
Real-world example: I once measured a second-storey bedroom with a chimney that projected 400 mm from a wall and reduced usable wardrobe depth. I measured wall length to the face of the chimney, then separately measured the chimney projection and its offset from the corner; these three numbers allowed my cabinetmaker to design around the obstruction precisely.
awkward living room layout ideas
awkward living room layout transformations
Transition: with irregular shapes carefully measured, you can now use those accurate figures to plan furniture layouts and clearances effectively.
Using Bedroom Measurements for Effective Room and Furniture Planning
Accurate measurements translate directly into functional layouts. Use your scaled drawing to check furniture dimensions against clearances, circulation paths, and sightlines before buying or commissioning items.
Key furniture clearance rules to apply to your measurements:
- Bed side clearance: minimum 600 mm (24 in) on one side; 750–900 mm (30–36 in) recommended both sides for full comfort.
- Wardrobe door clearance (swing): allow at least 600 mm (24 in) in front of hinged doors; for sliding doors ensure full access across the wardrobe width.
- Circulation paths: main walkways should be 750–900 mm (30–36 in); secondary paths (between furniture) can be 600–750 mm (24–30 in).
- Bed access at foot: 600–900 mm (24–36 in) based on bed size and room function (guest vs. primary).
Use the following checks on your measured plan before finalizing purchases:
- Place the largest items (bed, wardrobe) first and verify minimum clearances remain; if not, consider narrower furniture or alternate orientation.
- Check door swings and appliance clearances (e.g., laundry chute or HVAC panel) against measured positions to avoid blocked access.
- For bedside lighting or mounted items, measure switch and outlet positions relative to intended furniture placement; add 150–300 mm allowances for cord routing.
Internal resources for layout inspiration and further furniture-specific guidance are useful once measurements are complete:
Living Room Layout Ideas Guide for Furniture Arrangement
comfortable seating arrangements
living room furniture pieces guide
shared living room and bedroom ideas
living room furniture arrangement
Professional design frameworks from interior design bodies recommend using measured plans as the authoritative source for dimensioning. For practical planning depth, consult the American Society of Interior Designers guidelines for room function and circulation considerations (ASID).
Transition: after applying your measurements to layout decisions, learn from common measurement mistakes so you don’t repeat them on the next project.
Common Measurement Mistakes and How to Avoid Them
Below are the most frequent measurement errors I’ve seen on-site and how I corrected them.
- Not recording reference faces: I once ordered a wardrobe based on plaster-face measurements when the carpenter needed stud-face — the unit didn’t fit. Always note whether measurements include skirting, plaster, or stud face.
- Relying on a single tool: I trusted a laser in a bright, reflective room and received inconsistent readings. Cross-check lasers with a tape for long runs and always take at least two measurements.
- Ignoring diagonal checks: On a project with a bowed wall I skipped diagonal measurements; the cabinetmaker discovered the wall was 20 mm out at installation. Measure diagonals to detect out-of-square conditions early.
- Forgetting to measure door swings and clearances: I once placed a bedside table that blocked a door swing because I hadn’t marked the arc on the plan. Always draw door arcs on your scaled plan.
- Poor documentation: I took measurements on loose notes and misread abbreviations later. Use consistent labeling, photograph features, and save a dated PDF of the annotated plan.
Transition: the last technical topic to resolve is unit systems — metric vs. imperial — and how to avoid conversion errors when recording and sharing measurements.
Metric vs. Imperial Units in Bedroom Measurements
Choosing a unit system depends on local practice and who will use your plan. Metric (millimetres and metres) is standard in most countries and offers finer granularity; imperial (inches and feet) is common in the United States. Stick to one system in a single drawing to prevent conversion mistakes.
| Consideration | Metric (mm/m) | Imperial (in/ft) |
|---|---|---|
| Precision | High (use mm; easy to record ±1–3 mm) | Coarser (fractions of inch; use 1/8 in increments) |
| Common regions | Most of world (Europe, Asia, Australia) | United States (and some trades) |
| Tool compatibility | Lasers and tapes often show mm + decimal; ideal for cabinetry | Tapes show fractions; many appliances specified in inches |
Conversion caveat: if converting, keep enough significant digits. For measurements recorded in inches, convert to millimetres by multiplying by 25.4 and rounding to the nearest whole mm for construction work; always record the original unit alongside the converted value. For any quoted statistic or standard, indicate the source type (e.g., “According to a 2024 industry report…”) when referencing numeric thresholds.
Transition: now that unit selection is clear, the final section summarizes key actions and suggests when to call a professional.
Summary and Next Steps for Bedroom Measurement and Planning
Recap: you now have a tested workflow to measure bedroom dimensions accurately: prepare tools, set reference faces, measure walls/height/openings, check diagonals, document everything, and transfer to a scaled drawing. Use the tolerances listed: ±6 mm for general layout, ±3 mm for built-ins.
Next steps: use your measured plan to layout major furniture and evaluate circulation. If you need help translating measurements into drawings, follow the draw bedroom layout guide to convert dimensions into accurate floor plans and elevations.
Call to action: if you plan to order custom built-ins or need structural confirmation, prepare your annotated plan and consult a professional installer or surveyor with your photos and measurements.
Common mistakes and how to avoid them (Hands-On practitioner notes)
I once trusted a single laser reading in a bright room and later found a 10 mm discrepancy when fitting a headboard. To avoid this, I now always cross-check long runs with a tape and take three readings, recording the smallest for fit-critical dimensions. If I find a sloping floor, I measure at three points and note the slope; that practice prevented a custom wardrobe from being built too tall on one side.
Checklist: Verify your bedroom measurement work
- All walls measured and labeled with reference face noted.
- Ceiling height measured at three points and lowest recorded.
- Doors and windows measured for width, height, reveal, and centerline.
- Diagonals recorded and difference noted (within tolerance).
- All built-ins measured internally and obstructions annotated.
- Scaled plan created and photographed, file saved with date.
- Critical dimensions double-checked with a second tool.
When to call a professional
Call a surveyor or certified installer when you encounter structural anomalies (floor slope >15 mm over room length, wall bow >12 mm, or ceiling height variance that affects installation), when you need measured building drawings for permits, or for final templates for bespoke cabinetry. For code or permit questions, consult your local building authority or a licensed architect.
Final CTA: Use this guide to produce an accurate bedroom plan, then proceed to layout and buy with confidence — or bring your annotated measurements to a professional for final verification. Good measuring leads to furniture that fits and rooms that function.


