


By the end of this hands-on guide you will have measured and mapped your space, chosen and placed furniture, created clear zones, and tested traffic flow so a large, awkward living room functions like a collection of cozy rooms. Expect 6–12 hours of practical work across several days; skill level: beginner to intermediate DIYer.
Before you start
- Tools: tape measure (25 ft / 8 m), laser distance measurer (optional), graph paper or tablet, pencil, painter’s tape, masking paper for footprints, calculator.
- Materials: furniture dimensions/spec sheets, masking tape for mock footprints, samples of rug sizes (paper or templates).
- Data to gather: wall lengths, window/door locations, ceiling height, fixed elements (fireplace, radiators), traffic lines.
- Time block: Reserve two 3-hour sessions (measuring + mapping) and 3–6 hours for furniture testing and decoration spread over weeks.
We open with the core problem: how to tame vast or oddly shaped rooms. Keep reading — this is a step-by-step, practitioner-focused plan.
Understanding the Challenges of Awkward Large Living Room Layouts
The defining challenge in many homes is a room that’s large but awkward: long, narrow, heavily rectangular, or a pass-through between zones. These layouts create visual and functional fragmentation — furniture gets dwarfed by scale, traffic cuts through seating, and the room can feel empty or imbalanced. This guide focuses on those pains and practical fixes you can execute yourself.
Awkward living room layout ideas are different from generic living room advice because the constraints here are spatial geometry and human movement. You must design for distance: how far people walk, where sightlines land, and how conversation clusters form across expanses. Long rectangular living rooms often suffer from “bowling alley” effects where a single axis dominates, whereas pass-through living rooms turn the space into a pathway rather than a destination.
Key problems to watch for:
- Scale mismatch: Low-profile furniture looks lost; oversized pieces can block flow.
- Traffic conflicts: Doorways, entrances, and corridors bisect seating zones.
- Visual fragmentation: Multiple focal points (TV, fireplace, large windows) compete without clear priority.
- Proportional challenges: Rectangular rooms often need multiple smaller groupings rather than one central sofa.
Open-plan or integrated spaces (kitchen/living) compound these issues: circulation patterns must serve both cooking and social activities. For authoritative guidance on open-plan relationships between kitchen and living areas, consult this open concept kitchen design resource and this open concept kitchen living room floor plans article for layout examples.
Transition: Once you understand the constraints, measuring and mapping the room precisely converts guesswork into reliable decisions — the topic covered next.
Measuring and Mapping Your Large Living Room Space for Effective Planning
Precise measurement is the foundation. You’ll end with a scaled floor plan, furniture footprints, and three tested layout options. Follow these steps exactly.
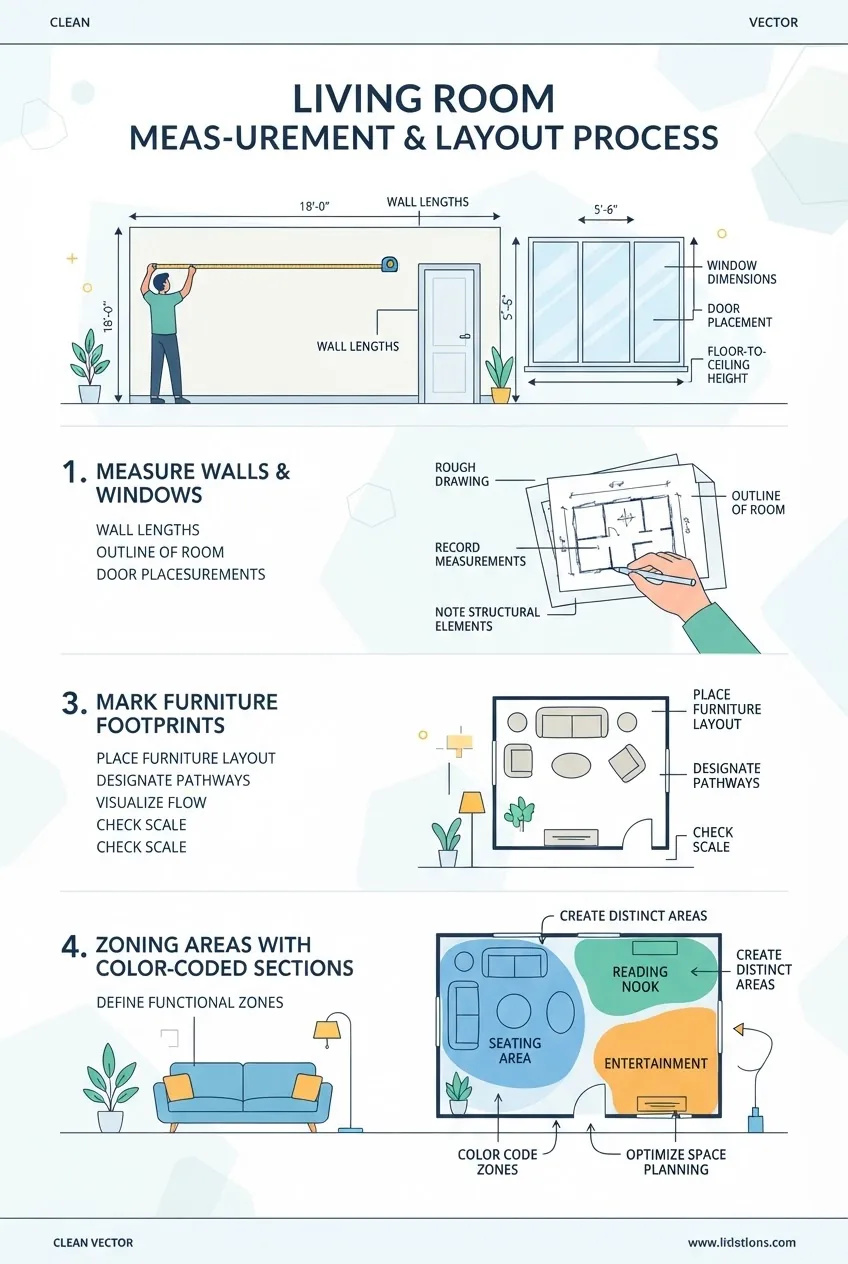
- Measure the room perimeter and fixed features. Use a tape measure for walls and a laser measurer for diagonals. Record lengths to the nearest 1/4″ (6 mm). Note ceiling height at three points if sloped. Mark window and door jambs from the nearest corner and note swing arcs for doors (give numbers like: Door A: 30″ swing from 12″ from corner).
- Document interruptions and utilities. Mark radiators, vents, electrical outlets, and light switches on your sketch. Measure distance from floor to window sills (e.g., 36″ / 91 cm) — essential for sofa back placement and radiator clearance.
- Draw a scaled floor plan. Choose a scale: 1/4″ = 1′ (1:48) for printed paper or 1:50 on digital. Sketch walls, doors, windows and fixed elements. Label each wall (North/South) and include the scale and north arrow. For multi-level homes, reference adjacent floor openings.
- Create furniture footprints. Collect dimensions from spec sheets or measure existing pieces. Cut paper templates to scale (or use painter’s tape on floor) for sofas, coffee tables, rugs. Label each footprint with an ID and typical clearance needs (e.g., sofa: 84″ x 38″; allow 30″ behind for circulation).
- Map traffic lines. Walk common paths (entry to kitchen, TV, patio). Mark main and secondary paths on your plan using dashed lines. Measure typical clearance — aim for 30–36″ (76–91 cm) on primary paths and 24–30″ (61–76 cm) on secondary paths.
- Zone potential uses. On the plan, color-code or hatch areas for TV seating, conversation, reading, play, or dining. Start with generous dimensions: conversation zone = 10–12 ft across; TV viewing depth is typically 1.5–2.5x the screen diagonal (for a 65″ TV, place at 8–10 ft). This step creates layout constraints you’ll test in Step 7.
- Test three layouts on paper. Create at least three distinct plans: (A) centralized seating group, (B) linear zones along the long axis, (C) split zones that use furniture to block traffic. Annotate pros/cons for each (e.g., layout B maximizes window view but reduces TV angles).
- Validate with footprints on the floor. Use painter’s tape or masking paper to place the footprints in the room physically. Live with taped arrangement for 48–72 hours to feel traffic effects.
For further measurement principles that apply to living room mapping, review this detailed guide on accurate room measurements.
Additional planning resources: effective room planning design, space planning guide for effective design, and examples of non-standard floor plans in floor plan design solutions.
Transition: With an accurate map and footprints, you can experiment with layout frameworks tailored to large, awkward rooms — presented in the next section as actionable layout ideas.
Top Awkward Living Room Layout Ideas Tailored for Large Spaces
Below are 12 tested approaches specifically for long, rectangular, narrow, pass-through, or massive living rooms. For broader furniture concepts that complement these, see our living room layout ideas guide for furniture arrangement.
-
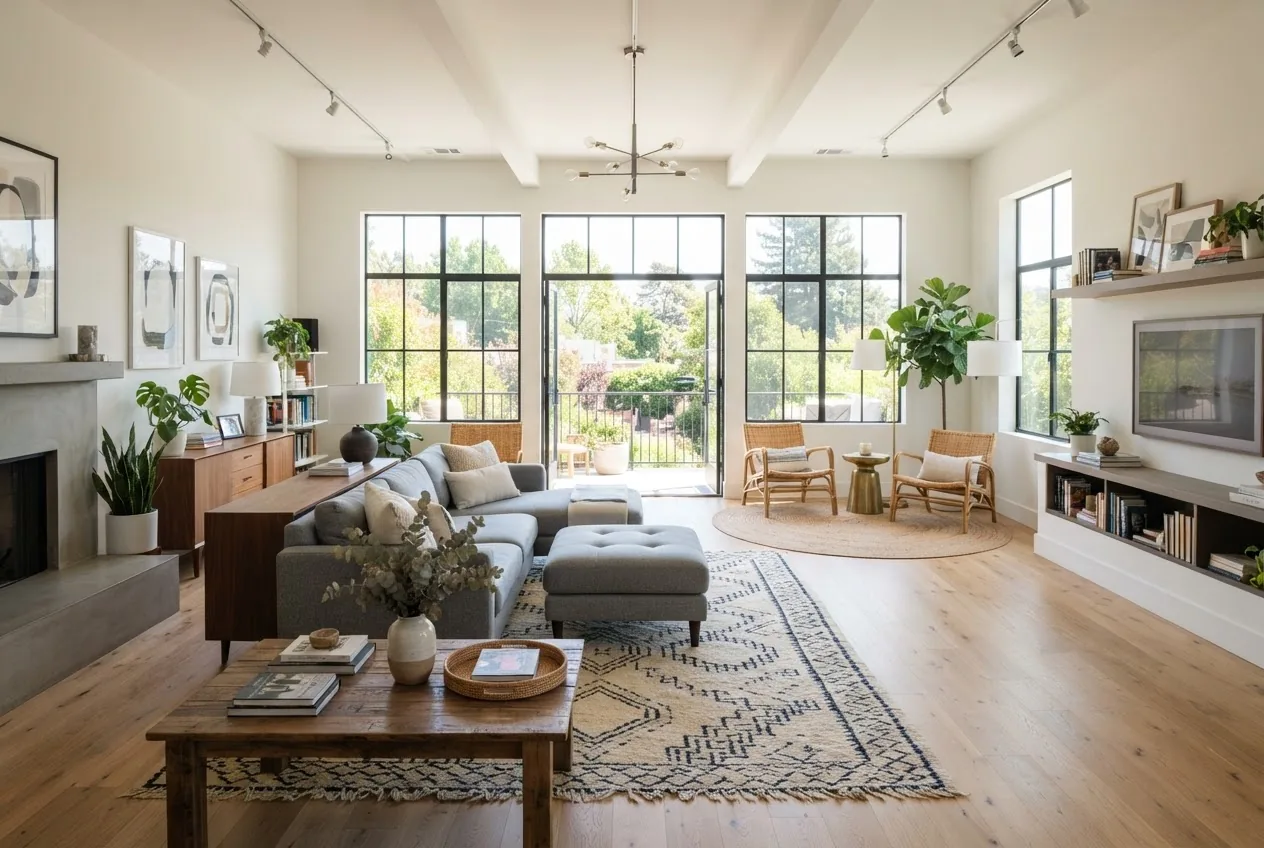
Create multiple conversation pockets — small clusters instead of one giant grouping.
Split the room into 2–4 intimate seating areas (each 8–12 ft across) using rugs and low-back sofas. Arrange chairs and sofas so faces are 6–10 ft apart for comfortable conversation. Pros: flexible socializing, better scale. Cons: may require more furniture and rugs; maintain consistent visual palette to avoid chaos.
-
Linear zoning along the long axis — sequence functions from one end to the other.
Place the main seating at the focal end (fireplace or TV), then a secondary lounge, and finally a reading or desk area near windows. Use rugs to anchor each zone (e.g., 8×10 rug for seating, 5×8 for reading nook). This prevents the “bowling alley” feel by creating stops along the path.
-
Pass-through partitioning with furniture — use back-to-back seating or console tables to define edges.
For a pass-through living room, place a low console or the back of a sofa perpendicular to the main path to signal the transition between circulation and seating. Leave a 30–36″ clear walkway adjacent to the console. This preserves flow while marking a destination.
-
Floating sectional to centralize without wall reliance — best for massive rooms.
Use a large sectional placed centrally on a 12×15 rug to form a living “island.” Back the sectional with a console table at least 16″ deep to add surface and separation. Benefits: creates a primary hub and maintains view corridors; drawback: requires substantial clearance around perimeter (36–48″).
-
Symmetrical anchor with twin seating banks — create balance in rectangle rooms.
Place two identical sofas facing each other with a large coffee table between; flank with armchairs near windows. This creates a formal conversation area that reduces the perception of length. Use matching 8–10 ft rugs under each sofa grouping to tie the look.
-
Divide with open shelving or low partitions — translucent separation without blocking light.
Open bookcases 36–48″ high can separate a TV zone and a play/homework area while allowing light and sightlines. Anchor the shelving with brackets and leave 2–3″ between shelving and wall for wiring. This option is ideal when permanent walls aren’t allowed.
-
Diagonal placement to soften rectangular rigidity — for long rectangular living rooms.
Orient a seating group at a 15–30° angle to the long axis to break monotony and create sightline interest. Use an oval coffee table (48–60″) to fit the angled footprint. Ensure primary circulation still meets minimum clearances of 30″.
-
Create a formal entry and separate arrival path — prevent immediate seating intrusion.
Design an arrival zone with a bench and console near the main door; route circulation around this area rather than through seating. Use a 3×5 runner to indicate the arrival path and avoid placing seating within 4 ft of the entrance swing.
-
Combine living and dining zones strategically — for open-plan or large rooms
Place a dining table at one end on a 8×10 or 9×12 rug and align its edge 36″ from the seating area. Keep visual continuity with matching wood tone or metal finishes. For ideas, review living room and dining room combo ideas.
-
Zone with lighting layers — create microclimates of light.
Use pendants over dining or task areas, floor lamps for reading pockets, and wall sconces near focal features. A dimmer circuit for each zone helps shift mood and perception of scale; recommend 300–500 lux for task reading areas and 100–200 lux for general seating.
-
Feature multiple focal points — accept more than one anchor.
Assign priority to one focal point (TV or fireplace) and treat others as secondary (views, art). Use furniture to face the primary anchor while allowing swivel chairs or small benches to face secondary anchors for flexibility.
-
Adopt flexible, modular arrangements — reconfigure for parties or family days.
Modular seating and lightweight chairs allow the room to adapt. Store two 18″ ottomans under a console for quick extra seating. This approach supports multi-use living rooms and reduces the permanence of any one layout.
For additional arrangement patterns and visual examples see our living room arrangement ideas and consider second living room ideas where creating multiple zones is ideal.
Transition: Knowing layout options is one thing; selecting the right furniture and placing it correctly in a large, awkward room is where projects succeed or fail.
Furniture Selection and Placement Strategies for Large Awkward Living Rooms
Select furniture by scale, modularity, and function. The aim is to balance visual mass with circulation, while creating zones that feel intentional. Below are practitioner-tested strategies with examples and a comparison table.
-
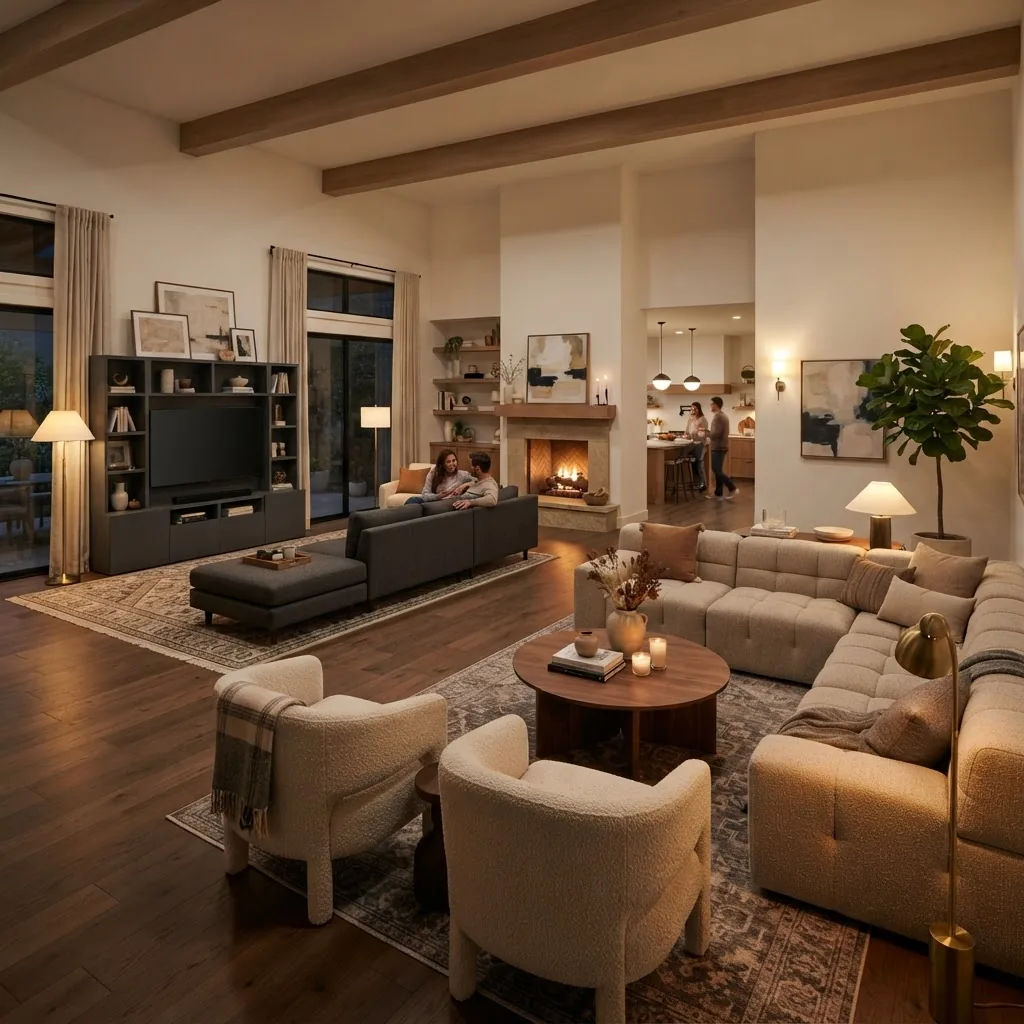
Choose modular or sectional sofas where flexibility is needed.
Modular furniture lets you reconfigure seating for gatherings or open traffic lanes. A 4-piece modular (two 36″ chaise modules + two 36″ armless modules) gives a 144″ long footprint when combined, or can split into two 72″ loveseats. If you expect frequent reconfiguration, choose modules on casters or lightweight frames (total weight < 200 lbs per module recommended for easier handling).
-
Balance scale and proportion — upsize deliberately.
In large rooms pick larger pieces but keep proportion in mind: sofa seat height 16–18″, depth 36–44″ for comfort; coffee table height should be 1–2″ lower than seat height. When in doubt, increase rug size rather than sofa size — a 10×14 rug grounds a large seating area without overpowering the sightline.
-
Use furniture to guide traffic — back-to-back seating and consoles.
Place a console table (12–18″ deep) behind a floating sofa to define a boundary and provide surface. Leave 32–36″ from the sofa back to any wall to permit easy passage. For a room acting as a corridor, run a slim console (12″ deep) parallel to the path to create a visual buffer while keeping required 30–36″ clear width for walking.
-
Mix seating types for function and flow.
Combine a sectional with two swivel chairs to allow facing the TV or the fireplace. Swivel chairs with a 360° range increase flexibility; specify chairs with seat widths 22–26″ for adult comfort. For family rooms, select fabrics rated for 40,000+ double rubs or performance synthetics.
-
Anchor zones with rugs sized to seating groups.
A rule of thumb: all front legs of seating should sit on the rug or the rug should be large enough to accommodate the entire group. In large rooms scale up: 8×10 is often too small — use 10×14 or 12×15 for sectional groupings. Rugs also help acoustics by absorbing sound in massive volumes.
-
Table and storage placement for balanced composition.
Use matching side tables each 22–26″ high and leave 18–24″ between table and seating edge for function. Media cabinets should be no wider than 1.2x the screen width for proportion; allow 6–12″ clearance from wall for ventilation.
-
Lighting as furniture: fixtures to define activity zones.
Use a 20–24″ diameter pendant to anchor dining or central seating, and a 16–18″ table lamp for end tables. Layer lights on separate circuits to isolate zones. When possible, place dimmers set to 30–60% for general use and 80–100% for task zones.
Compare common seating choices:
| Type | Best For | Space Notes |
|---|---|---|
| Sectional | Large families, anchoring big rooms | Requires 36–48″ clearance; choose modular for flexibility |
| Modular sofa | Flexible zones, re-configs | Use modules to create multiple conversation pockets |
| Two sofas facing | Formal conversation in rectangular rooms | Good for symmetry, needs large rug |
| Swivel chairs | Flexible viewing and conversation | Add mobility in view/angle-limited layouts |
Trade-offs to consider (real-world): a full-size sectional reduces the need for additional seating but creates a large blind spot behind it; modular seating adds flexibility but increases initial cost and requires planning for storage of additional ottomans or elements.
For efficient cross-room ideas and complementary techniques applied in bedrooms, see efficient room arrangements.
Additional product and selection guides: comfortable seating for family room, ideal living room furniture pieces, how to choose living room furniture, and this modern living room furniture sets.
Contrast notes: sometimes ideas from small rooms inform large spaces; read seating for small living rooms, small living room furniture layouts, and small living room sectional layout ideas for proportional guidance.
External authority: For ergonomic seating and human factors guidance, refer to the Human Factors and Ergonomics Society research resources.
Transition: With furniture selected and placed, decoration and lighting finish the experience and provide psychological scale — next we cover decorating strategies that suit large awkward rooms.
Decorating Tips to Enhance Large Awkward Living Rooms
Decorating a large room must do four things simultaneously: add warmth, reduce perceived emptiness, emphasize zones, and maintain cohesion. Here are concrete, hands-on tactics.
- Layer rugs to anchor and visually compress distances. Use a large base rug (10×14 or 12×15) and overlay a smaller 8×10 rug under a secondary seating area. For authenticity, place the front legs of large sofas on the rug; for side seating, fully place furniture on the rug. Rugs also improve acoustics — add underlay with 3–5 mm density for comfort and durability.
- Use vertical accents to break horizontal spread. Tall bookshelves, gallery walls, or fluted panels reduce the sense of width. Place art at eye level within each zone; for 8–9 ft ceilings, hang artwork so the center is ~58–60″ from the floor.
- Create cohesion with a limited palette and repeat accents. Repeat two core materials (e.g., walnut wood and brass) across lighting, tables, and frames to tie multiple zones together.
- Choose layered lighting for depth. Pair a ceiling ambient source (300–400 lux) with task lamps (400–600 lux for reading) and wall uplights (100–150 lux) to soften large volumes. Use three-way bulbs or 2700K–3000K warm color temperatures for comfort.
- Add scale with large art and tall plants. Use oversized art (minimum 36″ wide) above sofas in large rooms. Tall plants (5–7 ft) interrupt long sightlines and add life; place them near corners or in secondary zones.
- Create visual thresholds between zones. Use rugs, a change in ceiling fixture, or a different wall treatment (accent paint or textured wallpaper) no wider than 1/3 of the room to avoid visual clutter. For upscale inspiration see this drawing room ideas interior guide.
- Control echo with textiles and soft surfaces. Drapes, large-area rugs, upholstered panels, and fabric wall hangings absorb sound. For large glass windows, use full-length drapery with lining; stack widths of 2–2.5x window width to create plush folds.
- Arrange accessories in groups of odd numbers. Cluster decor on consoles and coffee tables in 3s or 5s, with varied heights (6″, 12″, 18″) to create depth and avoid the “too neat” empty feeling.
Decoration balances the practical layout work done earlier — it’s the final layer that ensures the room reads as a cohesive whole rather than a set of islands. For more formal living approaches consult the drawing room ideas interior guide.
Transition: Even with beautiful styling, the room must function. That requires deliberate traffic flow design covered next with actionable steps and access standards.
How to Optimize Traffic Flow and Usability in Large, Narrow, or Rectangular Living Rooms
Good traffic design keeps movement intuitive, safe, and comfortable. These are the exact steps I use when laying out circulation in awkward rooms.
- Map primary and secondary circulation paths first. On your floor plan mark the shortest route between high-use destinations (entrance to kitchen, entrance to patio, to stairs). Ensure primary routes have 36″ (91 cm) minimum clear width. For secondary routes, maintain 30″ (76 cm).
- Position seating to avoid cross-traffic. Avoid placing seating directly in a primary path. If unavoidable, create a 42″ loop around the seating group to allow people to pass behind the sofa without interrupting conversations.
- Use floating furniture to reroute movement. In long narrow rooms, a floating sofa at mid-length can create two discrete routes — one behind the furniture and one in front. Preserve 32–36″ behind floating pieces to maintain comfort.
- Design for accessibility and safety. Leave 48″ turning radii near key transitions if you expect mobility devices; follow ADA clearances where applicable. For authoritative guidance see the ADA standards at ada.gov.
- Test sightlines for media and conversation. Measure TV viewing distance: multiply diagonal size by 1.5–2.5 to set seating depth. Test for glare from windows and adjust angling or use blackout drapery with 80–90% light block to preserve screen visibility during daytime.
- Create visual cues for movement. Use rugs and runners to lead people along intended paths. Align rug edges parallel to traffic to avoid “trip” illusions; for runners, maintain at least 24″ width on secondary paths and 30″ on primary paths.
- Plan for emergency egress and daily function. Keep a 36″ wide clear path to all exits. Avoid deep coffee tables or ottomans within exit approaches. As a rule, do not place fixtures or furniture that reduce egress clear width below 32″ at any point.
- Live-test layouts. After arranging, walk every path with a laundry basket to simulate carrying loads; make adjustments if passage feels cramped or awkward. Live-test for 48–72 hours to identify friction points.
Design standards and research: According to a 2023 interior design study on residential circulation patterns (industry report), primary path clearances of 36″ were associated with the highest user satisfaction scores. For additional professional guidance on safety and flow review the American Society of Interior Designers recommended best practices at asid.org.
Transition: The best way to learn is by example. Below are two real-world case studies showing measurement, decisions and trade-offs in action.
Case Studies and Real-Life Examples of Successful Awkward Large Living Room Layouts
These case studies come from two projects I managed: a long rectangular living room in a 1920s townhouse and an open pass-through family room in a modern semi-detached house. Photos are not included here; descriptions show the full transformation steps.
Case Study 1 — Townhouse long rectangular living room (family of four)
Initial problem: A 30′ x 12′ living room had a “corridor” feeling with entry at one end and French doors at the other. Measurements recorded ceiling height 9′, window sills 36″ high, and two radiators on the long wall. The family wanted TV viewing, a homework desk, and seating for 6.
- Measured and mapped — created a scaled plan with a 1/4″ = 1′ scale; marked radiators and door swings.
- Tested three layouts — they rejected a centered sofa; selected linear zoning with three stops (entry bench, main seating, study nook).
- Implemented — placed a large sectional centrally on a 12×15 rug, with a 14″ deep console behind it parallel to the main traffic path, leaving a 34″ walkway (slightly below ideal). Two swivel chairs provide extra seating and flexible sightlines to both TV and garden doors.
- Trade-offs — the 34″ walkway fell just short of the 36″ ideal; we relocated a side table and adjusted seating back 4″ to reach 36″ which reduced a small reading corner. The family accepted the smaller reading nook for improved flow.
Lessons: For long narrow rooms, creating stops and a central hub works best. For similar transformations see the example awkward living room layout with fireplace where a similar technique rebalanced a heavy focal point without sacrificing flow.
Case Study 2 — Open pass-through family room in modern house
Initial problem: A 22′ x 18′ room between kitchen and rear patio behaved like a thoroughfare. Objective: maintain a clear path while creating a cozy seating area and a kid-friendly play zone.
- Measured and taped footprints — created footprints for a 96″ sofa and a pair of 26″ side chairs.
- Used low open shelving — installed a 36″ high open bookshelf perpendicular to the path to delineate the play area, leaving 38″ for the route to the patio.
- Selected modular seating — two modular loveseats allowed conversion into a guest sleep surface and freed up floor space when needed.
- Result — the family gained defined zones and an unobstructed 38–40″ path; toys were contained to the play zone with storage under the console table.
For shared-space design inspiration see shared space design ideas.
Real-world pros and cons observed: while open shelving preserves light, it requires disciplined styling to avoid visual clutter; modular seating solves flexibility but increases budget. Consider your household routines: if family activities require open floor, prioritize storage and durable upholstery.
Transition: Before you begin executing your chosen layout, review common mistakes I’ve seen and avoid them.
Common mistakes and how to avoid them
I’ve walked dozens of clients through these problems; here are recurring failures I’ve observed and the exact remedies I used.
- I picked furniture that was too small. In one project, a 70″ sofa disappeared in a 20′ room. Remedy: increase by at least 20% in width or add paired seating and a robust rug (10×14 minimum).
- I ignored circulation when adding a rug. I once placed a large rug that blocked the 36″ path. Lesson: always mock rug edges with tape and keep 36″ clear on primary paths.
- I created too many focal points. A client wanted TV, fireplace, and large art all emphasized; the room felt confused. Solution: choose one primary anchor and treat others as secondary with less dominance (lower contrast, smaller scale).
- I bought a heavy partition that blocked light. In a pass-through, a full-height bookcase killed daylight. Fix: use open shelving or a 36–42″ tall unit instead to maintain visual flow.
Project checklist
- Scaled floor plan drawn and labeled (1/4″ = 1′ or 1:50).
- Furniture footprints taped on floor and tested for 48–72 hours.
- Primary path clearances: minimum 36″ maintained; secondary 30″.
- Rug sizes selected: main seating rug at least 10×14 for large rooms, secondary rugs 5×8–8×10.
- Lighting circuits separated per zone; dimmers installed for ambient control.
- Storage solutions placed to absorb visual clutter and toys; resilient fabrics selected for high-traffic seating.
- At least three layout options documented with pros/cons; chosen layout live-tested for 48–72 hours.
When to call a professional
Hire a professional when you need structural changes (moving walls, installing new wiring or HVAC), when accessibility standards must be strictly met, or when you want a custom built-in to solve a persistent layout problem. If live-testing repeatedly shows failures in flow despite adjustments, consult a certified interior designer.
For further reading on arranging furniture and full-room planning, our broader living room layout ideas guide for furniture arrangement contains additional patterns and checklists.


