


By the end of this hands-on guide you’ll have a measured plan, one or two tested layout options, and a styling checklist to arrange a small living room sectional layout ideas that maximizes flow and comfort. Expect 90–180 minutes of planning time; basic measuring and sketching skills are all you need.
Before you start
- Tools: tape measure (minimum 25 ft), laser measure (optional), graph paper or printable grid, pencil, masking tape
- Materials: floor plan printout or blank room sketch, furniture dimensions (width, depth, height), photo of the room from two angles
- Optional: access to a helper for lifting or moving small pieces during dry runs
- Files: take photos of door swing directions, window placements, fireplaces, radiators, and wall-mounted equipment
Transitioning from measurement to layout requires clear priorities: define whether the room’s primary use is TV viewing, conversation, dining overflow, or multi-use. That choice determines sectional orientation and multifunctional needs such as sleepers or storage.
-
Measure and map the room.
Step 1 — Exact room measurement and obstacle mapping
Measure overall room length and width, then record ceiling height, door clearances (swing radius), and window sill heights. Sketch a to-scale plan on graph paper where 1 square = 6 inches or 12 inches. Mark fixed elements: fireplaces, radiators, built-ins, and electrical outlets. Measure traffic paths between doors and major furniture locations.
For minimum clearances, follow recommended standards: leave at least 30 inches (76 cm) for a main traffic path and 18–24 inches (46–61 cm) between a coffee table and seating for comfortable movement. According to a 2024 interior design recommendation from the Interior Design Society, a 30-inch minimum walkway keeps a compact living room functional for two-way traffic.
Interior Design Society guidanceRecord sectional measurements: overall width (A), depth (B, deepest seat), chaise length (if applicable), and arm width (C). These numbers will anchor the layout options below.
-
Assess use cases and seating capacity.
Step 2 — Choose the room’s primary functions
Define how many people sit regularly, whether you need a sleeper, storage, or flexible seating for guests. For example: two daily seaters + two occasional guests suggests a compact sectional (72–90″ long) plus a storage ottoman. Create three user scenarios and prioritize them: daily, entertaining, and overnight guest.
This step links practical use to sectional features (storage, sleeper) and influences shape decisions in the next section.
-
Decide on sectional shape family.
Step 3 — Match shape to room geometry
Use the measured plan to shortlist sectional families: L-shape for corners, modular for flexibility, U-shape for wider rooms, and sleeper sectionals when overnight guests are frequent. If walls are interrupted by doors or radiators, prioritize floating or modular options to avoid blocking egress.
If you want deeper guidance on furniture selection for companion pieces, see how to choose living room furniture.
-
Test two layout concepts at scale.
Step 4 — Tape-out and dry runs
Use masking tape to mark the sectional’s footprint on the floor to-scale. Run two arrangements: a wall-hugging plan and a floating plan (floating means the sectional is away from walls to create a walking path behind it). Spend an hour living with the taped layout: sit, walk, and open doors. Adjust until traffic flows without awkward turns.
For floating versus wall-hugging trade-offs, test both with masking tape or cardboard templates. Floating layouts create circulation on both sides but require extra space (minimum 18 inches behind the sofa).
-
Finalize sectional features and ordering dimensions.
Step 5 — Lock measurements and pick features
Confirm final sectional length and depth with 2–3 inches of tolerance for cushion fluff. Choose seat depth: 20–22 inches for upright seating, 24–30 inches if lounging is a priority. If you need storage, select a chaise with internal storage or a storage ottoman sized at 18–24 inches diameter for compact rooms.
When ordering, request a delivery sketch and confirm clearance for doorways: many narrow staircases require disassembly. If applicable, check manufacturer care instructions before selecting fabric. For fabric and cleaning guidance, see the manufacturer’s care guide or reputable resources. IKEA care guidelines.
-
Style and accessorize with scale in mind.
Step 6 — Choose rugs, lighting, and compact tables
Pick a rug that is large enough for front legs to sit on (minimum 48″ x 60″ for very small rooms) or smaller rugs that anchor the coffee table only. For lighting, favor vertical floor lamps (12–16″ base) and wall or sconce lighting to preserve floor space. Select compact tables: a coffee table 36–42″ long or nested tables to tuck away.
Styling choices are covered in depth in the “Styling Tips” section below.
-
Document the final plan and test ergonomics.
Step 7 — Create a move plan and live with it for a week
Photograph the taped layout, note measurements next to the drawing, and create a “move plan” with order of operations for delivery (which door first, narrowest passage, furniture disassembly steps). Use the layout for a week and adjust cushions, lighting angles, and accessory placement.
If the room handles daily movement and guests comfortably according to your prioritized scenarios, the plan is successful.
Understanding Small Living Room Challenges for Sectional Layouts
Small living rooms pose three recurring constraints: limited floor area, competing traffic lanes, and disproportionate furniture scale. You can overcome these with accurate room measurements, decisive functional priorities, and compact furniture choices. For measurement tools and standards, consult an accurate room measurements guide.
First, quantify “small.” For this guide, a small living room is 100–180 square feet (approx. 9–17 m²) with narrow walls or multiple openings. When a room is closer to 100 sq ft, standard two- or three-seaters (70–88″ long) and compact L-shaped sectionals (one side 60–72″, chaise 50–60″) are appropriate. Rooms nearer 180 sq ft can accept deeper modular pieces or small U-shaped configurations.
Traffic flow is the second major constraint. Treat circulation like a transportation plan: main routes should be 30–36 inches wide where two people walk in opposite directions, and secondary routes 24–30 inches. These thresholds are consistent with the US Department of Housing and Urban Development guidance on residential clearances for safe egress. HUD accessibility and clearance information.
Third, scale and proportion determine comfort. A large, bulky sectional in a small room will dominate sightlines and create an imbalanced feel. Choose pieces whose arm height aligns with window sill heights or remain lower than radiators so sightlines stay open. Remember the rule: if the sofa occupies more than 40% of a wall length, consider a smaller seat or modular configuration.
Measuring methodology — a simple step-by-step:
- Measure and draw the room perimeter to scale using 1:24 (1 inch = 2 ft) or 1:12 scale, whichever you prefer.
- Mark door swing arcs and minimum clearances (30″ primary, 24″ secondary).
- Add sectional footprints with cushion depth accounted for (add 2–3″ beyond stated depth for cushion compression).
For tools and broader planning methods, see the space planning guide for interior layouts.
Transition: With measurement and constraints mapped, the next section compares sectional shapes and how each performs in compact footprints.
Choosing the Right Sectional Sofa Shape for Your Small Living Room
Choosing the correct sectional shape is a balance between maximizing seating and keeping traffic flow smooth. Definitions: a floating layout means the sofa sits away from supporting walls, typically creating a passage behind it; a modular sectional is made of separate pieces that can reconfigure into different shapes.
| Sectional Shape | Best For | Pros | Cons |
|---|---|---|---|
| L-shape | Corner anchoring, small square rooms | Efficient corner use; chaise provides lounging without extra chairs | Can block doorways if chaise placed incorrectly |
| U-shape | Wider rooms (150–180 sq ft), conversational layouts | High seating capacity, intimate conversation | Requires more floor space; often too bulky for true small rooms |
| Modular | Irregular rooms, rentals, multi-use spaces | Reconfigurable, can create chaise or separate seats | More visible seams; some modules may shift |
| Sleeper sectionals | Small homes needing overnight options | Dual purpose; eliminates need for separate guest bed | Heavier, frequently higher seat height, can limit legroom |
Now the prose comparison and decision rules:
L-shaped sectional
An L-shaped sectional is often the best starting point for truly small living rooms with a usable corner because it hugs the wall and frees central floor area. Use an L-shape when one wall is at least 8–10 feet long. Keep chaise lengths under 60 inches if the room width is under 10 feet to avoid blocking opposing doorways.
Pair L-shapes with narrow-arm designs (3–5″ arm width saved) and low backs (30–34″ high) to maintain sightlines. If you plan a storage chaise, verify interior volume (typically 12–24 cubic feet) and check hinge clearance on delivery.
U-shaped sectional
A U-shaped sectional offers a cozy conversation area but usually requires wider rooms. Consider U-shapes only when the primary seating wall is 12 feet or longer and when the opposite wall can host media or shelving without blocking a main pathway.
For multipurpose small rooms, a U-shape can reduce flexibility; prefer modular pieces that can form a U when needed.
Modular sectional
Modular sectionals are the most flexible choice for compact spaces with awkward openings or multiple functions. You can disassemble them for narrow staircases, reconfigure for movie nights, and repurpose modules as individual seats when entertaining. Choose modules that lock together firmly to prevent sliding.
For renters, modular systems minimize permanent commitments and allow for future room repurposing. For more small-room seating options, see seating options for small living rooms.
Sleeper sectionals
Choose sleeper sectionals if you frequently host overnight guests but want to avoid a separate bed. Leave 24–30 inches clearance at the front of the sectional for mattress deployment. Mattress quality varies: 4–6″ foam mattresses are common in compact sectionals; opt for higher-density foam or an innerspring option when possible.
Transition: The table and descriptions show when each shape fits — next, a longer set of practical layout ideas with sketches and stepwise placement tactics.
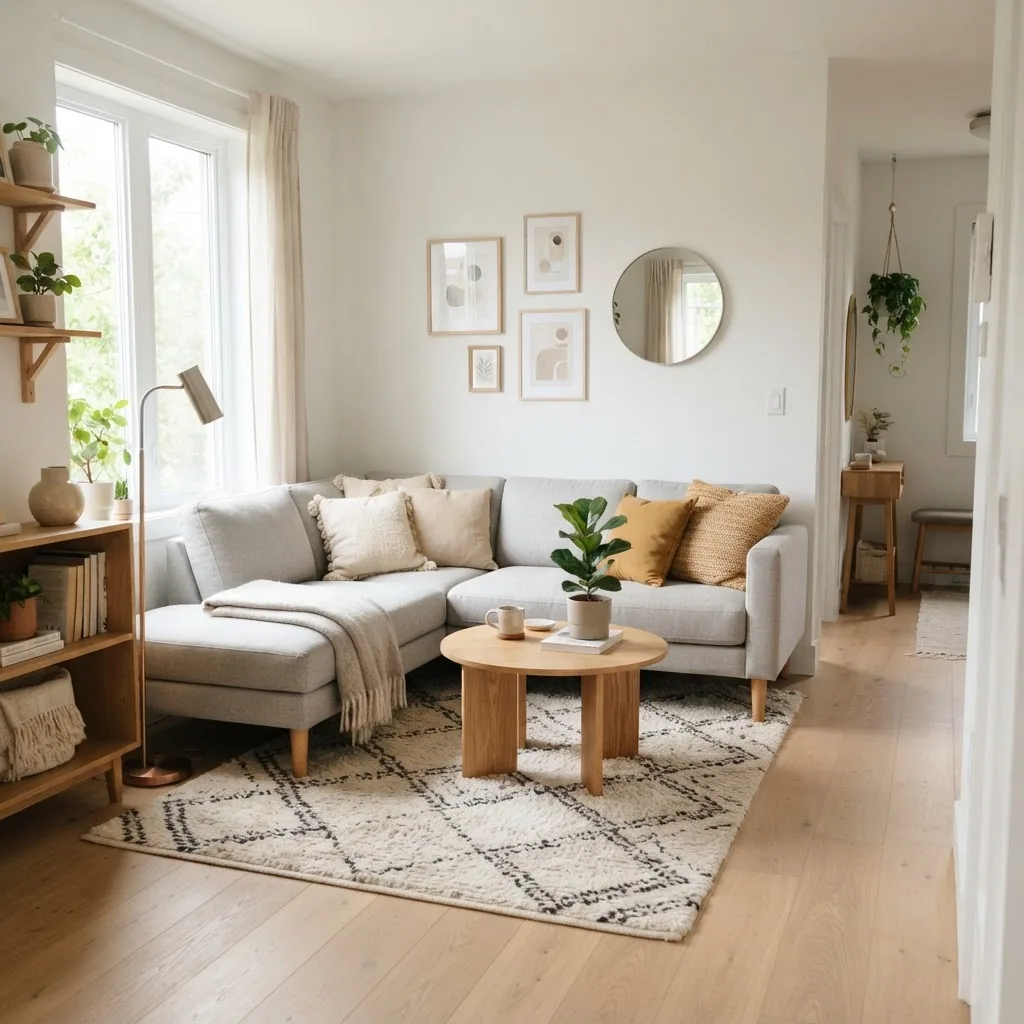
Layout Ideas to Maximize Space with Sectionals
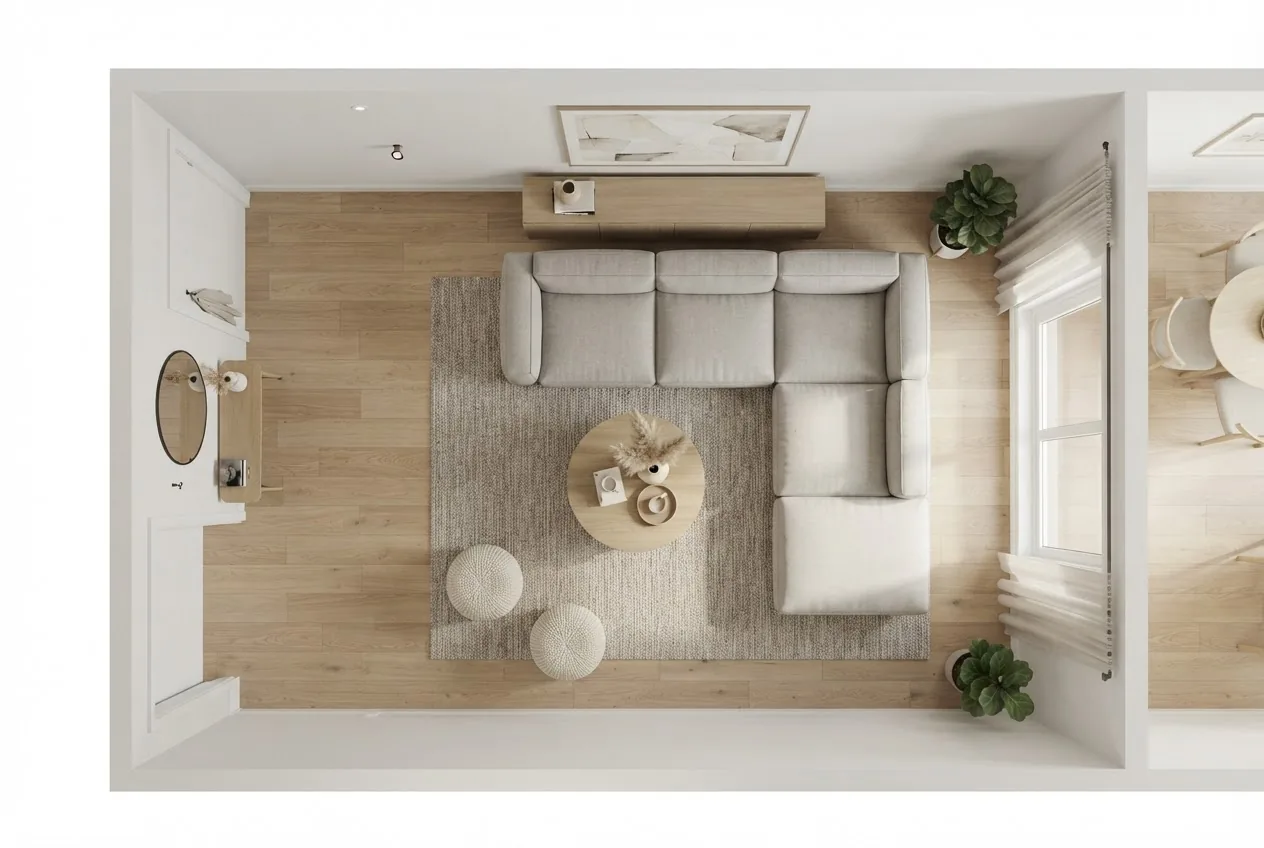
This section provides 12 actionable layout ideas with sketch descriptions you can replicate on graph paper or with room-planning software. Reference broader procedures in the living room layout ideas guide for furniture arrangement.
-
Corner-anchored L-shape (best for square rooms).
Sketch: sectional long side along the longest uninterrupted wall, chaise in the corner. Maintain 30–36″ main traffic lane from the nearest doorway. Place a compact coffee table 15–18″ from the sectional front. Use vertical lighting (sconce or slim floor lamp) at one end.
Use when: room is roughly square (10′ x 10′ to 12′ x 12′) and one corner is free. Result: maximizes seating while keeping central floor open.
-
Floating sectional to define a zone (for open plans).
Sketch: sectional placed 12–18″ away from the wall, with clearance behind for a narrow console (10–12″ deep) or 18″ walkway. Place rug under front legs to visually anchor the seat and create a traffic lane behind. This creates a distinct living zone in an open-plan small space.
Use when: room connects to kitchen/dining. For tips on shared spaces see living room and dining room combo layout tips.
-
Half-floor chaise + accent chairs (for narrow rectangles).
Sketch: short chaise (50–56″) against long wall, two slender accent chairs opposite or a pair of poufs that tuck under a console when not used. This keeps the central corridor clear while delivering flexible seating.
Use when: room width under 10 feet. Choose chairs with open legs for visual lightness.
-
Modular cluster (for irregular walls).
Sketch: place 2–3 separate modules to create an L- or U-like assembly that can be staggered to avoid blocking doors or radiators. Keep modules under 36″ deep to avoid crowding.
Use when: doors, windows, and heating elements interrupt continuous wall runs. Modular units may be reassembled for guests.
-
Sleeper sectional near the wall with pull-out clearance.
Sketch: place the sleeper side that deploys forward toward the center with at least 24–30″ front clearance. If the room is very tight, choose a pull-out that deploys sideways if offered by the manufacturer.
Use when: occasional overnight guests are needed without a separate bedroom.
-
Corner-love seat + floating bench (for multi-use rooms).
Sketch: small two-seat sectional in the corner plus a narrow bench along the opposite wall that doubles as extra seating or dining overflow. Bench depth should be 14–16″ to save space.
Use when: living room doubles as a dining or work area; bench tucks under a console when not in use.
-
Split sectional with narrow console (for tight entryways).
Sketch: instead of one large sectional, use two smaller modules separated by a 12–16″ console or side table to allow an entry path. This reduces the visual mass while preserving seating.
Use when: traffic must pass along the seating wall; console provides surface without the bulk of a full table.
-
Diagonal placement for optical width expansion.
Sketch: place a compact sectional on a 10–15-degree angle in the corner. This trick visually expands the room and opens up sightlines to adjoining areas. Keep at least one 30″ path on the long side.
Use when: room is narrow but allows a diagonal alignment to the main doorway.
-
Two-sided console behind a floating sectional (multi-function).
Sketch: floating sectional with a slim console behind (10–12″ deep) that acts as a landing zone and storage. The console doubles as a charging station or lamp surface without blocking the path.
Use when: you need entry or kitchen overflow surfaces without extra footprint.
-
Use storage ottomans instead of a coffee table.
Sketch: one or two storage ottomans in front of the sectional; use nesting stools or a tray to create table surface. Ottoman diameters of 20–24″ work well in compact plans.
Use when: you want hidden storage and flexible seating.
-
Short-back sectional under windows (preserve view).
Sketch: choose a sectional with back height under window sill height or place sectional so front legs sit under the window to keep the view clear. Keep 12–14″ between the back of the sofa and the wall when possible to allow air circulation.
Use when: preserving natural light and sightlines matters most.
-
Combine slim-profile sofa + narrow side tables for balance.
Sketch: choose a sectional with tapered legs and a slim arm profile (2–4″) paired with narrow side tables of 10–14″ diameter. This maintains usable surface area while keeping the room feeling open.
Use when: visual lightness is required and you still need surface space.
Transition: With specific layout ideas selected, apply styling principles to make the sectional feel integrated and the room larger.
Styling Tips to Enhance Small Living Rooms with Sectionals
Styling a small living room is about visual economy: every element should earn its place. Below are practical, scalable styling strategies.
-
Rug placement
- Option A (preferred): rug under front legs only — rug should extend at least 18 inches beyond the front legs on each side. For very small rooms choose a rug no smaller than 48″ x 60″.
- Option B: full rug under all legs if room allows — choose sizes like 5′ x 8′ only when floor area exceeds 120 sq ft.
-
Lighting strategies
- Use wall sconces or picture lights to free floor space and add vertical emphasis.
- Select a floor lamp with a base under 16″ diameter to keep it visually compact; place it behind one arm of the sectional for reading light.
-
Fabric and color coordination
- Choose mid-tone neutrals or light colors for sectionals to keep the room airy; dark fabrics recede only in rooms with strong natural or layered lighting.
- Prefer matte, tight-weave fabrics which are easier to maintain in high-use spaces; velvet and napped fabrics show wear faster without heavy-duty blends.
-
Visual tricks to enhance space perception
- Keep legs visible: sofas with exposed legs create a sense of floor continuity and expand perceived floor area.
- Use low-profile backs and open-arm styles to maintain sightlines across the room.
- Hang mirrors or artwork at eye level to increase perceived depth; avoid floor-length mirrors that compete with sectional height.
-
Corner utilization
- Fit an L-shaped sectional into a corner and use vertical storage above the short side (floating shelves 12–14″ deep) to draw the eye upward without cluttering the floor.
-
Scale and proportion
- Rule of thumb: seating depth + coffee table depth should not exceed 60% of room depth for comfortable circulation.
- Keep armrests and backs lower than 36″ in truly small rooms to avoid a hulking presence.
-
Color accents and continuity
- Introduce color with cushions and a single accent chair rather than with large upholstery changes to maintain a cohesive, roomy look.
- Repeat accent colors in small details like lamp shades, a rug stripe, or art frames to unify the room visually.
-
Texture layering
- Layer two textures max (smooth upholstery + knit throw) for depth without visual complexity; too many textures can make a room feel busy and smaller.
-
Maintain openness
- Avoid floor-to-ceiling drapery in small rooms; opt for blinds or lightweight curtains hung high and just above the window frame to add height without weight.
-
Upscale inspiration
For higher-end styling cues and elegant layouts in compact rooms, consult our elegant living room interior ideas.
Transition: Style decisions should follow functional layout choices. Once you’ve placed your sectional and chosen finishes, accessorize smartly to preserve function.
Accessorizing Around Your Sectional to Optimize Functionality and Space
Accessorizing in a small living room is tactical: pick pieces that add function and tuck away when not used. Follow these step-by-step how-to actions.
-
Choose a compact coffee table or storage ottoman.
Step: Measure the open floor in front of the sectional and pick a table no wider than two-thirds of the sectional length. For storage, choose an ottoman 20–24″ diameter or a rectangular ottoman 36″ long with internal storage. If you need variable surface height, add a tray that sits on the ottoman.
-
Add slim side tables and nesting tables.
Step: Use side tables 10–14″ wide that can slide close to seating. Nesting tables provide two surfaces and tuck under when not used — specify at least 2 inches clearance between nested pieces to avoid sticking.
-
Use wall-mounted shelving and floating consoles.
Step: Install shelves 10–12″ deep above the loveseat area. Keep heavy items low and light decor higher. For consoles behind floating sectionals, use 10–12″ depth to allow a narrow walkway behind.
-
Integrate multi-functional pieces.
Step: Choose an end table with drawers or a bench with storage (bench depths of 14–16″). For media, prefer wall-mounted TVs or slim cabinets 12–14″ deep to preserve floor area.
-
Prioritize easy pathways.
Step: Keep at least a 30″ main path clear between doorways and seating. If necessary, replace an accent chair with a pouf (16–18″ diameter) that tucks under a table.
-
Lighting and cord management.
Step: Use plugs near seating; if extension cords are necessary, use flat surge protectors along baseboards and secure with cable channels. Choose LED bulbs 2700–3000K for warm but clear light; use dimmers if possible to control mood without adding lamps.
-
Keep decor minimal and modular.
Step: Limit tabletop decor to one small tray and one plant or lamp per surface. Use stackable or foldable decor elements that can be cleared for gatherings.
-
Test ergonomics before committing.
Step: Sit, reach, and walk through the finished layout. Ensure coffee table height is 1–2″ below seat cushion height, and monitor sightlines to TV or focal point from the main seat (aim for a 10–15 degree upward tilt if TV is mounted higher).
For help selecting complementary furniture pieces, see ideal living room furniture pieces.
Transition: Even with a great plan and accessories, common mistakes can undo your layout; review the next section to avoid them.
Common Mistakes to Avoid When Arranging Sectionals in Small Living Rooms
-
Overcrowding the room with a too-large sectional.
Example: I once saw a client buy a deep 40″ seat depth sectional for a 110 sq ft room; it left only a 20″ passage and blocked the doorway. Avoid this by ensuring seating depth + coffee table depth < 60% of room depth.
-
Blocking traffic flow and doorways.
Example: I observed a layout where a chaise blocked the bathroom door—daily use became awkward. Maintain a 30–36″ primary walkway and avoid placing chaise ends in front of high-traffic doors.
-
Choosing the wrong scale (bulky arms, high backs).
Example: A bulky, rolled-arm sofa can visually swallow a compact room. Prefer narrow arms (3–5″) and backs under 34″ for small spaces.
-
Ignoring room shape and windows.
Example: Placing a low-backed sectional beneath a high window made the room look top-heavy. Align sectional height with adjacent architectural elements for balanced sightlines.
For other layout challenges in larger rooms, contrast with awkward living room layout ideas for large spaces.
-
Poor lighting choices that shrink the space.
Example: A single bulky table lamp placed in the center made the space feel heavy. Use layered lighting and wall fixtures to spread light without eating floor space.
-
Over-accessorizing surfaces.
Example: Too many frames and objects on a slim console visually cluttered a small room. I recommend one tray and one lamp per surface max, with hidden storage for the rest.
-
Skipping a tape-out or dry run.
Example: Skipping a taped layout led to a purchase that wouldn’t fit through the stairwell. Always measure turned corners and door widths; perform a tape-out to verify.
For room measurement guidance see accurate room measurements guide.
Transition: Correct layout and accessory choices extend the life and performance of your sectional. The next section covers maintenance and fabric care for high-use small rooms.
Maintenance and Upkeep Tips for Sectionals in High-Use Small Spaces
Regular maintenance preserves fabric appearance and structural integrity in tight, high-traffic rooms. Follow manufacturer care and tested cleaning techniques.
General upkeep schedule:
- Weekly: vacuum crevices with upholstery attachment, rotate cushions if reversible.
- Monthly: check frame joints and visible screws; tighten if needed.
- Quarterly: deep-clean removable cushion covers per label instructions.
Fabric cleaning and stain prevention:
- For synthetic blends (polyester/olefin), use a 1:4 solution of gentle dish soap to water for spot cleaning; blot, do not rub.
- For natural fibers (cotton/linen), pre-test cleaning agents on an inconspicuous area. Consider professional upholstery cleaning annually for high-use fabrics.
- For manufacturer instructions and fabric codes (W, S, WS, X), consult the maker’s care guide or a leading resource. For example, see IKEA’s fabric care information for practical cleaning codes and steps.
Pet-friendly and high-wear solutions:
- Microfiber and performance weaves resist stains and are simple to spot clean.
- Use washable slipcovers where possible; measure for a snug fit and verify zippers and seams withstand frequent washing.
- Add arm protectors or small throws in high-contact zones and launder them weekly.
Cushion care and frame longevity:
- Rotate cushions monthly and plump daily to prevent sagging; flip cushions where possible.
- Inspect webbing and foam density: replace cushions under 1.5 lb/ft³ density for frequent seating to avoid long-term deformation.
- For repair practices and recommended products, consult professional upholstery guides or manufacturer warranty information. According to a 2023 furniture manufacturer’s care bulletin, regular foam rotation and cleaning extend cushion life by up to 30% (industry bulletin, 2023).
Transition: Combining maintenance with thoughtful layout decisions preserves both functionality and aesthetics. Below are the final hands-on wrap-ups: a common mistakes section, a checklist, and guidance on when to call a professional.
Common mistakes and how to avoid them (practitioner notes)
I once recommended a 96″ sectional to a renter who had a 84″ long wall; the sofa fit on paper but made circulation awkward once cushions compressed. I now always add 2–3″ to depth for cushion compression and recommend a taped layout. Another time I underweighted lighting choices: a dark fabric sectional in a north-facing small room must be balanced with layered lighting. My failure taught me to always test sightlines with samples and taped arrangements before ordering.
Final checklist
- Room measured to scale on paper and taped on the floor
- Primary and secondary traffic paths at least 30″ and 24″ respectively
- Sectional depth and length confirmed with 2–3″ cushion tolerance
- Clearance for doors, windows, and radiators verified
- Lighting plan includes a minimum of two light sources (ambient + task)
- Accessory pieces sized (coffee table < 2/3 sectional length; ottoman ≤24" diameter)
- Maintenance plan set (weekly vacuum, monthly cushion rotation)
When to call a professional
- Structural obstacles: narrow stairwells or elevators that require sectional disassembly — call delivery specialists.
- Complex electrical or built-in shelving changes — hire an electrician or carpenter.
- If you need bespoke upholstery or foam replacement, contact a licensed upholsterer for estimates.
- When your layout must comply with accessibility standards — consult a certified interior designer. For accessibility and clearance standards, see HUD guidance.
Conclusion: Choose sectional shapes that match room geometry, prioritize traffic lanes, favor modular and storage options when flexibility is required, and use restrained styling to maintain openness. Start with precise measurements and a taped layout; iterate with one or two real-world dry runs. If the plan still feels tight after testing, consult a professional designer or delivery specialist.
Ready to test layouts? Sketch two taped options this afternoon and live with each for 48 hours — you’ll immediately see which preserves flow and comfort.


