


small living room furniture layout: by the end of this hands-on guide you’ll have a measured, sketched and test-fitted furniture plan tailored to your lifestyle; expect to complete the process in 2–6 hours depending on complexity, and this assumes beginner to intermediate DIY measurement and sketching skills.
This piece is a practical, step-by-step implementation manual focused on efficiency and usability, not just aesthetics — you’ll learn to measure, zone, choose multifunctional pieces, and finalize a layout that preserves traffic flow and daylight.
Introduction to Small Living Room Furniture Layout
This introduction expands on the high-level aims before we begin the hands-on steps. A well-executed small living room furniture layout reduces clutter, preserves clear walking paths and increases usable seating without expanding square footage. Many small space challenges come from poor scale choices, blocked natural light or undefined activity zones; systematic layout planning addresses all three.
Start by understanding how layout planning fits into broader room strategy — if you want a deeper overview, see the comprehensive Living Room Layout Ideas Guide for Furniture Arrangement, then return here for an intensive layout-focused execution plan.
Before you start
- Tools: 25 ft tape measure, laser distance measurer (optional), graph paper or room-plan app (e.g., RoomSketcher), pencil, eraser, masking tape.
- Materials: furniture spec sheets (dimensions), photos of current room, a measuring helper if possible.
- Decisions to make in advance: primary function (TV + seating, workspace, guest sleeping), preferred seating capacity (2–4 people), and storage needs (books, media, toys).
We now move into the procedural sections; each H2 below contains specific, measurable steps and checklists for that topic.
Assessing Your Small Living Room Space Before Layout
Transition: Before moving any furniture, perform a precise assessment so every placement decision is data-driven rather than guesswork.
- Measure the room dimensions. Use a tape measure or laser measurer to record length, width and ceiling height to the nearest 1/4 inch. Note alcoves, bay windows, radiators, vents and any permanent fixtures. Record measurements on graph paper at a 1/2″ = 1′-0″ scale or use a room-plan app.
- Identify focal points. Locate and mark the strongest visual focal point—TV, fireplace, window, or architectural feature. Focal points determine primary seating orientation and anchor furniture placement.
- Map traffic flow patterns. Walk the room and note typical paths (door-to-door, kitchen-to-couch) and measure a minimum 30–36″ clear path for primary circulation and 24–28″ for secondary paths; these are ergonomics-backed thresholds used in professional space planning.
- Record natural light sources and sightlines. For each window, note direction (north/south/east/west) and measure window height from floor. Natural light placement informs where you should avoid blocking light with tall furniture; place reading seats near light sources when possible.
- Check outlet locations and HVAC elements. Mark electrical outlets, cable runs and thermostat locations; the practical placement of media equipment and lamps depends on outlet availability.
- Assess furniture scale vs room scale. Gather dimensions for existing furniture or target pieces. Use these sample dimensions: standard sofa 78–90″ long x 33–40″ deep; apartment sofa 72″ or under; armchair 30–40″ wide; coffee table depth 16–20″. If your room width is under 11 feet, prioritize pieces under 36″ depth.
- Create a to-scale sketch. Draw the room outline with all measured features. If you prefer digital: import measurements into a tool like RoomSketcher or MagicPlan and place scaled rectangles for furniture to test arrangements.
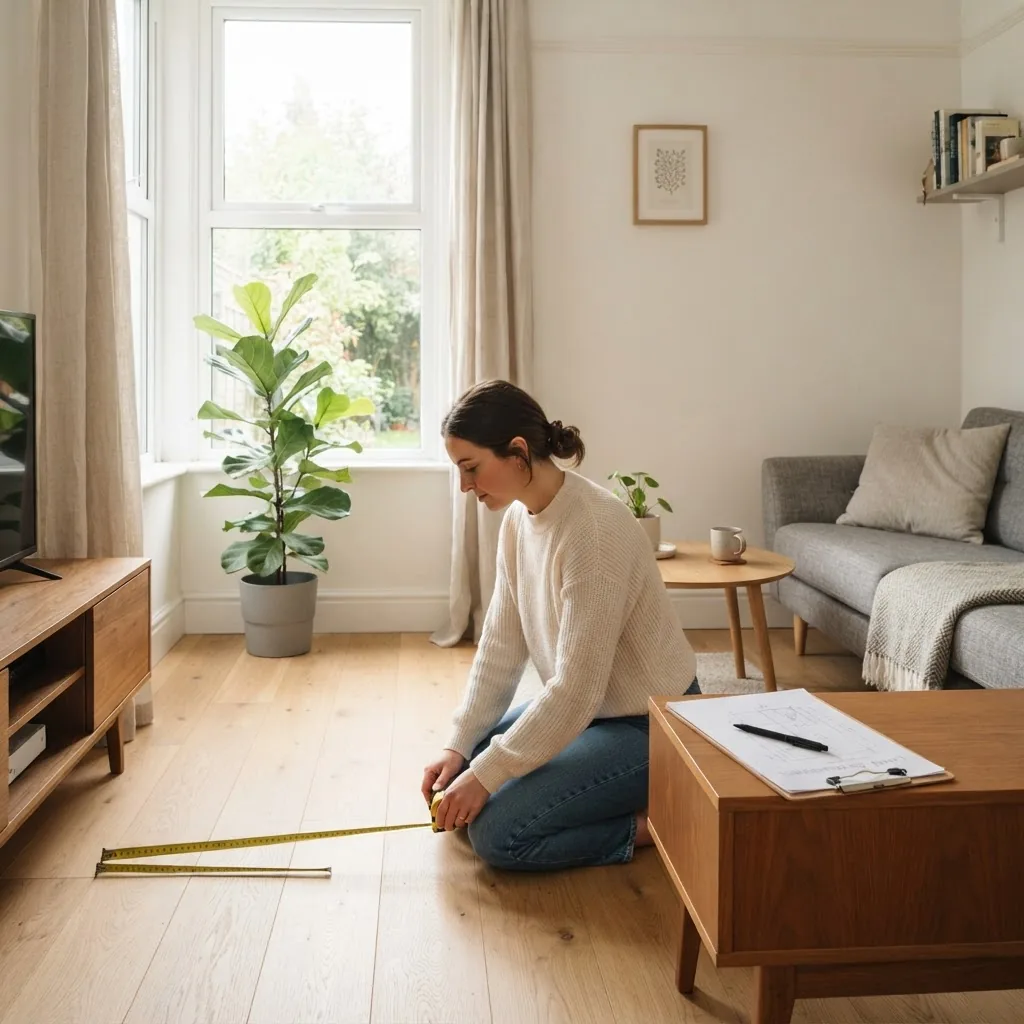
For more precise measurement techniques and calibration methods, see detailed accurate room measurement techniques and practice drawing methods in drawing effective room layouts.
Essential Principles for Arranging Furniture in a Small Living Room
Transition: With measurements and a sketch in hand, apply foundational principles that maximize usability and visual space.
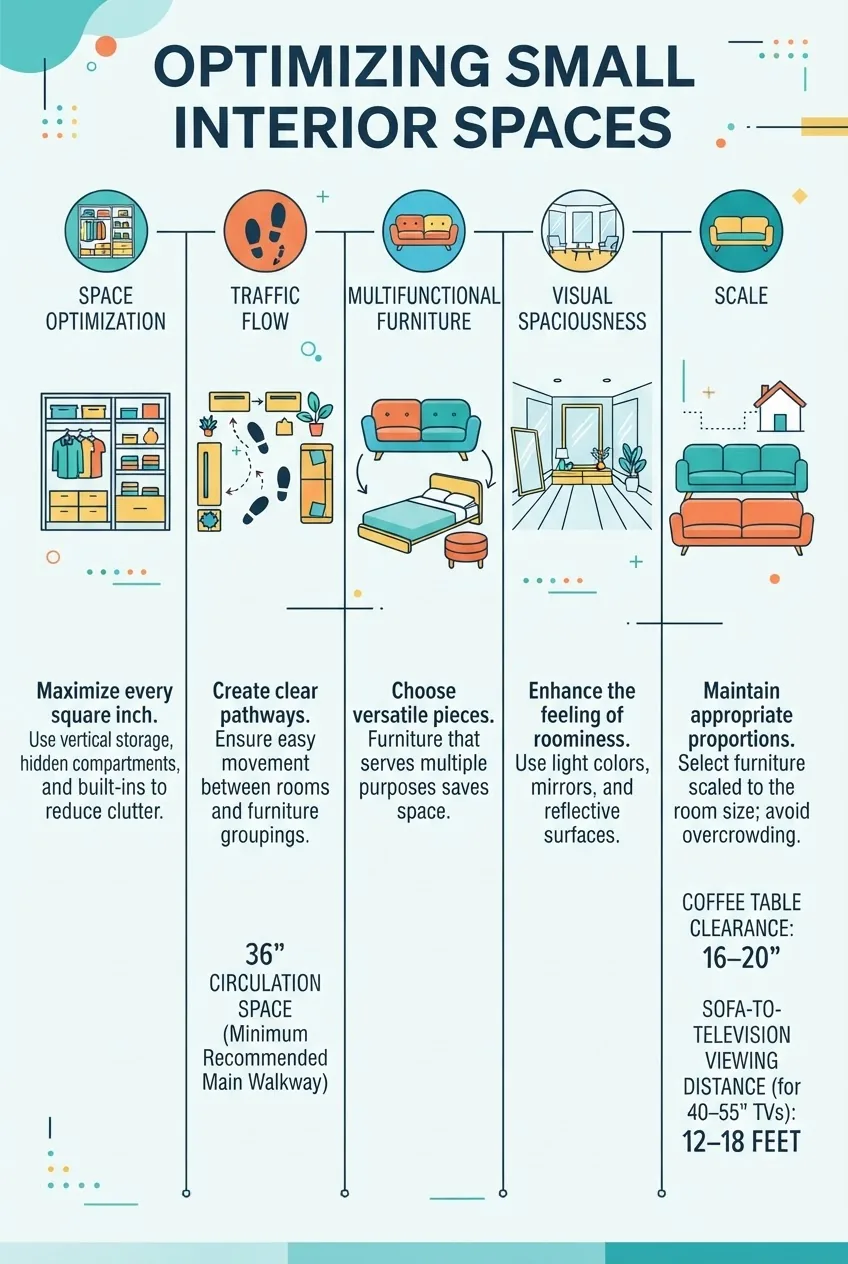
- Prioritize clear traffic flow. Arrange seating so primary walkways remain at least 30–36″ wide. For example, keep the space between a sofa and a TV console at a minimum of 8 feet (96″) for comfort when the room is wider, but in narrow rooms accept 7 feet (84″) and reduce coffee table depth instead.
- Use scale and proportion deliberately. Match furniture depth and height to room dimensions: in rooms under 11′ wide, choose sofas 30–36″ deep and coffee tables 16–18″ deep. Taller furniture (over 30″ height) should be placed against a wall to avoid closing in the room.
- Adopt multifunctional furniture. Use sofa beds, ottomans with storage, nesting tables and console desks; these save footprint while delivering utility. For instance, a storage ottoman occupying 30″ square can replace a 48″ long bench plus storage box.
- Favor modular and sectional pieces smartly. In compact L-shaped plans, a compact sectional with a 60″ chaise can replace a sofa + lounge chair while maintaining flow. Avoid excessively deep sectionals; choose pieces with 32–34″ seat depth for smaller rooms.
- Create smaller zones. Divide activity by function—conversation, TV, work—using rugs, furniture orientation, and low shelving as visual dividers rather than bulky screens. Aim for conversational groupings that allow a 12–18″ reach across a coffee table.
- Integrate storage with furniture. Choose media consoles with built-in shelving, side tables with drawers, and wall-mounted cabinets. A bench with 18″ deep storage beneath the window adds seating plus concealed storage without extra footprint.
- Design around natural light. Keep tall storage away from primary windows; orient seating to benefit from daylight for reading and socializing. Use lower-back furniture near windows to preserve sightlines and reflect light deeper into the room.
- Optimize visual space with proportionate color and form. Use furniture with exposed legs, open bases and lighter upholstery to create a “floating” effect. In narrow rooms favor leggy consoles and furniture with negative space beneath to give the eye room to pass under surfaces.
- Balance functionality and aesthetics. When trade-offs appear (e.g., larger sofa vs. more storage), prioritize the room’s primary function. If hosting is frequent, allow seating gains; if daily working is required, sacrifice a seat for a compact desk solution.
- Apply basic ergonomics and sightline rules. For TV viewing, use a viewing distance of approximately 1.5–2.5 times the diagonal screen size. For example, a 50″ TV pairs best with seating 75–125″ away (6.25–10.4 ft). These ranges follow industry ergonomics guidance used by interior designers.
For a broader primer on space planning principles used by professionals, refer to space planning for interiors. For ergonomics data, consult external guidelines such as NIOSH for human factors considerations and ASID for professional design standards.
Popular Small Living Room Furniture Layout Configurations
Transition: Below are the most effective layout configurations for small living rooms—each configuration includes when to use it, exact spacing recommendations, and trade-offs.
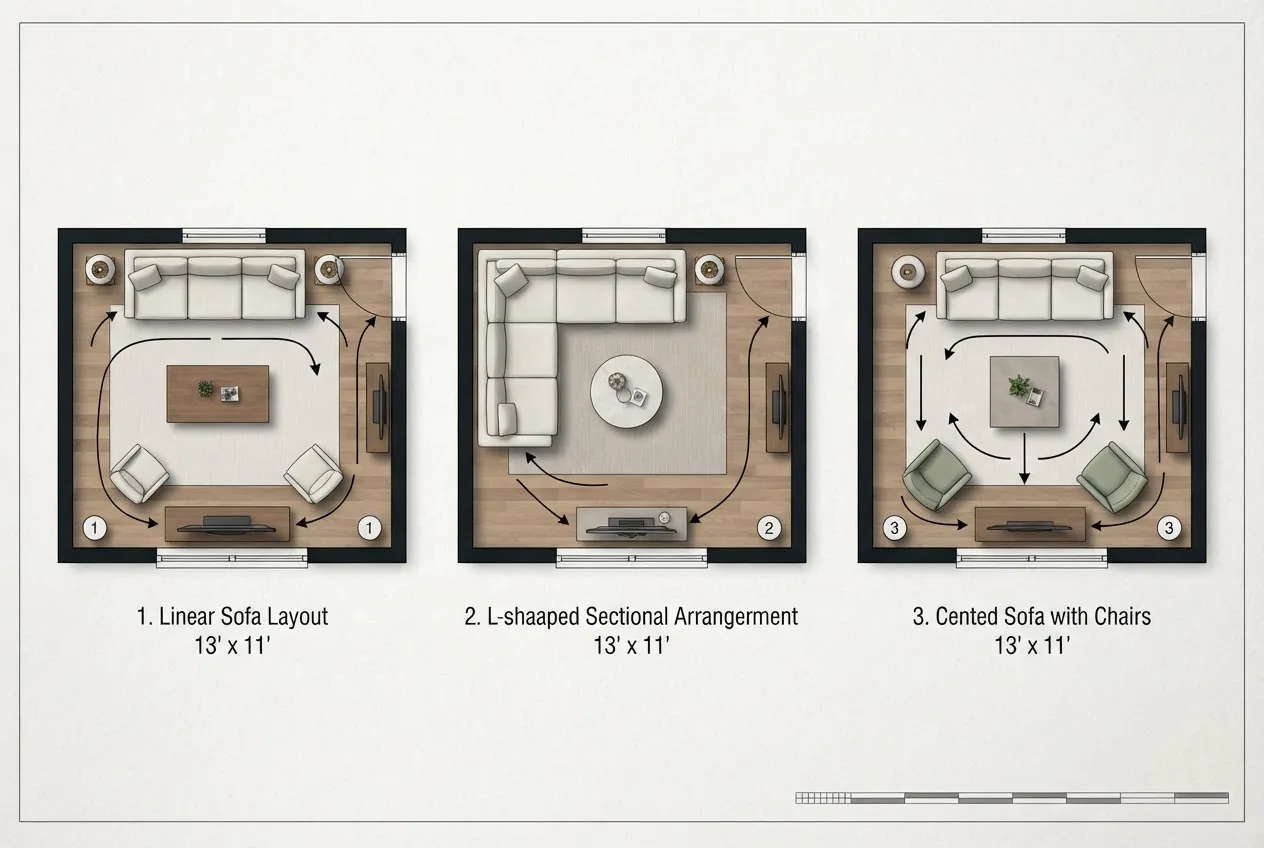
Linear layout
When to use: ideal for narrow rooms (under 11′ wide) or long rectangles where circulation runs along one side. Configuration: place a sofa parallel to the longest wall, with a slim console (10–12″ deep) behind if needed. Maintain a minimum 30–36″ aisle opposite the sofa toward entrances. Advantages: efficient circulation and simple sightlines. Trade-offs: limited conversational grouping unless supplemented with two small chairs (28–32″ wide) that can be moved as needed.
L-shaped layout (sofa + chaise or sectional)
When to use: works well in square or slightly rectangular rooms where a corner can be dedicated to seating. Use a compact sectional where one side is 60–84″ and chaise depth 60″ max. Leave 12–18″ between chaise and coffee table for leg clearance. Advantages: defines the seating zone without extra chairs; good for TV and conversation. Trade-offs: large sectionals can overwhelm very small rooms—prefer modular pieces you can reconfigure.
Centered layout
When to use: in square rooms or spaces with central focal points (coffee table + rug). Place the sofa centered on the rug with two armchairs opposite or at angles, maintaining a 12–18″ gap between seating and coffee table. Advantages: fosters conversation; symmetrical appearance. Trade-offs: demands slightly more clear floor area—use only when room width allows at least 9–10 ft for comfortable circulation.
Corner utilization
Use corners for storage or seating niches: corner shelving, a corner chaise, or a compact angled desk (30–36″ depth) can convert underused space into functional areas. Keep corner pieces low-profile (under 36″ high) near windows to preserve light.
Sectional-specific tactics
For small rooms, choose small-depth sectionals (seat depth 32–34″) and modular units so you can remove or rotate pieces. For help visualizing transformations, review curated before and after layout examples that show how changing a sofa axis freed circulation and added storage.
For broader arrangements in small rooms, see living room furniture arrangement ideas and specialized sectional patterns described in sectional sofa layouts for small rooms.
How to Organize Furniture for Different Lifestyle Needs
Transition: The same room can support very different lifestyles; organize furniture to match how you actually live.
| Lifestyle | Layout focus | Furniture choices | Quick tips |
|---|---|---|---|
| Family-friendly | Durable seating, toy storage, open sightlines | Stain-resistant sofa, storage ottoman, low-profile media console | Keep toy bins near seating; maintain 36″ circulation for safety. |
| Entertaining | Flexible seating, clear serving paths | Modular sofas, stackable stools, nesting side tables | Arrange furniture to open a 36–42″ serving corridor to dining or kitchen. |
| Quiet zones / reading | Read-friendly lighting, cozy nooks | Compact armchair, floor lamp, small side table | Place chair within 36″ of a floor lamp and near natural light. |
| Workspace integration | Compact desk zone, sound separation | Wall-mounted desk (24–30″ depth), folding chair, cable management | Position the desk against a wall or behind a sofa on a console table. |
| Storage-first | Hidden storage, vertical shelving | Built-in shelving, bench with drawers, media console with doors | Use vertical space; keep tall units against longest wall to avoid visual clutter. |
Cross-references: Learn how bedroom planning principles transfer to living spaces in efficient room arrangements for bedrooms, and explore shared living and bedroom space ideas or living and dining room combos when rooms need to perform double duty. For multi-level houses with compact spaces, review small design solutions for multi-level homes.
Choosing Furniture Pieces to Complement Your Layout
Transition: With zones and circulation defined, choose pieces by scale, storage and visual weight to complete the layout.
Start with a list of required functions and match them to furniture roles: primary seating (sofa), secondary seating (chairs or stools), surface (coffee/side tables), storage (console/media), and lighting. Prioritize scale and proportion—measurements matter: sofa width should occupy 60–80% of the longest wall to avoid overwhelming the room.
Examples:
- For a 10′ x 12′ living room: target a 72″ apartment sofa (approx. 30″ depth), a 36″ wide armchair, and a 36″ x 18″ coffee table to maintain 12–18″ circulation around the table.
- If storage is a priority: choose a media console 36–42″ high with doors and adjustable shelving; combine with a storage ottoman 30″ square (approx. 8–12 cu ft storage) to replace bulky cabinets.
- For visually light furniture: select chairs with exposed legs and narrow arms, and glass or open-base tables to let light pass through the room.
For specific product recommendations and seating strategies, review comfortable seating ideas for family rooms, and compare styles in ideal living room furniture pieces.
Also consult buying guidance: choosing living room furniture and curated modern living room furniture sets that blend form with compact function. For seating-specific options, consult seating options for small living rooms.
Tips for Maximizing Visual Space and Lighting in Small Living Rooms
Transition: Light and visual tricks extend perceived space; apply both to make the room feel larger and more open.
- Maximize natural light placement. Keep windows unobstructed; place low-back seating within 3–5 ft of windows to take advantage of daylight. According to a 2023 industry guidance from ASID, maximizing daylight reduces reliance on artificial lighting and improves perceived space.
- Use mirrors strategically. Place a mirror opposite a window to reflect light deeper into the room; choose mirrors with thin frames and mount at eye-height to widen sightlines.
- Adopt a light, limited palette. Use 2–3 complementary tones; lighter ceilings with slightly darker walls add depth. Keep large furniture in neutral shades and reserve pattern for small accent pieces.
- Declutter horizontal surfaces. Leave coffee tables and consoles with 20–25% clear surface area to avoid visual overcrowding; use concealed storage where possible.
- Use vertical space. Install wall-mounted shelving up to 84–90″ high for books and décor—this draws the eye upward and increases perceived height.
- Layer lighting. Combine ambient (overhead), task (reading), and accent lighting (wall washers). Place floor lamps 24–36″ from seating for optimal reading light; follow lumens guidance from reputable lighting sources such as Architectural Digest for fixture selection and placement.
- Choose transparent or leggy furniture. Glass-top tables or sofas with exposed legs maintain visual continuity and reduce the “blocked” look often created by solid bases.
- Introduce low-profile rugs to define zones. Use rugs that leave 12–18″ of floor visible around the edges to create a breathing margin and define seating without closing the room.
- Optimize window treatments. Mount curtains as close to the ceiling as possible (4–6″ above trim) and extend rods 4–6″ beyond the window frame to make windows read larger.
- Open-concept coordination. In open-plan or kitchen-living combos, coordinate finishes and maintain 36″ circulation between kitchen islands and seating; for open-plan guidance see modern open floor plan design, kitchen and living room floor plans and flexible open floor plan layouts.
Common Mistakes to Avoid in Small Living Room Layouts
Transition: I’ll share common failures I’ve seen in real projects and how I corrected them in practice.
I once accepted a client’s insistence on a 96″ deep sectional in a 10′ wide room; traffic was immediately constricted. The corrected solution replaced the sectional with a 72″ apartment sofa and two narrow chairs (30″ wide) which restored 36″ aisles and added flexible seating. Common pitfalls include overcrowding the room with oversized pieces, blocking natural light with tall furniture, ignoring outlet locations, and failing to plan circulation. When evaluating options, measure twice, place temporary paper templates on the floor to test clearances, and prioritize multi-role furniture over single-purpose pieces.
For readers interested in how awkward or larger rooms require different approaches, consider reviewing guidance on awkward living room layouts for large spaces.
Final Checklist for Creating an Efficient Small Living Room Furniture Layout
Transition: Use this final numbered checklist to confirm your layout is functional, comfortable and aligned with your needs.
- Measure again. Re-check key distances: sofa-to-TV viewing distance, primary aisle (min 30–36″), and sofa-to-coffee table (12–18″).
- Confirm focal orientation. Ensure primary seating faces the chosen focal point or has a dual-focus arrangement.
- Test traffic flow. Walk all natural paths; keep primary paths 30–36″ and secondary paths 24–28″.
- Verify lighting layers. Confirm ambient + task + accent sources are in place and reachable from seating positions.
- Check storage capacity. Ensure visible storage equals or exceeds required volume (estimate in cubic feet) for media, books and daily clutter.
- Assess flexibility. Can you remove or reconfigure at least one piece to adapt the room for guests? Modular choices should allow 15–30 minutes reconfiguration time.
- Comfort check. Sit in all planned seating and verify sightlines, reach to side tables (arm’s length ~20–24″), and legroom under the coffee table (12–18″).
- Finalize surface clearance. Leave 20–25% of large horizontal surfaces clear to prevent visual clutter.
When to call a professional
Call an interior designer or architect when structural changes are required (moving windows or walls), when you need built-in storage solutions, or when you have complex electrical or lighting rewiring. If ergonomics or code compliance is a concern—particularly in multi-unit buildings—seek a licensed professional. For standards and professional certification resources see ASID.
Common mistakes and how to avoid them (practitioner notes)
I have repeatedly seen three errors: choosing furniture by photo rather than dimensions, ignoring circulation when adding a large TV, and underestimating storage needs. To avoid these, I always tape floor templates at scale, simulate traffic by walking projected paths, and commit to at least one hidden storage unit (bench or console) before buying extra seating.
Conclusion: A successful small living room furniture layout balances accurate measurement, thoughtful zoning, and smart furniture selection; invest 2–6 hours in measuring and sketching, choose multifunctional and modular pieces, and validate circulation before buying. Ready to start? Sketch your room, mark primary paths and focal points, and test one configuration for a weekend—then iterate.
Call to action: download or sketch your room plan now and test the top layout you identified for two days—if you want a second opinion, consider a quick consult with a professional designer.


