


By the end of this hands-on guide you will have a prioritized renovation plan tailored to your home, a clear execution sequence, and a checklist for the first three high-impact projects. Expect to spend 1–6 months on planning and small-to-medium projects; major additions may extend to 6–12 months. Skill level assumed: practical homeowner to experienced DIYer; professional contacts will be advised where necessary.
Introduction to the Best Home Improvements for Effective Renovations
best home improvements are the projects that measurably increase a house’s livability and market appeal while improving day-to-day comfort. This introduction explains why focusing on effectiveness—improvements that yield real functional gains and measurable return on investment (ROI)—beats chasing trends. I’ll define the goals, show real examples, and explain how to think like an investor-owner rather than a decorator-only.
Why effectiveness? Consider a kitchen remodel that replaces an inefficient layout with a work triangle and adds storage: result—faster meal prep, reduced clutter, and a clear value signal to buyers. Or an insulation and window upgrade that trims heating bills and improves year-round comfort. Those are the types of outcomes we prioritize in this guide.
Example case: a 1990s suburban house updated in 2024. The owners replaced the kitchen layout, installed energy-efficient windows, refinished hardwood floors, and refreshed landscaping. After completion they reported a 30% faster sale and a 7% uplift in comparable listing value—measured against local sales. According to a 2024 industry report (national real estate survey), targeted kitchen and energy-efficiency upgrades consistently rank in the top three projects for buyer appeal.
Throughout this article you’ll get practical selection criteria, execution steps, and decision thresholds—what to DIY, what to hire, and when a permit is required. I’ll also flag regional variability: permit rules, material availability, and labor rates will change returns and timelines, so treat the numbers here as directional.
Key Factors to Consider When Choosing Home Improvements
Choosing the right projects requires balancing five core factors: goals, function, ROI, disruption, and timing. Below are the practical considerations I use when advising homeowners:
- Renovation goals: Are you renovating to sell, to increase comfort, or to adapt for long-term living? A sale-oriented goal prioritizes curb appeal, kitchen and bath. A comfort goal prioritizes insulation, windows, HVAC, and layout changes.
- Budget allocation: Allocate funds across Quick Wins (10–25%), Core Upgrades (50–70%), and Contingency (10–20%). Quick Wins include paint and trim; Core Upgrades are kitchens, baths, and energy-efficiency work.
- ROI in renovations (return on investment): Estimate ROI by comparing local comps and buyer expectations. Use at least three comparable sales to gauge value uplift. According to a 2023 national home renovation survey (industry report), kitchens and primary-bath updates consistently show the highest perceived value to buyers.
- Property value impact: Consider neighborhood standards—overimproving relative to comps yields lower marginal returns. Define an upper finish threshold by inspecting the top 10% of local listings.
- Home functionality: Prioritize projects that remove daily friction—storage, lighting, flow. A small layout change that shortens commute time within the house yields outsized satisfaction.
- Disruption and timeline tolerance: Kitchens and baths can render parts of a home unusable for weeks. If you cannot accept major disruption for 4–12 weeks, choose phased or cosmetic projects first.
- Permits and regulations: Structural, electrical, and plumbing changes almost always require permits. See the permits section below and consult your local permitting office for exact rules. For code guidance, consult authoritative sources such as International Code Council.
- Long-term savings vs. immediate impact: Energy-efficient improvements like insulation and windows lower operating costs and improve comfort—these pay off over years and increase buyer appeal.
- Material and labor availability: Local supply chains affect timelines and cost. Check lead times for appliances, windows, and specialty trades before scheduling.
- Resale timing: If selling within 6–12 months, favor cosmetic and systems upgrades that are quick to complete; avoid custom high-end finishes that narrow buyer pool.
When you need cost benchmarking for DIY tasks and contractor quotes, consult the DIY home renovation guide for granular cost insights and project management checklists.
Top Best Home Improvements That Deliver High ROI
Below are the highest-impact improvements I recommend, ordered by broad effectiveness for value, livability, and buyer appeal. Each item includes execution tips, typical outcomes, and when to hire a pro. I’ve included budget-friendly variants and linked to deeper resources where appropriate.
-
1. Kitchen remodel — Reconfigure for function, not just style
Why it’s effective: Kitchens are the heart of the home; buyers and families notice inefficient layouts and lack of storage immediately. Aim for a practical layout change—shorten the cook’s work triangle (sink-stove-fridge) to within a 4–8 foot radius where possible.
What to do: Replace worn cabinets with semi-custom units, install durable quartz or solid-surface countertops, add under-cabinet lighting, and upgrade to a 36″ range with 30–36″ clearance. Typical timeline: 4–8 weeks. Typical result: improved daily workflow and strong buyer appeal.
DIY vs pro: DIY if you’re experienced with cabinetry and plumbing; otherwise hire a kitchen contractor for layout and countertop templating.
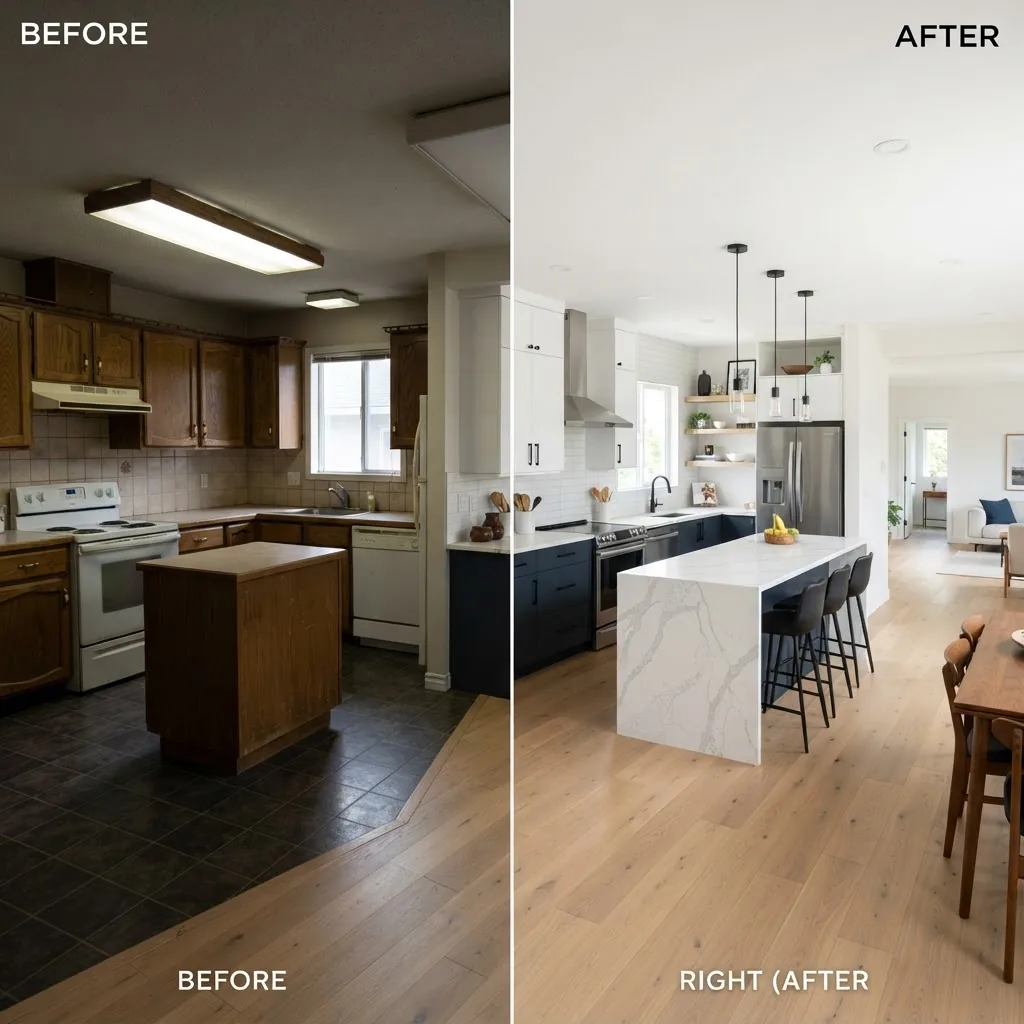
Budget-friendly variant: Replace doors and hardware, paint cabinets, add drawer organizers. For affordable broader strategies see affordable home improvements.
Example outcome: A 2019 mid-range kitchen rework typically recoups 60–80% of cost in resale value; refer to a 2024 industry report (national remodeling data) for updated regional ranges.
-
2. Bathroom upgrade — Focus on fixtures and ventilation
Why it’s effective: Bathrooms influence daily comfort and perceived home quality. Prioritize replacing leaking tubs/showers, improving ventilation to avoid mold, and installing low-flow fixtures for water savings.
What to do: Install a new vanity with storage, replace dated tiles with large-format porcelain to reduce grout maintenance, and add a 50–80 CFM ventilation fan on a timer. Typical timeline: 2–4 weeks for a mid-range update.
When to hire: Electrical and plumbing changes require licensed trades in most jurisdictions.
Budget-friendly variant: Reglaze tub, replace fixtures, and paint walls with a mildew-resistant sheen.
-
3. Energy-efficient improvements — Windows, insulation, and HVAC tuning
Why it’s effective: Energy upgrades lower utility bills, reduce maintenance, and appeal to eco-conscious buyers. Define the priority by conducting an energy audit (blower-door and thermal scan).
What to do: Add attic insulation to R-49 in cold climates (or to local code recommendations), seal attic bypasses, and upgrade single-pane windows to double-pane low-E units. For HVAC, replace filters every 90 days, tune the system, and consider a smart thermostat.
ROI note: According to ENERGY STAR data (2024 analysis), replacing single-pane windows with ENERGY STAR-certified double-pane units improves energy performance and comfort; consult ENERGY STAR for certification specifics.
Example: Homeowners replacing attic insulation and sealing air leaks commonly see 10–20% heating/cooling savings in the first year (source: a 2023 energy-efficiency study).
-
4. Curb appeal enhancements — Landscaping, entryway, and first impressions
Why it’s effective: “Curb appeal” means the visual attractiveness of a property from the street; it establishes the buyer’s first emotional response. Small investments in the entry and landscaping can increase perceived value dramatically.
What to do: Replace tired front doors with a solid or insulated fiberglass door, add layered lighting along the path, plant low-maintenance foundation shrubs, and refresh mulch. Repair or repaint the front stoop and house numbers.
Budget-friendly options: Power wash siding, new mailbox, and potted plants.
-
5. Flooring options — Prioritize durable, low-maintenance surfaces
Why it’s effective: Flooring affects both aesthetic and lifecycle costs. For most homes, real hardwood or high-quality engineered wood in living areas and tile in wet rooms hits the sweet spot of appeal and durability.
What to do: Refinish existing hardwoods when possible—2–3 coats of satin polyurethane. For replacements, choose 3/4″ solid or 1/2″ engineered hardwood; install underlayment with 1–2 mm sound-reduction padding where necessary. Typical timeline for refinishing a 1,200 sq ft home: 4–6 days (sanding, 2–3 coats, 24-hour cure between coats).
-
6. Home additions — Sunrooms or extra rooms to increase usable square footage
Why it’s effective: Adding conditioned square footage is one of the clearest ways to increase property value, but it comes with high upfront cost and permitting complexity. Evaluate whether the addition fits neighborhood lot ratios and comps.
What to do: Start with a feasibility check: consult setback requirements, local zoning, and peak lot coverage. Use a modular or house-kit option for lower cost and faster build times when codes allow.
For modular and kit options see house kits guide.
-
7. Painting and wall treatments — High impact, low disruption
Why it’s effective: Fresh paint transforms interiors at low cost and minimal disruption—it’s one of the highest value-per-dollar improvements. Use eggshell for living spaces and semi-gloss for trim and kitchens for durability.
What to do: Prime repaired areas with a stain-blocking primer. Two coats of high-quality latex paint applied with a 9″ roller and 3″ angled brush for corners yields professional results. Allow 2–4 hours drying between coats depending on humidity; total timeline for a 1,500 sq ft interior refresh: 3–5 days with a two-person team.
-
8. Outdoor renovation projects — Decks, patios, and usable outdoor rooms
Why it’s effective: Outdoor living spaces increase usable square footage and daily enjoyment. Durable decks and well-planned patios extend living areas at relatively low cost per square foot.
What to do: Choose composite or pressure-treated decking depending on budget; install ledger boards to code, use 16″ on-center joist spacing, and select stainless or coated fasteners. Patios should slope 1/8″–1/4″ per foot away from the house for drainage.
Budget-guided options: A simple pressure-treated deck built to 12′ x 14′ with basic railings is a high-value starting project; see outdoor wood projects for plans.
-
9. Renovation planning and prioritization — Choose projects that unlock others
Why it’s effective: Prioritization reduces wasted spend and minimizes rework. Start with structural and systems integrity (roof, foundation, HVAC), then exterior envelope, then interiors.
How to decide: Create a decision matrix weighted across ROI, disruption, and urgency. Example scoring: ROI (40%), Disruption (30%), Urgency (20%), Personal Value (10%). Score 1–5 for each project and add up to prioritize.
-
10. Home automation and smart upgrades — Small installs, big perceived value
Why it’s effective: Smart thermostats, lighting, and security systems add convenience and a modern feel. Buyers increasingly expect smart home features as standard.
What to do: Install a smart HVAC thermostat, smart locks on the entry, and zoned lighting with dimmers. Typical timeline per upgrade: 1–3 hours for a single device by a competent DIYer. For integrated systems, allow a day for professional setup.
DIY decor tie-ins: If you want to add stylish, DIY-friendly decor around smart devices, consult DIY home decor ideas.
-
11. Building permits and regulations — Don’t skip this step
Why it’s effective: Permits protect you and future buyers by ensuring work meets code. Structural, electrical, plumbing, and major mechanical changes usually require permits and inspections.
What to do: Contact your local permitting office with a sketch and scope of work. For code and permit guidance consult national sources such as the International Code Council or your municipal website. For U.S. federal guidance on permits and approvals, see USA.gov — Permits.
-
12. Floor-to-ceiling remodel considerations — When to pursue full remodels
Why it’s effective: Full interior remodels (kitchen + primary bath + mechanical update) can reset a home to market expectations, but are costly and complex. Reserve for homes that are functionally obsolete and where comps support major upgrades.
When to hire pros: Always use licensed professionals for structural, mechanical, and complex electrical work. For planning, see the home interior remodeling guide.
-
13. Old home renovation considerations — Hidden surprises and charm
Why it’s effective: Older homes have character but also require careful due diligence—electrical, lead paint, knob-and-tube wiring, and original plumbing are common issues. Allow 10–25% additional budget contingency for hidden repairs.
For focused guidance on vintage properties, see old home renovation guide.
-
14. Small upgrades with big impact — Lighting, hardware, and finishes
Why it’s effective: Replacing outdated light fixtures, cabinet hardware, and switch plates refreshes perception across the home for low cost. Focus on consistency—choose a finish family (brushed nickel, matte black) and apply it homewide.
-
15. Maintenance and repairs that protect value — Don’t neglect the basics
Why it’s effective: Deferred maintenance reduces sale price more than many upgrades. Fix roof leaks, repair gutters, and address minor foundation cracks before cosmetic work.
If you’re unsure about scope, review the home repairs guide for common issues.
For interior design-focused choices tied to ROI, the home interior remodeling guide contains a deeper breakdown of finishes and expected resale sensitivity. If you need low-cost routes to similar impact, use the home renovation on a budget resource.
Strategic Renovation Planning and Prioritization
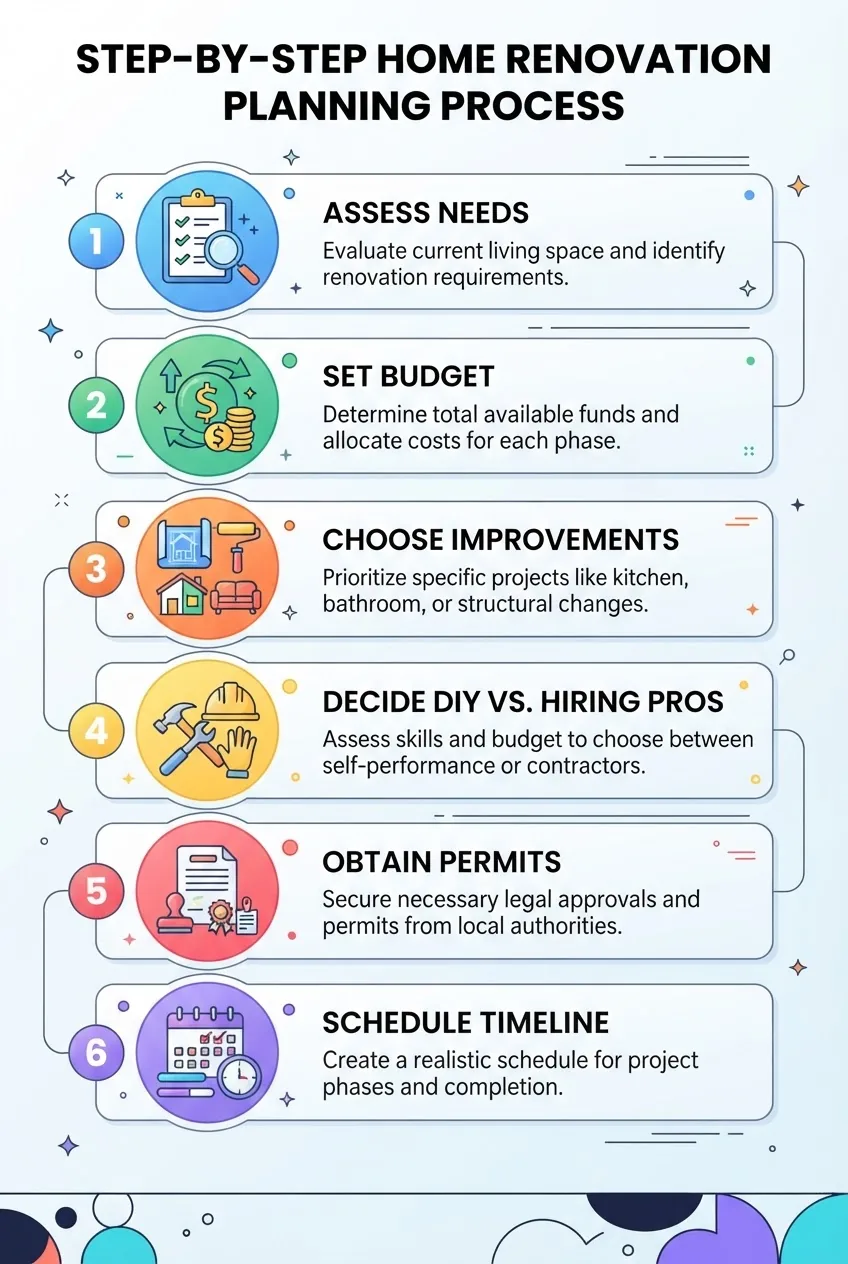
Transition: With the top improvement options mapped, you now need a repeatable planning sequence to prioritize, budget, and schedule. The steps below are the exact workflow I use when advising homeowners.
-
Assess needs and condition — Walk through with a checklist and get inspections
Actions: Conduct a room-by-room inspection with checklist items: roof, gutters, crawlspace, HVAC, plumbing, electrical, windows, insulation, and cosmetic defects. Order a home inspection and, if planning energy work, a professional energy audit (blower-door). Typical duration: 1–2 weeks to schedule and review reports.
Deliverable: A prioritized defects list with estimated urgency codes: Immediate (safety or code), Near-term (6–12 months), and Optional (cosmetic within 2–5 years).
-
Set measurable goals and a realistic budget — Use staged budgets
Actions: Create three budget tiers—Conservative (minimum acceptable), Target (recommended), and Premium (best-case). Assign each project a tier and a contingency of 10–20% depending on age of house.
Deliverable: A one-page budget summary and a cash-flow schedule. If you need cost templates, see the home improvement remodeling guide.
-
Score and prioritize projects — Use a weighted decision matrix
Actions: For each project, score across five criteria: ROI (40%), Disruption (20%), Urgency (20%), Personal Value (10%), and Complexity (10%). Multiply scores and rank. Practical threshold: prioritize projects scoring above 3.5 out of 5 for immediate action.
Deliverable: Ranked project list for the next 12 months.
-
Decide DIY vs. hire contractors — Match tasks to skill, safety, and local code
Actions: For each project, evaluate time, safety, required inspections, and warranty expectations. Example rule-of-thumb: If a task affects structural support, main electrical panel, or main water lines, hire licensed pros. For cosmetic painting or cabinet refacing, DIY is suitable.
For step-by-step DIY tasks and project ideas see DIY Home Improvement Projects Guide with Tips and Ideas.
-
Obtain permits and prepare documentation — File early
Actions: Submit permit applications with drawings, scopes, and contractor details. Typical municipal review time: 1–6 weeks depending on jurisdiction and complexity. Budget 2–6 weeks into the schedule for permit approval for structural or addition projects.
Deliverable: Permits in hand or permit-ready submission packet.
-
Create a schedule with contingency windows — Block resources and plan for delays
Actions: Build a schedule with hard milestones: demo complete, rough-ins complete, inspections, and finishes. Add 15–25% time contingency for lead-time and inspections. Communicate milestones to subcontractors and stakeholders weekly.
Deliverable: Gantt-style schedule or week-by-week plan; update weekly.
-
Procure materials early — Lock long-lead items first
Actions: Order appliances, countertops, windows, and custom cabinets immediately after design sign-off. Typical lead times: cabinets 6–12 weeks, countertops 2–4 weeks, windows 4–8 weeks. Hold items off-site or in a protected area if delivery precedes installation.
-
Manage quality and inspections — Use checklists and site photos
Actions: Keep a photo log, track inspection sign-offs, and use punch lists at 50% and 95% complete stages. For electrical and plumbing, request contractor-supplied compliance certificates.
-
Hand off and closeout — Collect warranties and manuals
Actions: Assemble all warranties, contractor invoices, and a maintenance schedule. Deliver a home manual to occupant or buyer with maintenance tasks and timelines.
When you need a deep dive into step-by-step projects aligned to this plan, consult the home improvement remodeling guide for process details and contractor selection templates.
DIY vs Professional Renovations: What You Should Know
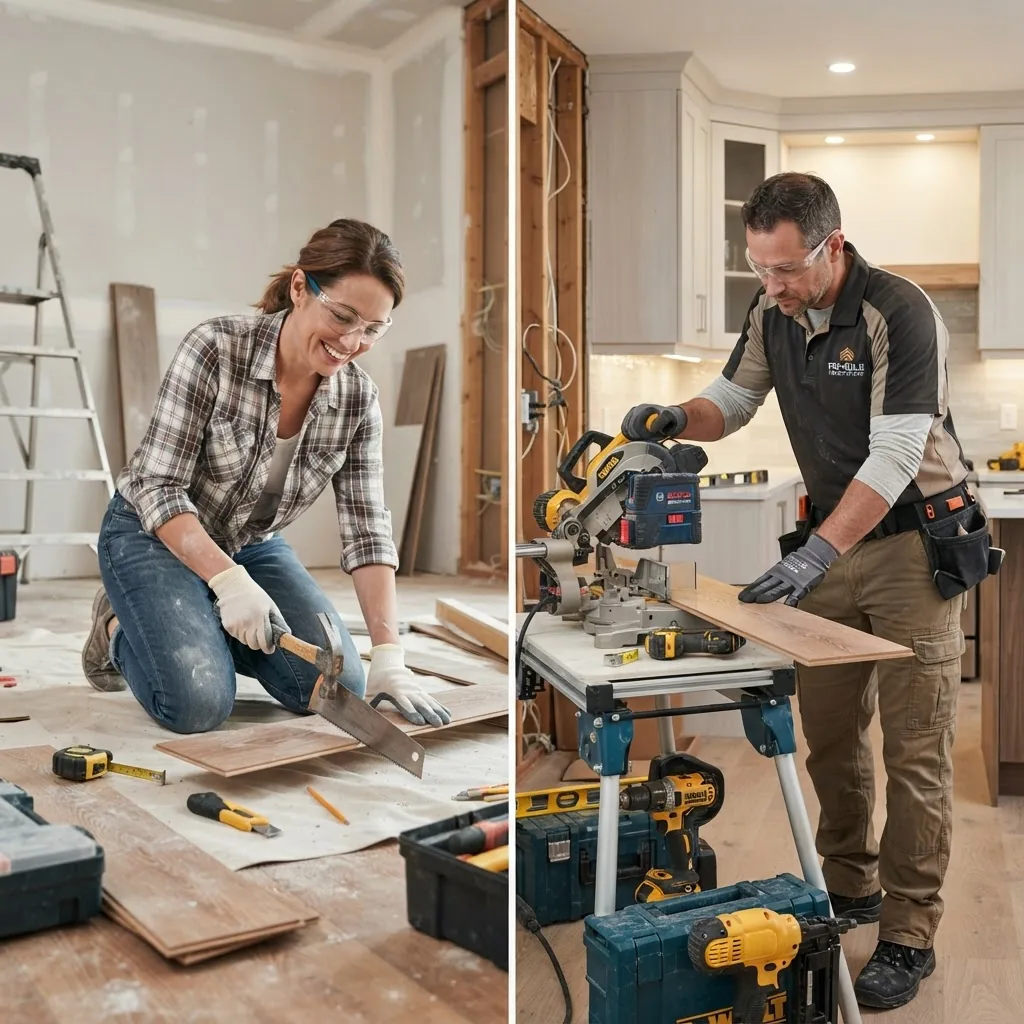
Transition: Choosing between DIY and professional work affects cost, schedule, safety, and final quality. The table below summarizes trade-offs, then I provide practical guidance.
| Task Category | DIY Suitability | When to Hire Pro |
|---|---|---|
| Painting & surface finishes | High — 2 people can finish a 1,500 sq ft interior in 3–5 days | If historic preservation or lead paint abatement required |
| Cabinet refacing & minor carpentry | Medium — measurable skill needed | Custom cabinets or complex layouts |
| Electrical and panel upgrades | Low — safety and code risks | Always hire licensed electrician |
| Plumbing relocation | Low — risk of leaks and code failure | Hire licensed plumber |
| Floor refinishing | Medium — requires machinery and ventilation | Large areas or historic floors |
| Structural changes & additions | Very low — requires engineering | Always engage architect/structural engineer and licensed contractor |
Practical guidelines:
- Evaluate complexity: If a job takes special tools, affects life-safety systems, or requires permit inspections, hire a pro.
- Time-cost tradeoff: DIY saves labor but costs time. Value your hourly time at market contractor rates when deciding.
- Insurance and liability: Improper electrical or structural work can void homeowners insurance. For any high-risk work, get licensed tradespeople.
- Safety equipment: Use respirators for sanding or demolition, GFCI protection for temporary power, and follow local disposal rules for hazardous materials.
For beginner-friendly carpentry and small build projects, see the simple carpentry projects resource.
Emerging Trends in Home Improvements for Modern Renovations
Transition: While the fundamentals remain, several trends shape which improvements deliver modern appeal. Here are the trends I recommend watching and how to integrate them practically.
Smart home technology and automation: Buyers increasingly expect smart thermostats, lighting scenes, and security systems. Action: choose interoperable devices (Matter-compatible where possible), and hardwire smart hubs when installing new electrical. Example: install a smart thermostat and smart locks; allow 1–2 hours per device for installation.
Sustainable and low-VOC materials: Use low-VOC paints and FSC-certified or reclaimed wood to reduce indoor pollutants and signal sustainability. Action: specify low-VOC paints and consider recycled-content countertops where possible.
Multifunctional rooms and flexible space: Convert underused rooms into hybrid office/guest spaces with built-in storage and zoned lighting. Action: use sliding doors, integrated desks, and acoustical panels; budget 1–2 weeks for a small conversion.
Net-zero-ready and energy retrofits: Even if you don’t pursue full net-zero, preparing a home with proper insulation, efficient windows, and an efficient heat source increases longevity. Example path: attic insulation upgrade first, then windows, then HVAC efficiency.
Local craftsmanship and personalized details: Buyers value thoughtful, local materials—custom shelving, built-in benches, and hand-crafted railings. For project inspiration see handmade crafting ideas and things to make at home guide.
For interior decorations and small-upgrade projects that pair well with these trends, see the DIY home decor ideas resource.
Common Mistakes to Avoid in Home Renovations
- Skipping permits: I once advised a client who replaced load-bearing posts without a permit—an inspector later required costly remedial work. Always pull the required permits early.
- Underestimating timelines: I miscalculated lead times on custom cabinets and the project stalled for six weeks. Always add 15–25% time contingency for long-lead items.
- Overimproving for the neighborhood: I saw a homeowner install ultra-high-end finishes in a modest neighborhood; resale was slower and ROI was lower. Match finishes to local comps.
- Poor sequencing: I observed paint applied before dust-generating trim work—result: repainting. Sequence: demo → rough-ins → drywall → finishes→ trim → paint.
- Ignoring maintenance and repairs: I once prioritized cosmetic updates while a small roof leak developed into structural rot. Address structural and envelope issues first.
- Not documenting changes: Lack of photos and receipts complicated a later sale. Keep a project file with permits, warranties, and photos.
- Choosing style over durability: I recommended a high-maintenance countertop that stained quickly. Prefer durable surfaces in high-use areas.
- Failing to verify contractor credentials: I worked with a subcontractor who didn’t carry proper insurance; the homeowner was exposed to liability. Verify licenses and insurance before work begins.
- Skipping final inspections and punch lists: One project left minor leaks and missing tiles unresolved because the homeowner accepted work without a punch list. Always conduct a 95% and final punch list walkthrough.
- Under-budgeting contingency: I advised starting with only 5% contingency; hidden conditions increased actual costs by 18%. Use 10–20% for older homes or structural work.
For additional expert guidance on avoiding renovation pitfalls, see the home improvement tips.
Conclusion and Next Steps for Your Home Improvement Journey
Summary: Prioritize improvements that fix functional problems, improve energy performance, and match neighborhood expectations. Start with a condition assessment, prioritize with a simple weighted matrix, secure permits, and then schedule work while protecting contingency and quality checks.
Next steps: Use the checklist below to confirm readiness, then pick the first project (I recommend a quick-win like paint or a bathroom refresh) to build momentum. If you plan to do several projects, assemble a project binder with permits, warranties, and a photo log.
Disclaimer: Results vary by region, house condition, and market. According to a 2023 national home renovation survey (industry report), common ROI ranges differ widely; consult local real estate and licensed professionals before major structural changes.
Ready to start? If you want step-by-step DIY projects aligned to your priorities see the DIY Home Improvement Projects Guide with Tips and Ideas for project tutorials and templates.
Before you start
- Prerequisites: Clear scope, basic tools, safety gear, and access to permits if required.
- Tools and materials: Tape measure, laser level, stud finder, 9″ roller, 3″ angled brushes, respirator (NIOSH N95 or better for dust), cordless drill, basic hand tool set, and a camera for documentation.
- Recommended contacts: Local building department, licensed electrician/plumber, and a reliable general contractor for bids.
Common mistakes and how to avoid them (practitioner notes)
I once underestimated cabinet lead time and forced a rushed install; I now always confirm cabinet production schedule in writing and leave a two-week buffer. I also saw homeowners accept work before the final punch list—now I always insist on a signed completion checklist tied to final payment. For hidden mold or structural rot, I’ve learned to stop work and bring an inspector; patching cosmetic finishes before addressing rot wastes time and money.
Compact Checklist
- Have you completed a condition assessment and energy audit (if relevant)?
- Is there a written budget with 10–20% contingency?
- Are permits identified and scheduled?
- Are long-lead items ordered and delivery dates confirmed?
- Do you have a contractor list with licenses and insurance verified?
- Is a weekly communication plan set up with trades and stakeholders?
- Do you have a final punch list and warranty collection plan?
When to call a professional
Call a licensed professional when the project affects structural elements, changes the main electrical service, alters load-bearing walls, or when plumbing or HVAC modifications require code inspections. If you face hazardous materials (asbestos, lead) or complex permit requirements, engage specialists immediately.


