


What you’ll achieve: By the end you’ll have a step-by-step plan to remodel major interior rooms, a room-by-room cost outlook, and an actionable hiring and materials checklist ready to implement. Expect realistic planning time of 2–6 weeks for pre-construction work and mid- to large-scale remodel execution of 4–16 weeks depending on scope; this guide assumes an intermediate DIY/owner project manager skill level (able to manage contractors, read basic plans, and handle light finish tasks).
Before you start
- Permits & documents: existing plans, property deed, and recent utility plans.
- Essential tools & materials: tape measure (25 ft), laser level, stud finder, set of screwdrivers, cordless drill (18V), basic carpentry tools, PPE (gloves, safety glasses), and a 5–10% contingency fund.
- Stakeholders to notify: household, neighbors (for noisy work), and your lender if financing.
- Budget baseline: have at least 20% of estimated project cost readily available as contingency for mid- to large-scale jobs.
- Insurance & warranties: verify homeowner’s insurance and contractor liability coverage before work begins.
- Define the scope and priorities. List must-have changes, nice-to-haves, and non-negotiables. Quantify priorities (e.g., new kitchen layout, upgraded HVAC, bathroom full gut). Assign each item a rough budget range using local quotes or national benchmarks.
- Set a firm timeline and milestones. Break the project into phases (design, permits, demolition, rough-in, finishes, inspections). Allocate buffer days: +15% for unknown delays for modern homes, +30% for older homes.
- Create an itemized budget. Use three columns: estimate, bid from contractor, and contingency. Target allocations: 35–45% for kitchen, 15–20% per full bathroom, 10–15% for bedrooms/living areas, 10–15% for systems (HVAC, electrical), remaining for finishes and furniture.
- Decide labor split (DIY vs pro). Mark each task as DIY-capable, pro-required, or pro-managed DIY. Typical owner-DIY tasks: painting, minor trim, installing fixtures; pro tasks: structural changes, major electrical/plumbing.
- Secure design and technical documents. Finalize layout drawings, electrical plans, and fixture schedules. For structural changes, obtain stamped drawings if required by your local jurisdiction.
- Apply for permits. Submit plans with permit applications and schedule reviews early—permit reviews often add 2–6 weeks. Refer to government guidance for local requirements.
- Tender and hire contractors. Get at least three written bids, verify licenses, ask for references and photos of completed projects, and sign a scope-based contract with payment milestones.
- Order long-lead items. Order cabinetry, windows, appliances, and custom finishes immediately after contract signing—expect 6–12 week lead times for many items.
- Prepare the site. Establish dust mitigation, temporary living areas, disposal plans, and a daily cleanup protocol.
- Kick off construction with a pre-start meeting. Confirm daily hours, subcontractor arrivals, inspection schedule, and emergency contact list.
After these steps you’ll be ready to follow the deeper guidance below on design decisions, material choices, cost benchmarks, common pitfalls, and ROI strategies. Transitioning now into the broader context will help you align aesthetics and budget before demolition.
Introduction to Home Interior Remodeling
Home interior remodeling is the process of updating and reconfiguring interior spaces to improve function, aesthetics, and value. Whether you plan a mid-scale kitchen overhaul or a whole-house interior redesign, remodeling includes planning, permitting, demolition, systems work (electrical, plumbing, HVAC), and finishes. The goal is not simply replacement but aligning interior design concepts—like flow, lighting, and material coherence—with practical constraints: budget, schedule, and code compliance.
I’ll show real-world before/after scenarios. One example: a 2019 mid-sized kitchen reconfiguration that added a 7-foot island, re-routed plumbing, and upgraded appliances returned 60% of cost at resale in that market—this illustrates how targeted scope choices balance design and ROI. According to a 2024 industry report from Remodeling Magazine, national averages remain useful benchmarks but vary widely by region and project type; always adjust with local bids.
Before we dig into planning specifics, you may want hands-on ideas that complement your interior remodel. DIY home improvement projects
Planning Your Home Interior Remodeling Project
Effective project planning turns design intent into achievable work. Follow the numbered how-to steps below to convert vision into a executable plan.
- Set measurable goals. Write three primary objectives (e.g., add storage, increase natural light by enlarging windows by 20%, and modernize kitchen workflow). Assign a priority level 1–3 and a target completion date.
- Build an initial budget matrix. Start with national benchmarks: according to a 2024 industry report from Remodeling Magazine, average midrange kitchen remodels range widely—use those numbers as a starting point, then solicit local bids. Include a 20% contingency.
- Map the timeline. Create a Gantt-style schedule with key milestones: design completion (2–4 weeks), permit approval (2–6 weeks), demolition (1–3 days per room), rough-in (1–3 weeks), finishes (2–6 weeks). Add buffer for inspections (+3–7 days each).
- Identify permits and code requirements. Use your local building department checklist. For general federal and state permit guidance, consult official resources like government building permit offices when planning structural or electrical changes.
- Assemble your vendor shortlist. Gather three bids per trade (general contractor, electrician, plumber, HVAC). Check references, license numbers, and insurance. Ask for a sample contract with clear change-order language and payment milestones.
- Plan logistics and site protection. Define dumpster location, temporary power, dust barriers, and run times for noisy work. Allocate 10% of the budget for site logistics and protection.
- Procure long-lead items on a schedule. Order cabinetry, tile, and large appliances within 7 days of contract to avoid 6–12 week delays. Record expected delivery dates and add them to the timeline.
- Set communication protocols. Decide on weekly progress calls, a single point of contact for change orders, and a document folder (cloud-based) for plans, permits, and invoices.
- Create a walkthrough checklist before demolition. Confirm existing conditions (floor heights, wall locations, mechanical access), photograph everything, and get sign-off on final scope to reduce disputes.
- Plan post-construction integration. Allocate 8–14 days after the final trade for furniture, fixture integration, and a final punch list walkthrough.
As you plan, consider broader remodel or rebuild options—if scope grows, you may need to explore house kits or full construction workflows. house kits and building requirements and how to build a home can inform decisions when remodeling morphs into rebuild-level work.
Key Interior Design Principles to Guide Remodeling
Good design makes a remodel feel inevitable and effortless. Use the principles below to shape decisions that affect layout, finishes, and flow planning.
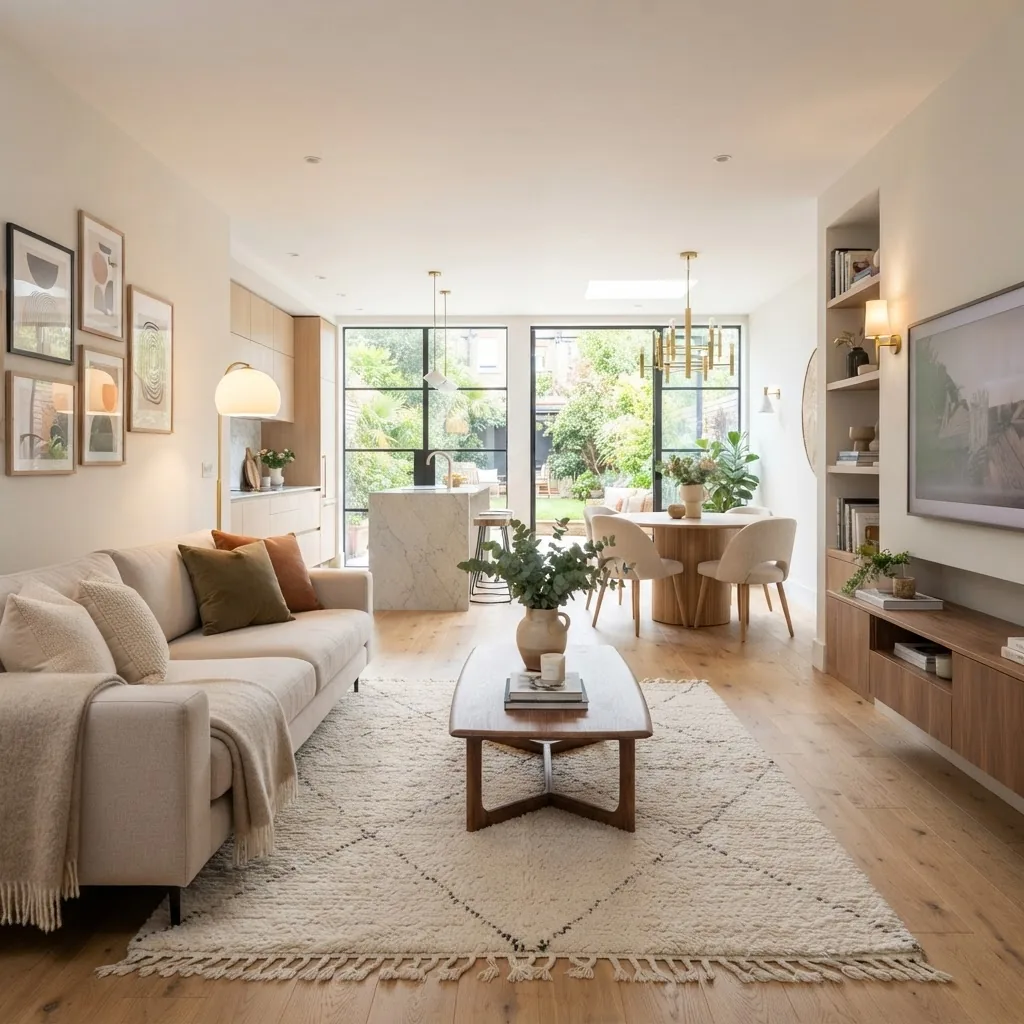
Space optimization: start with furniture footprint analysis—measure major pieces, allow 30–36 inches of circulation zones in primary living areas, and 36–48 inches around kitchen islands for two cooks. For bedrooms, target 30 inches clearance on at least two sides of the bed.
Color schemes and material coherence: choose a base palette (2 neutrals), a primary accent, and a secondary accent. Example: warm off-white walls, matte oak floors, deep-blue kitchen cabinets, and brass hardware for contrast. Use larger swatches in the space before committing.
Lighting design: layer lighting—ambient (recessed or central fixtures), task (under-cabinet, vanity lights at 3000–3500K), and accent (wall washers, picture lights). Specify dimmable circuits for living spaces and bathrooms to extend usefulness and energy savings.
Flow planning: test sightlines and adjacency—place the kitchen near service entrances, keep bathrooms near plumbing stacks when possible to reduce rerouting costs, and plan bedroom privacy by minimizing through traffic.
Style coherence: choose one dominant style and mix in two complementary textures. For a contemporary-luxe scheme: streamlined cabinetry, matte metallic accents, and textured textiles. For transitional: classic moldings with modern hardware.
Examples and craft projects to extend design: use DIY accent panels or a custom built-in to match new millwork—see curated ideas for finishing touches. DIY home decor ideas, handmade crafting ideas, and things to make at home offer finishing touches that connect to the remodel.
Also consider outdoor/indoor continuity if you plan to alter connection points or sightlines—some projects can include exterior carpentry to anchor the interior design. outdoor wood projects
Room-by-Room Remodeling Considerations and Average Costs
Below are major rooms, core design considerations, typical scope options, and average cost ranges. Use these tables and notes as benchmarks—local bids and materials will vary widely. According to a 2024 industry report from Remodeling Magazine, national averages are useful baselines but expect regional variance.

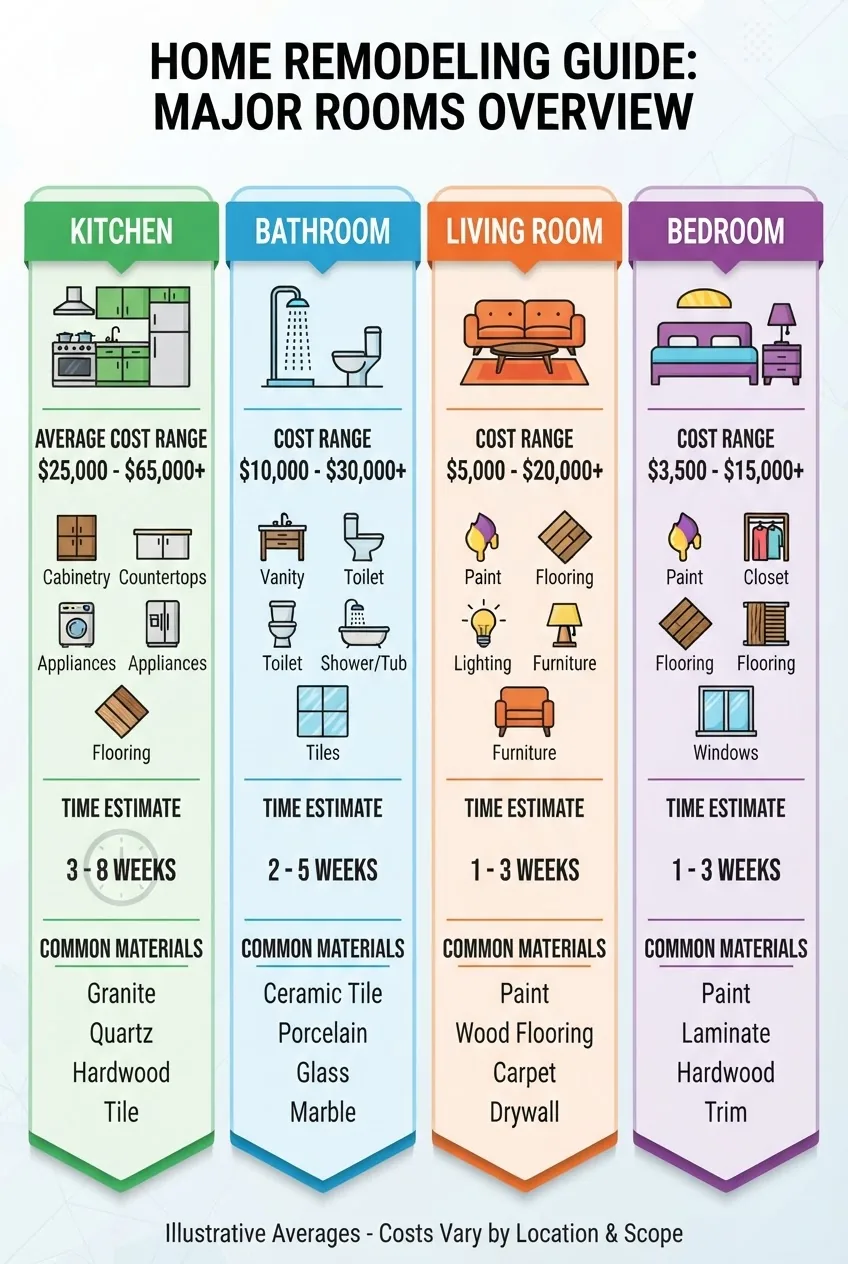
| Room | Common Scope | Average Cost Range (USD) | Typical Timeline |
|---|---|---|---|
| Kitchen (mid-scale) | Cabinets, counters, appliances, minor layout; no structural move | $25,000–$75,000 | 6–12 weeks |
| Kitchen (large) | Layout reconfiguration, island, structural opening, premium finishes | $75,000–$200,000+ | 10–20+ weeks |
| Full Bathroom | Demolition, new fixtures, tile, plumbing rough-in | $12,000–$40,000 | 4–8 weeks |
| Half Bath / Powder | Fixture swap, vanity, lighting | $4,000–$12,000 | 1–3 weeks |
| Living Room / Great Room | Flooring, lighting, trim, fireplace work | $8,000–$40,000 | 3–8 weeks |
| Bedroom | Closet rework, flooring, lighting, paint | $3,000–$15,000 | 1–4 weeks |
| Whole-house interior refresh | Kitchens, baths, finishes, systems upgrades | $80,000–$350,000+ | 8–24+ weeks |
Cost drivers: structural changes, moving plumbing stacks, high-end finishes, custom millwork, and energy-efficiency upgrades. When you compare bids, itemize labor, material, and permit fees. For more renovation concepts and inspiration, see home renovation ideas.
Case study: A 1,200 sq ft contractor-managed interior remodel (kitchen, two baths, flooring) completed in 14 weeks totaled $95,000; energy-efficient HVAC upgrades saved an estimated $200/year in energy bills. According to a 2024 industry report from Remodeling Magazine, kitchen upgrades still rank among top ROI contributors, but the percent recovered varies by market.
Materials and Finishes: Balancing Quality and Budget
Choosing materials is where design meets cost. Prioritize durability in high-traffic zones and reserve statement finishes for focal areas. Below is a compact comparison to guide decisions.
| Material | Durability | Relative Cost | Best Use |
|---|---|---|---|
| Engineered hardwood | High | Mid | Living areas, bedrooms |
| Porcelain tile | Very high | Mid–High | Bathrooms, kitchens, high-moisture zones |
| Solid-surface counters | High | Mid | Kitchen, baths (non-heat) |
| Quartz | Very high | High | Premium countertop use |
| Laminate | Moderate | Low | Budget kitchens, renter upgrades |
| Low-VOC paint | Moderate | Low | All interiors |
Sourcing: buy large-ticket items from established suppliers and get written return/defect policies. For budget-minded alternatives and techniques to lower material spend without sacrificing look, consult our guide to budget-friendly renovation ideas and affordable home improvement ideas.
Sustainability: consider recycled glass or FSC-certified wood, and look for Energy Star-rated appliances for kitchens—energy-efficiency upgrades can be costed separately but may boost ROI and reduce operating costs.
Hiring Professionals vs. DIY in Home Interior Remodeling
Deciding who does what affects cost, schedule, and outcome. Below are clear pros/cons and a how-to hiring checklist for contractors.
Pros and cons list
- Pros of hiring professionals: faster schedules, code compliance, warranty-backed work, streamlined subcontractor coordination.
- Cons of hiring professionals: higher labor costs, less owner control over small details unless specified, potential for change-order markup.
- Pros of DIY: lower labor cost, direct control, satisfaction; best for painting, trim, and simple installations.
- Cons of DIY: time-consuming, potential for rework, may void some warranties, risk of failing inspections if work is non-compliant.
How to hire contractors — step-by-step
- Verify credentials. Ask for license numbers and insurance certificates and confirm them with the issuing agency. Require general liability and workers’ comp.
- Request itemized bids. Ensure bids separate labor, materials, permit fees, and allowances for unforeseen items.
- Check references and visits. Visit two completed jobs if possible, or ask for recent photos and a contact.
- Define payment schedule. Limit upfront deposits (commonly 10–30%), tie payments to milestones, and hold back 5–10% for final punch list sign-off.
- Sign a scope-based contract. Include change-order processes, insurance expectations, timeline, and dispute resolution procedures.
- Set weekly check-ins and documentation rules. Agree on photo logs and a single point of contact for change orders.
If you plan more DIY, consider reading our practical cost and methodology guide for owner-managed renovations. DIY home renovation tips and small carpentry tasks to keep in-house are covered in simple carpentry projects.
Common Challenges and How to Avoid Remodeling Pitfalls
Remodeling often hits predictable roadblocks. Below are common challenges with troubleshooting tips drawn from practitioner experience and real projects.
Budget overruns: I once saw a mid-scale kitchen go 28% over budget after unplanned structural beam work. Avoid this by budgeting for unknowns (20% contingency), pre-inspecting hidden systems, and agreeing change-order thresholds in writing.
Timeline delays: long-lead items and back-ordered fixtures add weeks. Avoid surprises by ordering cabinets, tiles, and appliances within 72 hours of contract and tracking delivery ETA updates weekly.
Design changes mid-construction: changes during finish phases multiply cost. Lock in finish schedules and approve samples in writing; reserve a small finish-change allowance (2–4%).
Permit and inspection issues: I once halted work for a change requiring additional drawings. Submit complete plans, request pre-submittal guidance from inspectors, and schedule inspections early. For permit basics, consult official resources at government building permit offices.
Quality control: use an independent punch list template, photograph defects, and require contractor sign-off for corrective work. For ongoing maintenance and repair guidance after your remodel, see home repair and maintenance tips and general home improvement tips.
Maximizing ROI Through Smart Interior Remodeling Choices
To maximize return, prioritize projects that improve function and curb appeal without excessive luxury upgrades that fail to recoup cost. According to a 2024 industry report from Remodeling Magazine, targeted updates like midrange kitchen remodels and primary-bath updates typically yield stronger resale recovery than highly customized, high-end upgrades.
Example metrics: expect to recover roughly 50–70% of a midrange kitchen cost at resale in many markets; minor bathroom remodels often recover 60–70%. Energy-efficiency upgrades (LED lighting, improved insulation, Energy Star appliances) can reduce operating costs and are attractive to buyers—calculate simple paybacks by dividing upgrade cost by annual savings (e.g., a $3,000 HVAC efficiency upgrade saving $300/year gives a 10-year payback).
For prioritization frameworks and top-value renovations, see our compilation of the best home improvements for renovation.
Conclusion and Next Steps for Your Home Interior Remodel
You now have the planning checklist, room-level cost benchmarks, material trade-offs, hiring steps, and ROI logic to begin your remodel with clarity. Next steps: finalize your scope, obtain three bids, order long-lead items, and schedule permit submissions. Start by setting a pre-construction meeting date and locking a 20% contingency to protect the project.
Call to action: If you’re ready, download your project kickoff checklist, gather three local bids, and schedule your permit review—then begin demolition when approvals are in hand.
Common mistakes and how to avoid them
I once underestimated demolition costs by 30% because concealed water damage required joist repairs; I now always add a 20% structural contingency and do a targeted exploratory demo near suspected problem areas. Another time late appliance deliveries stalled completion for three weeks—now I order appliances immediately on contract signing.
Final checklist before you call “complete”
- All permits closed and final inspections passed
- Punch list items resolved and signed off
- Warranties and manuals delivered and stored
- Final payment made per contract after withholding agreed retention
- Appliances and fixtures tested (run times, water flow, GFCI/RCD tests)
When to call a professional
If your project includes structural modifications, complex electrical or plumbing re-routing, or multi-unit code requirements, hire licensed professionals. Also engage pros for projects requiring stamped structural drawings or when coordinating more than three trades concurrently: the coordination overhead and code risks justify professional management.


