


By the end of this hands-on guide you will be able to evaluate, budget for, and assemble a house kit for a small or micro home; a realistic DIY build for a 200–600 ft² kit takes 8–16 weekends (or 2–4 months part-time) and assumes an intermediate DIY skill level (basic carpentry, electrical familiarity, and willingness to hire inspections or one trade for systems).
Before you start
- Lot with verified zoning and access (survey, 1:1) and easy delivery route for 20–40 ft trailers
- Budget reserve: 20–30% of kit price for contingency
- Core tools: 18V cordless drill, framing hammer, circular saw, miter saw, level (48″), laser level, reciprocating saw, socket set, torque wrench
- Safety gear: hard hats, safety glasses, hearing protection, gloves, fall protection for any work above 6 ft
- Drawings & permit set: foundation plan, site plan, floor plan, electrical and plumbing risers
- Phone contacts: local building department, a licensed electrician/plumber for final hookups, scrap timber supplier
What Are House Kits and How Do They Work?
House kits are pre-packaged collections of building components designed to be assembled on-site or with light on-site trade work. A house kit can range from a pallet of precision-cut framing members and pre-cut sheathing for a 350 ft² tiny home to factory-built modular volumes delivered ready for craning onto foundations. Kits work by moving manufacturing, cutting and quality control off-site, then shipping materials or modules to your lot to reduce waste, speed assembly and simplify sourcing.
Common kit methods:
- Panelized/prefab kit — walls and roof panels, often sheathed and sometimes pre-wired; assembly like large-scale furniture.
- Modular kit — completed volumetric sections (bath/kitchen included in some), delivered and joined on-site.
- Flat-pack / DIY small home kits — pre-cut lumber and parts with fasteners; ideal for DIY builders comfortable with tools.
- Shell kits — structural shell only (frame, roof, exterior); interiors finished later by owner or trades.
Many DIY builders compare a DIY house kit to assembling high-end furniture—precision pieces, hardware, and instructions—but scaled and requiring permits and trades for systems.
Examples: a 240 ft² flat-pack tiny home might arrive as labeled bundles for floor, wall and roof studs plus windows and fasteners; a 600 ft² modular kit may arrive as two 12 ft-wide modules requiring crane set and final joining. For broader DIY project inspiration see DIY Home Improvement Projects Guide with Tips and Ideas and explore more DIY home improvement projects that pair well with a kit build.
Transition: Now that you understand the core concept, let’s compare the main kit types you’ll choose between.
Types of House Kits: From Small Kits to Modular Tiny Homes

Below is a compact comparison table of the common kit families followed by short pros/cons and use-case notes for each. Rows use alternating shading to aid scanning.
| Kit Type | Best for | Typical Cost Range (materials only) |
|---|---|---|
| Flat-pack / DIY small house kits | Hands-on DIY builders, remote sites | $10,000–$60,000 |
| Panelized prefab kits | Faster build, modest trade work | $30,000–$150,000 |
| Modular volumetric kits | Short on-site time, higher transport costs | $80,000–$300,000+ |
| Shell kits | Custom interiors or phased builds | $20,000–$120,000 |
| Micro home / mini home kits | Minimal footprint, ADU or backyard units | $12,000–$90,000 |
Flat-pack / DIY small house kits
Pros: Lowest material cost, learn-as-you-go, minimal crane/transport. Cons: More on-site labor and assembly time; you must source or trust the kit’s fastener list and instructions. Ideal when you have carpentry experience and a lot of time.
Panelized prefab kits
Pros: Faster envelope assembly, tighter tolerances, often pre-wired walls. Cons: Requires larger delivery access and a small crew; less hands-on customization during framing stage.
Modular tiny home kits
Pros: Very short on-site time, high factory QA. Cons: Highest transport and crane costs, must meet local zoning for module size, and module joins require weatherproofing details.
Shell kits and micro home kits
Shell kits let you phase finishes to spread cost; micro home kits focus on compact systems and space efficiency. For off-grid or eco options, micro kits often integrate composting toilets, mini-split HVAC and solar-ready roofs.
Transition: Understanding types helps frame budgeting; next we break down the real costs you’ll face and how to plan.
Costs of House Kits: What to Expect and Budget For
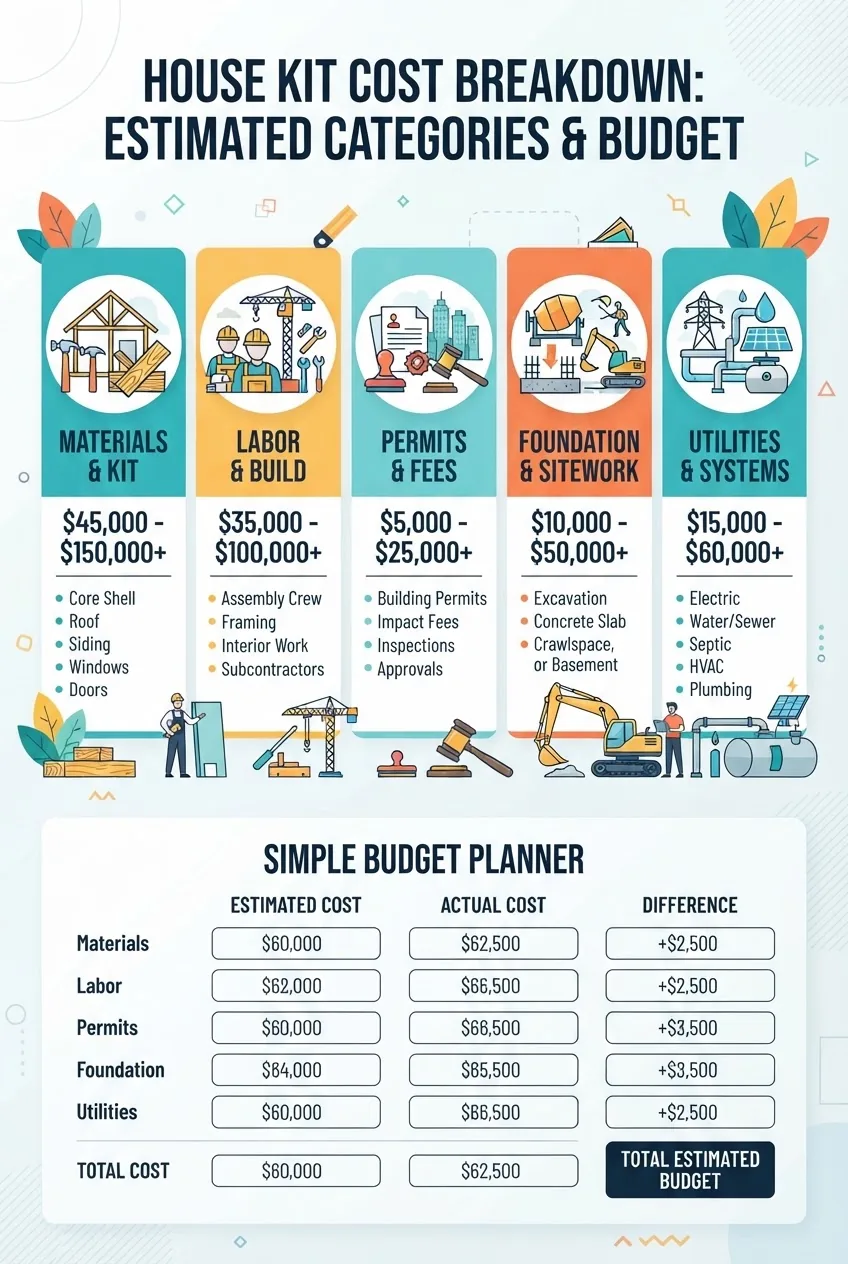
Costs vary by kit type, region, and scope. Below are detailed cost categories, realistic ranges, and planning rules. Note: figures are averages—actuals vary. According to a 2024 industry report by national construction cost indexes, raw material input price volatility can swing kit base cost ±10–20% year-to-year.
1. Kit purchase price (materials and factory work)
Ranges:
- DIY flat-pack micro kit (120–350 ft²): $10k–$40k
- Panelized 400–900 ft²: $45k–$140k
- Modular 600–1,600 ft² modules: $150k–$350k+
These are manufacturer selling prices before delivery, tax or upgrades.
2. Delivery, craning and transport
Flat-pack delivery: $500–$5,000, depending on distance. Module transport & crane: $8,000–$40,000 depending on route permits and crane day rates. Always get a delivery quote with truck dimensions for your lot access.
3. Foundation
Common foundation types and quick ranges:
- Concrete slab (200–600 ft²): $4k–$12k
- Pier & beam or screw piles: $3k–$10k (site-dependent)
- Full crawl/continuous footing with perimeter wall: $8k–$25k
Choose foundation by soil report and frost depth. A geotechnical soil report typically costs $800–$2,500.
4. Utilities and MEP (mechanical, electrical, plumbing)
Estimates:
- Electrical hookup/UG service: $1,500–$6,000
- Plumbing rough-in and hookup: $2,000–$8,000
- HVAC (mini-split): $1,200–$5,000
If you connect to septic or well, add $8k–$25k for systems and hookups.
5. Permits, inspections and fees
Permit fees vary widely: $500–$8,000 depending on jurisdiction and valuation. Plan for plan-check fees, utility connection permits and impact fees. For reliable guidance see your local building department or a national code authority. International Code Council.
6. Labor (if you hire help)
Typical local labor day rates (2024 averages): carpenter $300–$700/day; electrician $350–$900/day; plumber $350–$900/day. If you hire subcontractors for MEP, allocate 30–60% of the non-kit project cost to labor depending on DIY share.
7. Finishes, appliances and contingency
Finishes for small builds: cabinetry, flooring, fixtures and paint often add $7k–$30k. Always keep 20–30% contingency for changes, delivery damage, or scope creep. For post-build updates and low-cost upgrades see affordable home improvement ideas and budgeting tips. For remodeling budgeting techniques see home remodeling cost and process tips and budget-friendly renovation strategies.
Rule-of-thumb budget planner: Kit price + delivery/crane + foundation + MEP hookups + permits + finishes + contingency = total. Example: 300 ft² flat-pack kit ($28k) + delivery $1k + slab $6k + MEP $8k + permits $2k + finishes $10k + 20% contingency ($11k) = ~$66k total. For construction cost indexing and national averages consult industry sources such as RSMeans / Gordian.
Transition: Money aside, there are explicit legal and tool requirements you’ll need before the first screw goes in.
Building Requirements for House Kits: Permits, Tools, and Skills
- Verify zoning and lot compliance — Confirm allowable use (ADU, accessory dwelling, tiny house on foundation), setbacks and occupancy limits with your local zoning office. If the lot is in a historic district, get approvals early.
- Acquire a permit set — You need a stamped site plan, foundation plan (engineer if required), floor plans, roof plan, and MEP diagrams for most jurisdictions. Permits typically include plan review, building permit and trade permits.
- Soil and structural checks — Order a geotechnical report ($800–$2,500) if required; engineer-signed foundation details are common for modular units or unusual soils.
- Utility coordination — Apply for electrical service extension, water/sewer or well/septic permits; allow 4–12 weeks for utility tie-ins in some areas.
- Tool and crew plan — Core tools listed earlier; plan whether you need a small framing crew for panel lifts or a crane operator for modular set. A two-person team can assemble a flat-pack envelope in 2–4 weekends; a three- to four-person team is faster.
- Inspections schedule — Plan inspections for foundation, rough-in electrical/plumbing, insulation, final occupancy. Book them early — many jurisdictions require inspections within 3–7 business days of request.
- Safety and insurance — Update homeowner insurance to cover “under construction” phase and confirm contractor liability if you hire trades; follow OSHA basics for elevated work.
- Foundation selection — Choose from slab, screw piles, or pier & beam based on frost depth and soil. For exterior timber decks or site-built platforms use pre-approved connectors and treated timber per code.
- Assembly instructions and hardware inventory — Cross-check delivered fasteners, plates and labeled parts against the kit packing list before signing delivery. Keep photos and records if parts are missing.
If you plan to add exterior woodwork after assembly, consult supplemental plans; for plans and material lists for exterior projects see outdoor woodworking project plans. For legal code references consult the International Code Council: https://www.iccsafe.org.
Transition: With permits, tools and foundation ready, follow this step-by-step assembly sequence to complete a DIY kit build.
Step-by-Step DIY Guide to Building a House Kit
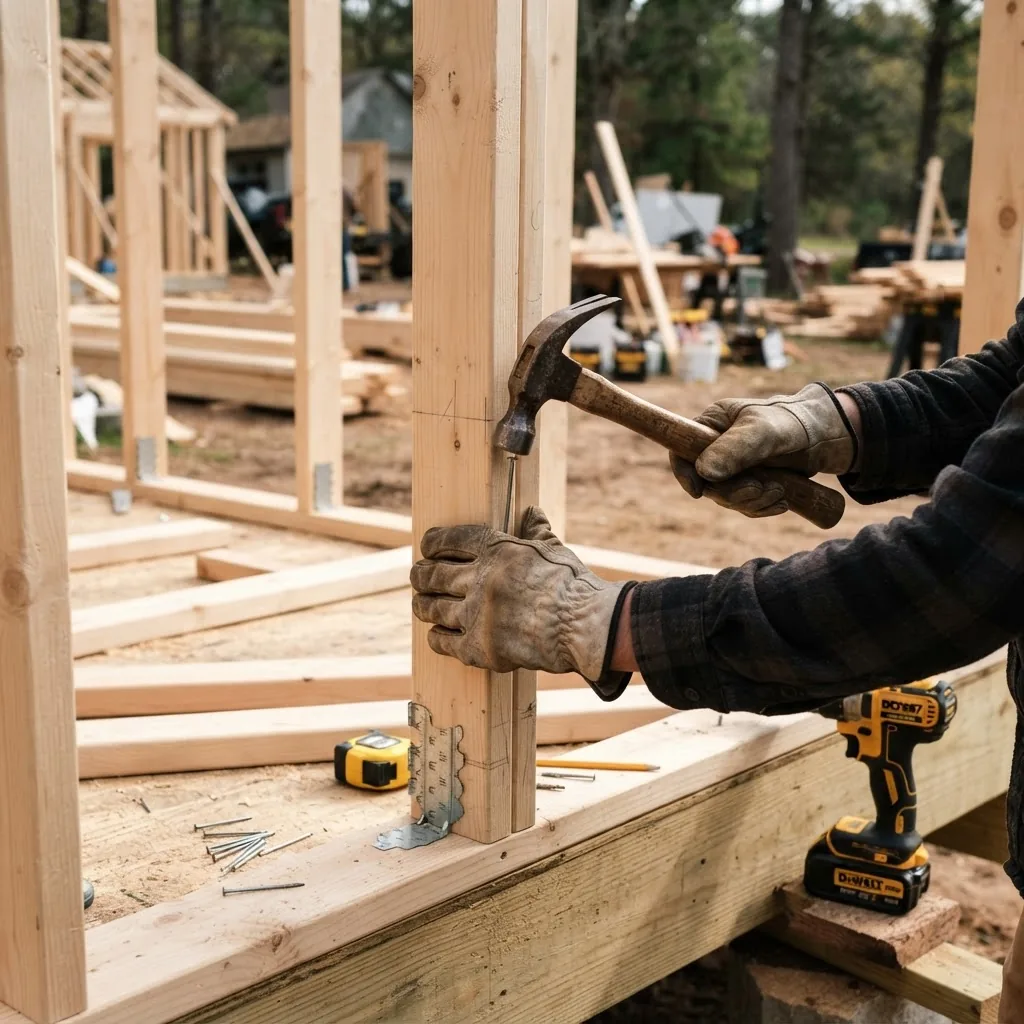
This core section is the hands-on assembly sequence. Each step begins with a bold, action-first phrase and includes timing, quantities and practical tips. For interior finishing inspiration after assembly see DIY home decor project ideas and handmade home decor crafting ideas.
-
Prepare the site and verify dimensions
Time: 1–3 days. Actions: stake corners, verify planned foundation elevation with laser level (+/- 1/8″), confirm delivery truck clearance (min 14′ height and 10′ width for typical flatbed). Order locational call 811 utility markups 48–72 hours prior to digging. Quantities: place 1:50 scale stakes for access path if modules exceed 8′ width.
Tip: Photograph and timestamp the site pre-delivery for permit and insurance records.
-
Lay foundation to kit/spec
Time: 3–10 days depending on type. Actions: pour slab (mix and cure schedule: initial set 24 hours; light work 7 days; full design strength at 28 days) or install screw piles to torque values specified by geotech (typically 4–10 kNm). Verify anchor bolt layout to kit subfloor plan: anchors typically M12–M16 spacing per manufacturer.
Tip: For modular kits, confirm module hold-down anchor pattern and load path with an engineer.
-
Inspect and confirm delivered inventory
Time: 1 day. Actions: cross-check labeled bundles, count doors/windows, verify hardware packs (nails, screws, metal connectors). Log shortages immediately with photos to manufacturer and delivery company; note on delivery receipt before signing if possible.
Tip: Sort and label components in sequence of assembly to speed installation.
-
Assemble floor and subfloor
Time: 1–3 days. Actions: lay rim joists, install floor joists at 16″ or 24″ o.c. per plan, install subfloor (tongue-and-groove OSB or plywood) using recommended screw pattern (every 6″ at panel edge, 8″ field). Use construction adhesive plus screws to reduce squeaks.
Quantity Example: For a 12×20 ft module with 16″ o.c. joists, you will need ~15 joists and 8 sheets of 3/4″ subfloor OSB.
-
Raise wall panels and shear panels
Time: 1–4 days. Actions: set pre-assembled wall panels per layout, temporarily brace every 8–10 ft with 2×4 braces at 45°. Fasten per kit schedule: typically 10d nails @ 6″ o.c. at studs and 2–1/2″ screws at plates. Check plumb and square before permanent fastening.
Safety note: use two-person lifts for 8 ft panels; use appropriate fall protection for elevated tasks.
-
Install roof panels and sheathing
Time: 1–3 days. Actions: follow rafter/plate layout, install roof sheathing with recommended fastener pattern, apply synthetic underlayment, and complete flashing at penetrations. For panelized roofs, tighten panel clamp hardware to specified torque (manufacturer-specified, often 25–40 ft-lbs).
Tip: Install temporary tarps if high winds or rain are forecast during the envelope stage.
-
Rough-in MEP systems
Time: 2–7 days. Actions: run plumbing drain/waste/vent per plan, install electrical runs per riser diagram, and place HVAC refrigerant lines for mini-split systems. Ensure clear labeling of circuits and plumbing stacks. Call for rough inspection when required—don’t conceal work before sign-off.
Tip: Use conduit and dedicated lines for solar-ready systems if you plan photovoltaic integration.
Related resources: basic wiring and carpentry help is available in simple carpentry tutorials and project ideas at DIY project ideas to make at home.
-
Install windows, doors and weather barrier
Time: 1–2 days. Actions: flash openings per manufacturer (self-adhesive flashing tape, head flashing), set windows with recommended shim spacing (1/8″ gap around frame), and complete continuous water-resistive barrier (WRB). Test for air and water tightness with a blower door test if possible.
-
Insulate and seal the envelope
Time: 1–3 days. Actions: install specified insulation (spray foam, batt, or blown) to R-values per climate zone (e.g., R-38 roof in cold climates, R-13 walls in mild). Seal penetrations with canned foam and gasket boxes for electrical fixtures. Insulation contractors may be needed for spray foam.
Example: For a 400 ft² build in Zone 5, follow R-49 roof and R-20 wall guidance.
-
Finish interior systems and fixtures
Time: 1–6 weeks depending on finish level. Actions: install drywall or finished wall panels, paint, fit kitchen and bathroom fixtures, connect appliances, and test HVAC and hot water systems. Many DIYers stagger finishes to one room at a time to keep costs manageable.
Tip: Use low-VOC paints and fixtures to improve indoor air quality.
-
Exterior finishes and flashings
Time: 2–10 days. Actions: install siding, trim, gutters, and exterior penetrations per flashing plan. For timber cladding, use stainless fasteners and 1x vertical strapping for rainscreen where recommended to prevent rot.
-
Final inspections and occupancy sign-off
Time: variable (1 day to 2 weeks for scheduling). Actions: request final inspections for building, electrical, plumbing and mechanical. Collect certificate of occupancy or final approval document before using the structure as a dwelling.
-
Perform punchlist and warranty documentation
Time: 1–3 days. Actions: walk the project with written punchlist, photograph defects, submit to manufacturer for warranty claims, and retain all receipts and permit documents for future sale or refinance.
-
Finish landscaping and site drainage
Time: 1–7 days. Actions: grade 2% away from foundation, install swales or French drains as needed, and restore disturbed areas per local erosion control rules.
After the build, personalize interiors with crafts and small projects; see interior remodeling design and costs and handmade home decor crafting ideas. For a full construction process check how to build a home step-by-step.
Common mistakes and how to avoid them
I’ve seen four frequent DIY failures and how I prevented them: first, miscounting fasteners—I always recount packs on delivery and photographed shortages. Second, skipping third-party inspections—I booked inspections in advance to avoid rework. Third, poor site access planning—I walked the truck route with a tape measure and noted overhead wires. Fourth, underbudgeting for utility tie-ins—my contingency fund covered an unexpected septic permit fee.
Build completion checklist
- Site stakes and elevations verified and photographed
- Foundation installed to engineered details and inspected
- Kit inventory checked and cross-referenced packing list
- Envelope assembled, roof sealed, windows flashed
- MEP rough-ins completed and passed rough inspections
- Insulation installed to required R-values and verified
- Final inspections passed and Certificate of Occupancy obtained
- Warranty documentation and punchlist closed
When to call in a professional
Call a licensed professional when you encounter: structural modifications outside kit scope, main electrical service hookups, septic or well installations, complex HVAC sizing beyond a simple mini-split, or when local code requires licensed trade sign-offs. If your project’s total valuation exceeds your local threshold for owner-builder work (often $5k–$25k), hire or consult a contractor.
Transition: weigh the advantages and limitations of kits against your goals before committing to a specific product.
Advantages and Challenges of Using House Kits for DIY Homes
Using home building kits gives clear benefits but also realistic challenges. Below are practitioner-focused points with direct implications for planning and timeline.
Advantages
- Speed: factory precision reduces on-site cutting and rework—envelope up in days for many panelized systems.
- Waste reduction: off-site cutting lowers jobsite scrap.
- Predictable scope: manufacturer lists and engineering reduce unknowns in material procurement.
- Scalability: micro kits let you start small and expand in phases if zoning permits.
Challenges
- Transport & crane cost spikes for modules or large panels.
- Customization limits: altering engineered components can void structural warranties or require re-engineering.
- Permit risk: some jurisdictions treat tiny homes differently; verify classification early.
- Skill gap: electrical/plumbing usually require licensed trades for final hookups and sign-offs.
For guidance on effective finishing and future renovations see effective home improvements and renovation strategies, and for cost planning beyond the build see home renovation cost planning and tips. When you need long-term repair advice, consult home repair and maintenance tips or compare with old home renovation considerations.
Transition: finally, choose a kit that aligns with your budget, timeline and lifestyle—use this decision guide to prioritize factors.
Choosing the Right House Kit for Your Project and Lifestyle
- Define your must-haves — list square footage target, number of wet areas, and whether you need off-grid capability (solar, composting, rainwater). Prioritize these before vendor conversations.
- Set a firm total budget — include kit, delivery, foundation, MEP, permits, finishes and 20–30% contingency. Use a three-column spreadsheet to track quotes and actuals.
- Assess your skill and time — if you can spend weekends and have carpentry basics, a flat-pack or panelized kit is workable; if time is limited, lean modular.
- Check local regulations — ensure kit dimensions and foundation type meet your local zoning and setback requirements; request written zoning determinations if possible.
- Evaluate manufacturer support — prefer kits that include detailed assembly manuals, labelled parts, and phone/field support for complex joins.
- Compare warranties and certifications — ask about thermal performance guarantees and whether the kit meets sustainability certifications like LEED or Passive House standards; for certification guidance see USGBC (LEED).
- Pilot test with a sample or mockup — request a small mock-up panel or a 1:1 door/window mock to verify dimensions and fit.
- Make the decision matrix — score options across: cost, delivery complexity, on-site time, warranty, energy performance and resale value. Weight budget and schedule highest for most DIYers.
For planning renovations after the build and longer-term budgeting see budgeting and design for home renovations.
Conclusion
A well-chosen house kit paired with realistic budgeting, confirmed permits, and a clear assembly plan lets an intermediate DIYer build a safe, code-compliant small home in a matter of months. Start by verifying zoning, requesting detailed kit documentation, and budgeting a 20–30% contingency. If you’re ready to take the next step, gather three kit quotes, order a soil report, and schedule your first permit review—then begin. Ready to plan your build? Review kit options and the permit checklist above, and start by consulting the manufacturer for a delivery and installation quote.


