


By the end of this guide you will have built at least one finished piece—typically a floating shelf or small bench—learned safe tool use, and created complete material lists you can reuse. Expect 2–8 hours per project and this assumes a beginner to low-intermediate skill level with basic hand tool familiarity.
Before you start, gather the workspace, basic tools, and safety gear listed below and set aside uninterrupted blocks of time: short projects (shelf, frame) 2–4 hours; medium projects (bench, shoe rack) 4–8 hours. Read each project top-to-bottom once before cutting.
Before you start
- Prerequisites: basic measuring, a straight edge, and experience using a cordless drill and handsaw (or circular saw under supervision).
- Tools to have on hand: hammer, cordless drill with 1/8″–1/4″ bits, tape measure, combination square, hand saw or circular saw, clamps (2–4), sanding block or random-orbit sander.
- Safety gear: safety goggles, hearing protection, dust mask or respirator, work gloves, and an apron or shop coat.
- Workspace: a stable workbench or table at comfortable height, good daylight or task lighting, and a flat floor area at least 6’×4′ for assembly.
DIY Home Improvement Projects Guide with Tips and Ideas
DIY home improvement project ideas
Introduction to Simple Carpentry Projects
This guide focuses on simple carpentry projects—small, useful items you can complete in a weekend using affordable materials and a few core tools. Beginner woodworking is an approachable entry point to home improvement that builds essential carpentry skills: measuring and marking accurately, basic joinery with screws and glue, and clean finishing with sanding and stain. DIY carpentry benefits include saving money, customizing dimensions to fit your space, and gaining confidence for larger tasks.
Simple projects are chosen to teach fundamental techniques rather than advanced joinery: rip and cross cuts, pilot holes, countersinking screws, clamping and gluing, and progressive sanding. Each technique is repeated across projects so you practice and internalize core skills quickly. Safety and setup are emphasized: proper lighting, secure workpieces, and the right PPE reduce risk and ensure consistent results.
Throughout this article you’ll find step-by-step woodworking instructions, clear material lists, and practical troubleshooting. If you want broader DIY coverage after mastering these projects, see our pillar resource for extended ideas and project progressions.
Essential Tools and Materials for Simple Carpentry Projects
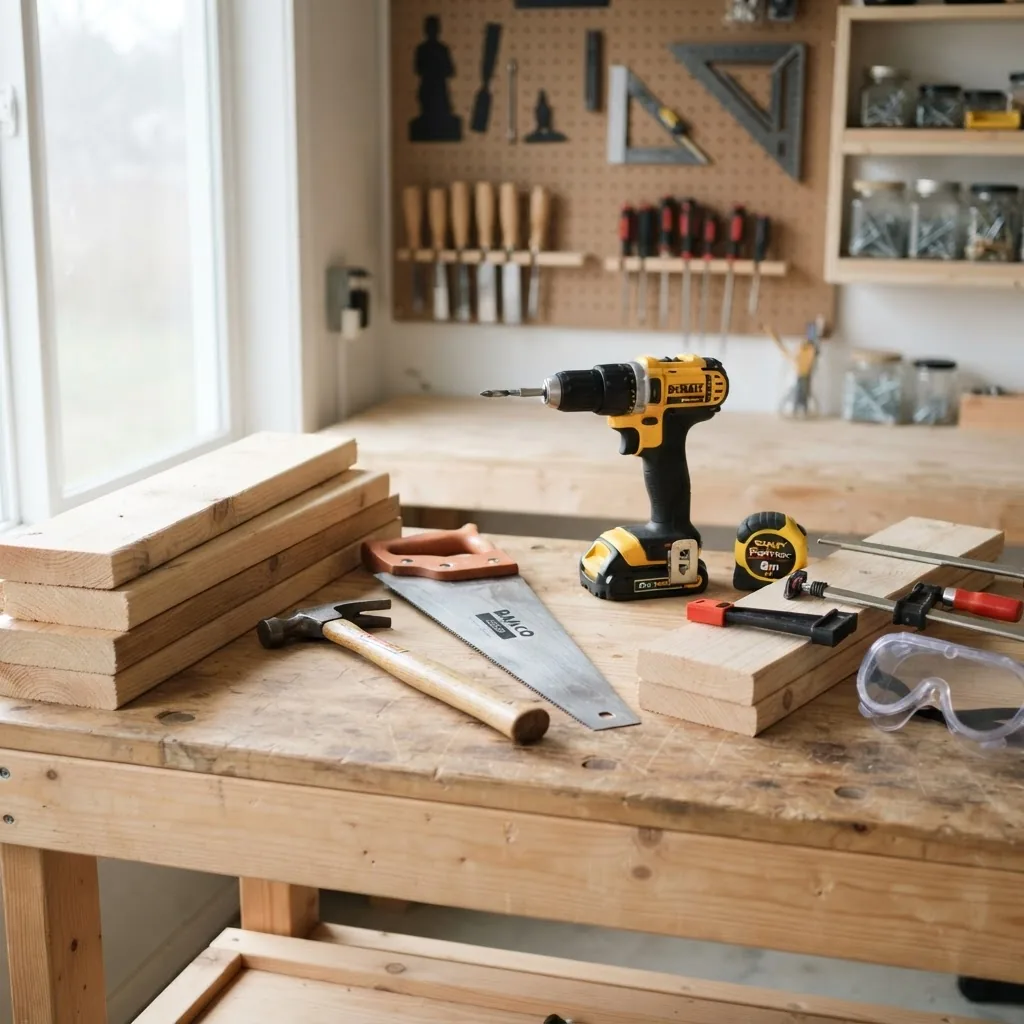
- Measuring & marking tools: 25′ tape measure, 6″ combination square, pencil (hardness HB), marking knife (optional). These give repeatable accuracy to 1/16″.
- Saws: handsaw for crosscuts and a circular saw for faster rip cuts. A 7–1/4″ circular saw with a plywood blade is versatile for beginners.
- Drill & drivers: 12V–18V cordless drill/driver, set of drill bits (1/16″–1/4″), countersink bit, and #2 Phillips screwdriver bit. Use 1,800–2,000 RPM for screw driving with moderate pressure.
- Fasteners & adhesives: 1¼” and 2″ wood screws (coarse thread for softwood), 18-gauge brad nails (if using a brad nailer), and interior PVA wood glue (tight bond in 15–30 minutes clamp time).
- Clamps: Two to four 6″–12″ bar or quick-grip clamps for gluing and alignment—clamping pressure around 100–200 lbf is sufficient for small joints.
- Sanding & finishing: 80/120/220 grit sandpaper, sanding block or 3″ random-orbit sander, stain or water-based finish and 2″ foam brushes. Sand with the grain and progress grit counts to avoid visible scratches.
- Safety equipment: safety goggles, disposable dust masks (or N95 respirator for sanding), hearing protection, and cut-resistant gloves for handling rough stock. According to 2024 OSHA guidelines, maintain eye and respiratory protection when cutting or sanding wood — see the OSHA site for specifics.
- Material basics: Pine boards (common 1×8, 1×4), 3/4″ plywood (fir or birch for cabinet-grade panels), hardwood strips for edges if desired. Pine is forgiving and cheap; hardwoods (oak, maple) are denser and need pre-drilling for screws.
- Workspace gear: bench with 3’–4′ of clear work area, sawhorses for longer boards, and a shop vacuum or broom for cleanup. Keep a first-aid kit handy.
Tool notes and buying tips: for tool safety standards consult the U.S. Consumer Product Safety Commission — U.S. CPSC — and for workplace guidelines reference OSHA at OSHA. For technique validation and deeper tutorials, resources such as Fine Woodworking are valuable.
Material shopping tips: buy 10–20% extra when cutting plywood or boards to allow for mistakes; look for straight boards free from excessive knots and warps. For budget projects use #2 common pine or construction-grade plywood, switching to cabinet-grade birch for visible faces.
Project Selection – Choosing the Right Simple Carpentry Projects for Beginners
Select projects that match your workspace, budget, and time. Project difficulty levels here use a simple scale: Easy (2–4 hrs, hand tools enough), Moderate (4–8 hrs, power tools recommended), and Intro to Joinery (may require clamps and extended drying times).
- Easy: Floating shelf, picture frame, corner planter box. Low cost, minimal cuts, mostly 1× stock.
- Moderate: Small bench, three-tier shoe rack, bedside table. Requires multiple accurate joints, glue-ups, and finishing steps.
- Intro to joinery: Simple drawer box or nightstand with dados; practice making consistent grooves and solid glue bonds.
Time estimates and trade-offs: Easy projects let you practice measuring and finishing without complicated joinery. Moderate projects teach clamping, squaring and longer assembly sequences. According to a 2024 industry report on hobbyist woodworking, weekend projects under 8 hours are the most likely to be completed by beginners.
Consider what you’ll use the piece for: functional daily use (bench) requires stronger joints and better finishes; decorative items (picture frames) can prioritize appearance over structural strength. If you enjoy smaller projects, combine woodworking with crafts — see curated handmade crafting ideas for decor-focused builds.
If you’re curious about large-scale or structural kits, check resources on assembly requirements and costs: house building kits and requirements and home building process and cost.
Step-by-Step Tutorials for 5 Popular Simple Carpentry Projects
These five projects are chosen to repeat essential skills: measuring and marking tools, wood joinery basics (nails, screws, glue), sanding, and finishing techniques. For decor-focused tutorials and layout ideas see our DIY home decor project tutorials.
Project 1 — Floating Wall Shelf (Easy, 2–3 hours)
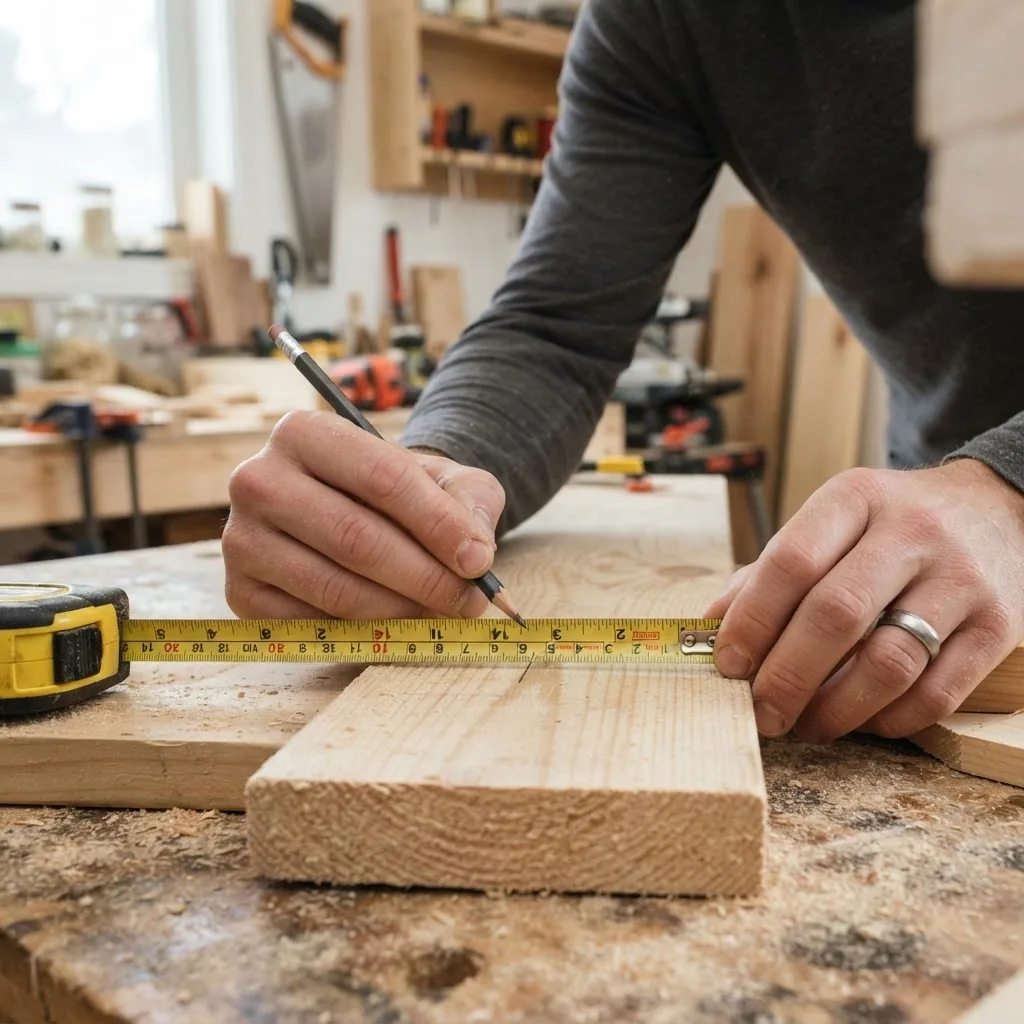
Outcome: One 24″×6″ floating shelf capable of holding 20–30 lbs when mounted into studs. Skill level: beginner. Time: 2–3 hours active work plus 30 minutes drying time for glue. Tools: circular saw or handsaw, drill/driver, 1¼” and 2″ screws, clamps, sandpaper.
- Mark and cut stock: Measure two 24″ shelf pieces and one 23½” top face (for a 24″ finished shelf with 1/4″ gap). Cut using a circular saw with a plywood blade or a fine-tooth handsaw. Verify square with a 6″ square.
- Create the box: Assemble a shallow box by placing the 23½” top face onto the two 24″ sides and a bottom piece of 23½”. Use 1¼” screws with pilot holes 3/8″ from the ends and 3/4″ deep to avoid splitting. Countersink screw heads 1–2 mm below the wood surface.
- Glue and clamp: Apply a 3 mm bead of PVA glue along mating faces, join, and clamp. Wipe squeeze-out with a damp rag within 5 minutes. Clamp pressure: firm, but not crushing—aim for 100–150 lbf via two clamps.
- Sand and fill: After 20–30 minutes tack-free time, sand edges with 120 grit, then 220 grit for finish. Fill small screw divots with matching wood filler if desired, then sand smooth after drying.
- Drill wall-mounting holes: On the back inside surface, drill two 3/16″ holes aligned with studs (16″ OC). Use 2″ screws into studs, or 1/4″ toggle bolts for hollow walls (follow toggle manufacturer instructions).
- Finish: Wipe with a tack cloth, apply a single coat of water-based polyurethane with a 2″ foam brush, wait 2 hours, sand with 220 grit, then apply second coat. Dry time: 24 hours before loading.
Case study: A beginner named Maria completed this shelf in 2.5 hours using pine and a water-based clear finish; she noted the biggest time sink was sanding the end grain until smooth. Her load test used a stud-mounted 2″ screw and carried a 25 lb speaker without movement.
Common mistakes and how I avoid them: I once cut the top face 1/4″ too short because my tape measure slipped; now I double-mark and clamp a stop block to ensure identical cuts.
Project 2 — Simple Entry Bench (Moderate, 4–6 hours)
Outcome: A 36″×12″ bench supporting up to 300 lbs when properly joined. Skill level: beginner to moderate. Time: 4–6 hours plus glue cure. Tools: circular saw, drill, clamps, 2″ screws, wood glue, 1×8 pine or hardwood slats.
- Cut legs and rails: Cut four legs to 18″ and two side rails to 32″ and two stretchers to 12″. Legs are 2″×2″ or 1½”×1½” hardwood for stability.
- Mark and pre-drill: Mark pocket or through-screw locations 1″ from each end. Pre-drill 1/8″ pilot holes on both sides of rails to avoid splitting. For hardwood, increase pilot to 3/16″.
- Assemble base: Apply glue and clamp rails to legs; drive 2″ screws through rails into legs—two screws per joint. Square the frame by measuring diagonal distances and adjusting clamps until equal.
- Add seat slats: Rip 1×8 boards into slats if desired and space them 1/8″ apart. Screw slats into rails using 1¼” screws and countersinking. Pre-drill countersink holes to keep heads flush.
- Sanding and rounding: Sand seat slats and edges with 120 then 220 grit. Round over edges 1–2 mm with sandpaper to avoid sharp corners.
- Finish for durability: Apply two coats of exterior-grade polyurethane if bench will be near an entryway exposed to moisture. Allow 2–4 hours between coats and 24–48 hours full cure.
Common mistakes and how I avoid them: I used too few screws on one leg and the joint loosened; now I use at least two screws per rail-to-leg joint and glue, then clamp overnight when possible.
Project 3 — Three-Tier Shoe Rack (Easy–Moderate, 3–4 hours)
Outcome: Compact 24″×12″ shoe rack. Skill level: easy to moderate. Time: 3–4 hours. Tools: saw, drill, screws, clamps, 3/4″ plywood shelves or 1×4 slats.
- Cut sides and shelves: Two side panels 24″×12″ with notches for three shelf supports at 6″ spacing. Use a jigsaw or handsaw for notches.
- Assemble supports: Glue and screw shelf cleats to sides at marked heights. Use 1¼” screws and clamps to maintain alignment.
- Place shelves: Seat plywood shelves onto cleats and secure with 1¼” screws through the cleats into the shelf edge or use glue for plywood-to-cleat joints.
- Finish and protect: Sand edges and apply a protective finish. Add rubber feet to lower shelf to prevent sliding and protect floors.
Common mistakes and how I avoid them: I once misaligned cleats by 1/4″ and the shelves sat crooked; now I use a scrap block as a temporary spacer to keep equal heights while clamping.
Project 4 — Simple Picture Frame (Easy, 1–2 hours)
Outcome: Custom-sized frame with glass and backing. Skill level: easy. Time: 1–2 hours. Tools: miter box or miter saw, clamps, brad nails or glue, backing board.
- Measure opening: Measure the photo and add 1/8″ clearance on all sides. Cut four miters at 45° for the outer frame using a miter box for accuracy.
- Dry-fit and glue: Dry-fit corners, then apply glue and use clamps or a band clamp. Reinforce with 18-gauge brad nails if desired.
- Insert glazing: Place glass or acrylic glazing, then the mat and backing. Secure with framing points or small screws and brackets.
- Finish: Sand corners lightly and apply a thin coat of stain or paint. For stained frames, use a wiping stain and finish with a satin polyurethane.
Common mistakes and how I avoid them: I once cut miters with inconsistent angles because my saw fence slipped; I now clamp a stop block and cut one miter, then use the first piece as a template for the others.
Project 5 — Small Planter Box (Outdoor, Moderate, 3–5 hours)
Outcome: 24″×12″ planter suitable for herbs or small flowers. Skill level: moderate. Time: 3–5 hours. Tools: circular saw, drill, 2″ or 1¼” galvanized screws, exterior wood glue, finish for outdoor use.
- Choose wood: Use cedar, redwood, or treated lumber for outdoor durability. Cut two long sides to 24″ and two short ends to 10″.
- Drill drainage: Drill 6–8 drainage holes in the bottom, 3/8″ each, spaced evenly. Elevate the planter on small feet to ensure water flow.
- Assemble bottom and sides: Attach bottom panel to side panels using 1¼” galvanized screws with pilot holes. Seal seams with exterior-grade polyurethane or spar varnish.
- Finish and line: Sand, then apply two coats of exterior-grade finish. Line the interior with landscape fabric before adding soil to protect the wood and extend life.
Common mistakes and how I avoid them: Early on I omitted drainage; plants suffered from root rot. I now always drill drain holes and elevate planters to improve airflow.
For readers ready to expand outdoors, review outdoor-focused plans: outdoor woodworking project plans.
Comprehensive Material Lists for Each Project
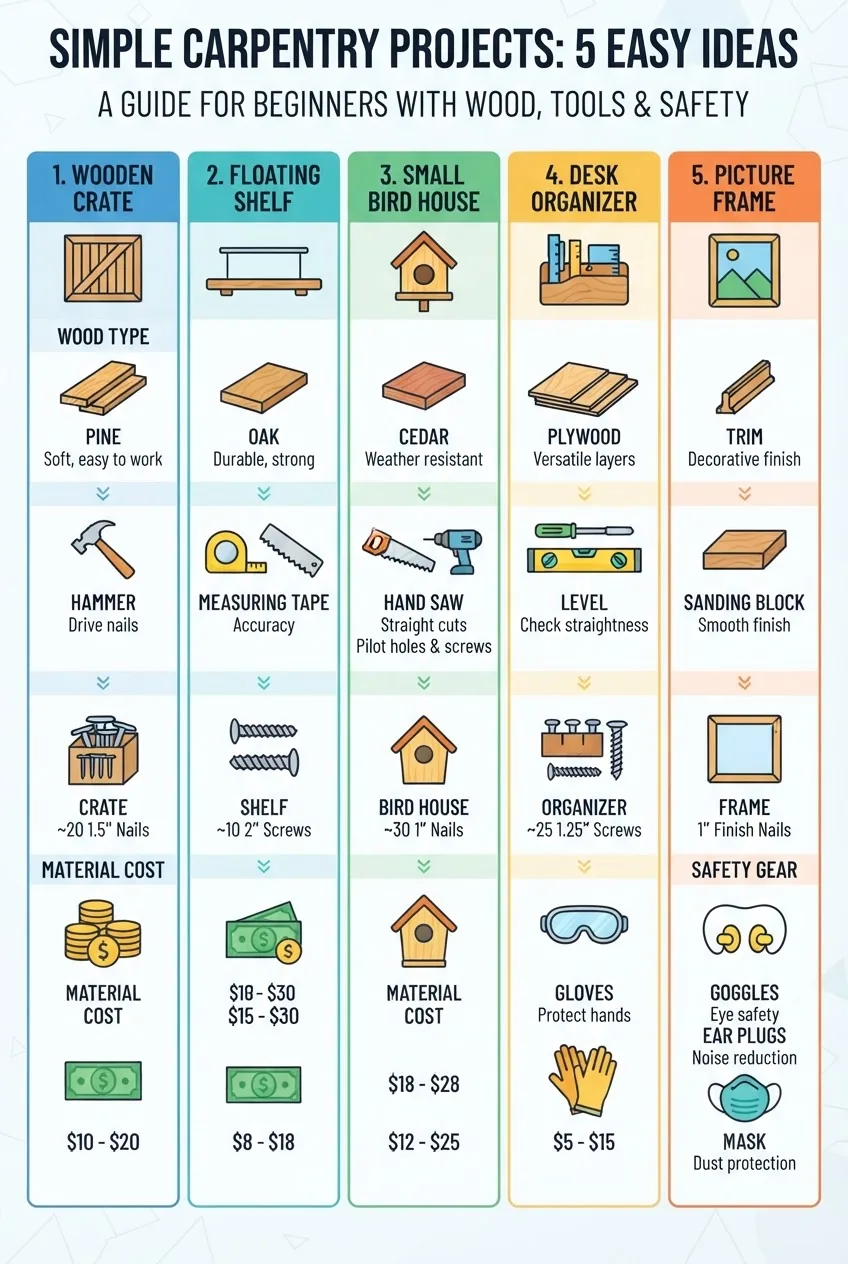
Below are detailed material lists with quantities, recommended fasteners, and low-cost alternatives. For broader budgeting techniques consult resources on cost-effective home improvement materials and home renovation cost tips.
Floating Wall Shelf (24″ × 6″)
- Materials: one 1×8 pine board (8 ft) — cut yields top/side pieces; or two 8′ pine scraps.
- Fasteners: 8 × 1¼” wood screws; 2 × 2″ screws for wall studs.
- Glue: 1 bottle PVA wood glue (8 oz).
- Finish: 8 oz water-based polyurethane.
- Estimated cost: $12–$30 depending on wood grade. Alternatives: use 3/4″ cabinet-grade plywood for faces to reduce cupping.
Entry Bench (36″ × 12″)
- Materials: 3 × 1×8 pine boards (8 ft) or 1×8 hardwood slats for stronger seat; 2″×2″ legs (4 pieces).
- Fasteners: 16 × 2″ wood screws; wood glue.
- Finish: exterior-grade polyurethane if near entry; 16 oz.
- Estimated cost: $40–$120. Alternative: use pallet wood with careful preparation for a budget build.
Shoe Rack
- Materials: 1 sheet 3/4″ plywood (2’×4′); or 4 × 1×4 boards (8 ft).
- Fasteners: 20 × 1¼” screws; wood glue.
- Estimated cost: $25–$60 depending on material choice.
Picture Frame
- Materials: 1×2 or 1×3 trim stock; glass/acrylic glazing (cut to size); backing board.
- Fasteners: small brad nails (50 × 18ga) or wood glue with corner clips.
- Estimated cost: $8–$35.
Planter Box (24″ × 12″)
- Materials: 2 × 1×8 cedar boards or 1×6 treated lumber; 1 piece 1/4″ exterior plywood for bottom (optional).
- Fasteners: 12 × 1¼” galvanized screws; exterior wood glue.
- Finish: exterior stain or sealer (16 oz).
- Estimated cost: $30–$90.
Cost-saving notes: buy 8′ boards and rip them to size to reduce waste; use salvaged or reclaimed wood when straight and dry. For larger remodeling budgets and material sourcing strategies, see interior remodeling cost and design insights, home renovation budgeting ideas, and budget home renovation strategies.
Tips to Avoid Common Mistakes in Simple Carpentry Projects
Below are pragmatic, numbered troubleshooting tips drawn from common beginner errors and standard workshop practice. For renovation-level process alignment, cross-reference broader strategies.
- Measure twice, cut once: I learned the hard way that a slipped tape measure adds 1/4″ error—mark, verify, then cut. Use a marking knife for precise lines.
- Pre-drill for screws: Prevent splitting by pre-drilling pilot holes sized to the screw’s shank. For hardwood, increase pilot hole by one drill size.
- Clamp and square before fastening: Always measure diagonals to ensure frames and boxes are square. Clamping during glue-up prevents misalignment.
- Sand progressively: Start with 80–120 grit to remove tool marks, then 180–220 grit for finish. Think of sanding like smoothing skin before painting—go slow and with the grain.
- Use the right fastener: For outdoor projects use galvanized or stainless steel screws. For softwoods, coarse-thread screws hold better; for hardwoods, fine-thread screws reduce splitting.
- Safety first: According to 2024 OSHA guidelines, maintain eye, ear and respiratory protection when cutting or sanding wood—this reduces long-term hazards and improves focus on accurate work. See OSHA for details: OSHA.
- Reference renovation best practices: For process-level guidance on integrating carpentry into broader projects, see effective home renovation strategies, home remodeling process tips, and expert home improvement strategies.
- Plan for maintenance: After finishing, consult home repair and maintenance tips to schedule re-coating and inspection.
- Adapting to old homes: When working in older houses, allow extra time for uneven walls and floors; see old home renovation design tips for adjustments.
Conclusion and Next Steps in DIY Carpentry
This hands-on guide has walked you through project selection, tools and materials, five complete tutorials, and detailed material lists. Key takeaways: start with one easy build to practice measuring and sanding; acquire a cordless drill, clamps, and good safety gear; and reuse material lists across multiple projects to save time and money.
Next steps: pick a single project from this guide and schedule a block of time in your workshop. Track your material leftovers for later projects to maximize cross-project material optimization. Join local maker spaces or online woodworking forums to share photos and learn from peers.
Compact verification checklist
- All cuts square within 1/16″.
- Screws countersunk and glue squeezed-out wiped clean.
- Sanding sequence completed: 80/120/220 or 120/180/220 for fine grain.
- Finish applied: two coats minimum with recommended dry times (2–4 hrs between coats for water-based poly).
- Mounting hardware selected for wall type (studs vs toggles).
When to call a professional
Hire a pro when a project involves structural framing, heavy load-bearing mounts (over 50 lbs unsupported), electrical/plumbing interfaces, or when you lack tools to safely make long rip cuts or heavy joinery. For complex remodels coordinate with licensed contractors to meet local code.


