


Outdoor wood projects hands-on guide: by the end you’ll have built at least one usable outdoor piece (bench or planter), created a materials list with exact 2024 cost estimates, and chosen a finish suitable for your climate. Typical time: 2–40 hours depending on project scale. Skill level: beginner to intermediate carpentry.
Before you start
- Prerequisites: basic measuring and cutting skills, ability to follow a plan, and access to a circular saw or miter saw for larger cuts.
- Essential protective gear: safety glasses, hearing protection, N95 dust mask, and cut-resistant gloves.
- Recommended workspace: flat, well-ventilated outdoor or garage area with a sturdy workbench and sawhorses.
- Permit check: confirm local codes for permanent structures (decks, pergolas) before starting.
Quick route: read “Before you start”, pick one project from the Step-by-Step Plans, gather the listed materials and tools, and complete the numbered steps. Transition: the next section explains why outdoor woodworking is rewarding and where it fits in broader DIY work.
Introduction to Outdoor Wood Projects
Outdoor wood projects deliver practical function and landscape enhancement—think seating, planters, shade structures, and decorative birdhouses. These projects add value to yards and patios while letting you customize dimensions, finishes, and budget. Outdoor woodworking encourages skill development: you learn measuring, joinery basics, fastening techniques, and finishing choices with tangible results.
Outdoor projects differ from indoor furniture mainly in material selection and finishing: you select weather-resistant species or pressure-treated lumber and invest in robust finishes to resist moisture, UV, and biological decay. They also require planning for drainage, ground contact, and seasonal movement (wood expands and contracts with humidity).
By choosing outdoor builds deliberately—small planter boxes to large pergolas—you balance cost, time, and maintenance. For broader inspiration, consider the DIY Home Improvement Projects Guide with Tips and Ideas and the comprehensive DIY home improvement projects guide to position your outdoor work within overall home upgrades.
Next, assemble the right materials and tools: the choices below will control longevity, aesthetics, and cost.
Essential Materials and Tools for Outdoor Woodworking
The foundation of any successful outdoor wood project is threefold: wood species selection, proper fasteners/hardware, and durable finishing products. Below are recommended materials, common options, and a practical tool checklist.
Recommended wood species and their outdoor pros/cons
- Cedar — Naturally rot- and insect-resistant, lightweight, good dimensional stability. Cost: mid to high. Best for benches, planters, and siding. (Reference: US Forest Service species durability data.) US Forest Service
- Redwood — Excellent durability and appearance; premium price and regional availability limitations.
- Pressure-treated pine — Affordable and widely available; chemically treated for ground contact and structural uses like decks and pergolas. Use ACQ or CA-treated products for 2024 uptime.
- Tropical hardwoods (ipe, teak) — Extremely durable, very dense; high cost and difficult to machine without carbide tooling.
- Composite lumber — Low-maintenance alternative, good for decking and benches, but less character and higher up-front cost.
- Sustainable options — Look for FSC-certified cedar/redwood or reclaimed lumber for lower environmental impact; check local suppliers for certified stock.
Fasteners, hardware and their outdoor considerations
- Use stainless steel (304 or 316 where salt exposure) or coated exterior screws and bolts; galvanized nails for non-structural decorative uses.
- Exterior-rated construction adhesives (polyurethane or MS polymer) for added joint strength and to reduce fastener count.
- Metal hardware (hangars, post bases, lag bolts): choose hot-dipped galvanized or stainless for buried/ground-contact applications.
Finishing products
- Sealants: penetrating oil seals (e.g., tung or teak oil blends) for natural look; film-forming sealers for long-term protection (spar varnish, marine varnish).
- Exterior stains: semi-transparent stains highlight grain and provide UV protection; solid stains behave like paint with lower maintenance for color retention.
- Paint: use 100% acrylic exterior latex for painted surfaces; use primers rated for exterior wood.
- Hardware finishes: stainless steel or powder-coated metal hardware for rust resistance.
Basic woodworking tools checklist
- Circular saw or miter saw (recommended: 12–16 tooth carbide blade for crosscuts; 40-tooth for finer cuts).
- Table saw (optional but speeds rip cuts) — blade set to 1/8″ above material for cleaner cuts.
- Power drill/driver with torque control, impact driver for heavy fasteners.
- Random orbital sander (120–220 grit progression) for finish prep.
- Clamps: bar clamps (2–3 of 48″ for benches), quick-grip clamps for smaller pieces.
- Measuring tools: tape measure (25′), square (framing and combination), pencil and marking knife.
- Hand tools: chisels, mallet, block plane for tuning joints, screwdriver set, hammer.
Consumables and finishing accessories
- Sandpaper: 80/120/180/220 grits per project size.
- Exterior wood filler, stainless fasteners, exterior caulk for seams.
- Brushes: natural bristle for oil-based finishes, synthetic for latex stains/paints.
Transition: with materials and tools selected, you can pick a project plan and follow the step-by-step build instructions below.
Step-by-Step Plans for Popular Outdoor Wood Projects
Each project below includes a short plan, tools and materials list, approximate build time, difficulty level, and step-by-step numbered actions. For compact decor and larger structures, these plans scale. For decor extensions see DIY home decor project tutorials and smaller crafts at handmade crafting ideas.
-
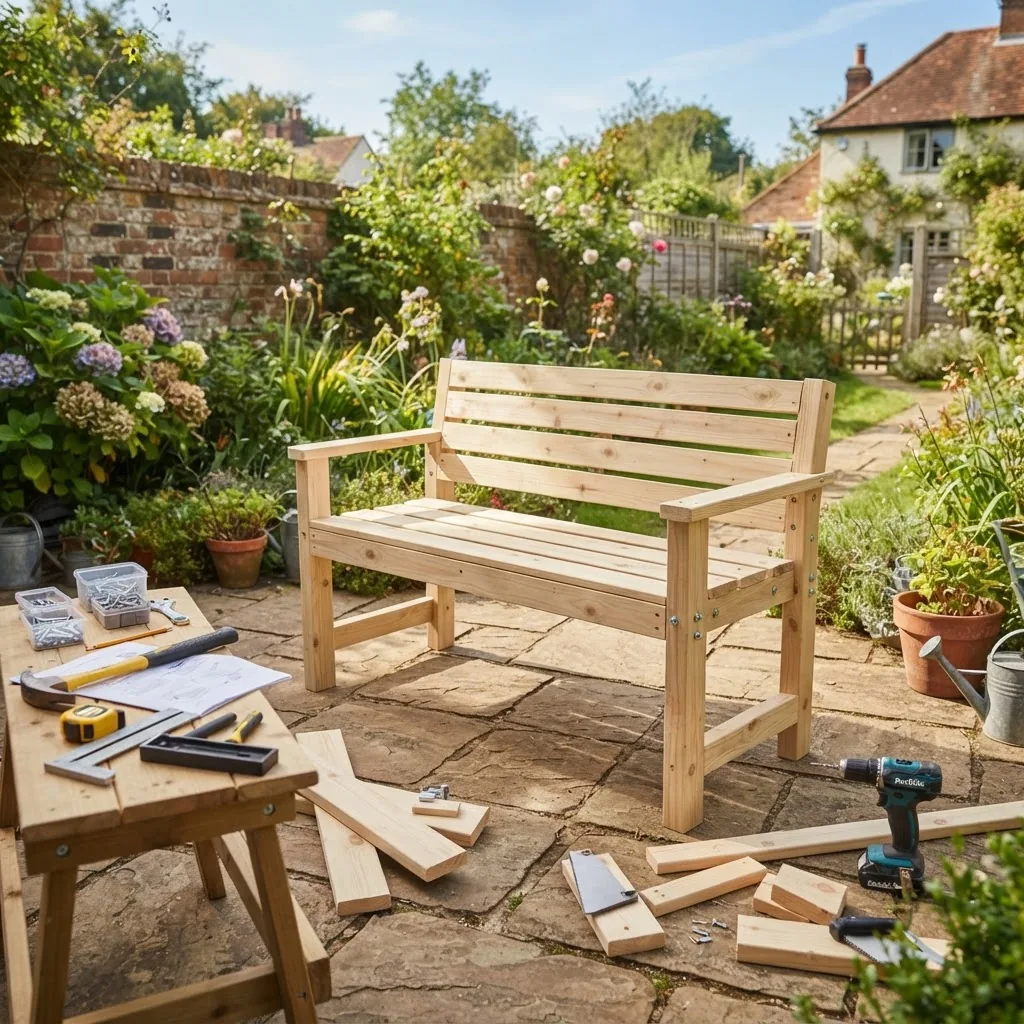
Garden Bench — simple 4‑board seat (Example Project #1)
Use-case: durable patio bench seating. Skill: Beginner. Time: 4–8 hours. Dimensions (finished): 48″ long × 18″ deep × 18″ high. Materials:
- 4 × 2×6 cedar boards, 8′ long (seat and apron)
- 2 × 2×4 cedar boards, 8′ (legs and stretchers)
- 16 × 3″ stainless exterior screws; 4 × 2.5″ exterior wood glue
- 1 pint exterior semi-transparent stain or 1 quart sealant
Approx cost (materials only, 2024 estimate): cedar boards $80–$140; hardware $12; finish $18 — total $110–$170. (Cost methodology: sum local retail board prices per board foot plus hardware; see Detailed Material Costs section.)
- Measure and cut the seat boards: cut three 2×6 cedar boards to 48″ length. Use a stop block on the saw to keep repeated cuts identical.
- Prepare the aprons and legs: cut two 2×4 aprons to 42″ (allow 3″ seat overhang each side total) and four legs to 17″ (to yield 18″ finished with seat thickness).
- Assemble the frame: glue and screw aprons to legs forming a rectangular frame; use two 3″ stainless screws per apron-leg connection, pre-drill 3/32″ pilot holes to avoid splitting.
- Attach seat boards: place seat boards on frame with 1/8″ spacing; use clamps to keep flush and fasten from top with 1.5″ stainless screws or from underside with screw + plug for cleaner top.
- Sand and finish: sand to 120 grit, then 180 touch-up. Apply two coats of semi-transparent stain or one coat penetrating oil per manufacturer drying times (typically 4–24 hours between coats).
Example photo suggestion for assembly context below.
-
Planter Box — raised 24″ × 48″ vegetable planter (Example Project #2)
Use-case: medium-height planter for herbs/veggies. Skill: Beginner. Time: 2–4 hours. Dimensions: 24″ wide × 48″ long × 24″ high. Materials:
- 4 × 2×8 cedar or pressure-treated boards, 8′ long (cut to size)
- 4 × 4 pressure-treated posts (4 × 24″ for legs)
- Exterior screws, landscape fabric, potting soil
Approx cost (materials only): cedar $80–$120, soil & fabric $35, hardware $10 — total $125–$165.
- Cut sides and ends: two boards to 48″ (long sides) and two to 24″ (short ends). Use a square to mark accurate 90° cuts.
- Assemble box: fasten ends to long sides with 2.5″ exterior screws through face into ends; reinforce with 3/4″ exterior glue if desired.
- Attach legs/posts: position 4×4 posts inside each corner and fasten through the inside face with 3″ lag screws; pre-drill clearance holes for lag bolts.
- Line and fill: staple landscape fabric inside box leaving drainage holes; add soil mix to within 2″ of top.
- Finish edges: chamfer top edges with a block plane and sand 120 grit; apply one coat of exterior penetrating oil.
-
Simple Birdhouse — 1-entrance nesting box
Use-case: wildlife habitat and decorative accent. Skill: Beginner. Time: 1–2 hours. Materials:
- 1 × 1×6 cedar board, 6′ long (cut into pieces)
- Exterior screws, 1/2″ hole saw for entrance, waterproof wood glue
Approx cost: cedar scrap $8–$15; hardware $3 — total $12–$18.
- Cut panels: cut back, front, two sides, floor, roof using straight square cuts; front has entrance hole 1.25–1.5″ diameter positioned 6″ from floor.
- Assemble: glue and screw sides to back; insert floor with small gap for drainage; attach front; mount roof with overhang for weather protection.
- Mounting: install at 6–10′ height using a screw-through mount or hanging bracket; avoid direct afternoon sun.
-
Pergola — freestanding 10′ × 10′ partial-shade structure
Use-case: shade and garden focal point. Skill: Intermediate. Time: 2–3 weekend days. Dimensions: 10′ square; posts 8–10′ tall. Materials:
- 4 × 6×6 posts (four 10′ posts or cut to height)
- 6 × 2×8 rafters (10′ each), cross members as desired
- Post bases, lag bolts, exterior screws
Approx cost: pressure-treated posts/rafters $400–$800; hardware $80–$150 — total $480–$950 depending on wood choice.
- Set posts in place: dig 24″ holes, set 6×6 posts in concrete or use adjustable post bases anchored to concrete pads as per code.
- Rafters and crossbeams: notch or attach with through-bolts; stagger cross-members for shade pattern and screw from above using stainless fasteners.
- Bracing and finishing: install diagonal braces if wind exposure requires; sand exposed ends and apply two coats of exterior stain or sealer.
Note: For large structures consult local building codes. For design and build logistics see house kits building requirements and consider the home building cost and process guide if you intend to scale structural skills.
-
Small Decking Basics — 8′ × 8′ platform
Use-case: entry platform or raised seating area. Skill: Intermediate. Time: 1–2 weekends. Materials and hardware: pressure-treated joists, deck boards, joist hangers, ledger screws or bolts, flashing for ledger.
See local code for ledger attachments. For small DIY deck tutorials consult simple carpentry projects and for decorative touches check things to make at home with DIY tips.
- Layout and footings: mark corners square, dig 12–18″ post holes or install concrete piers per frost depth.
- Frame and joists: use 2×8 joists spaced 16″ on center, attach with joist hangers; check level and diagonals for square.
- Decking: use stainless screws or hidden fastener systems; leave 1/8″–3/16″ gaps for drainage and expansion.
Common mistakes and how to avoid them
I once built a bench without pre-drilling cedar, and the boards split along the end grain—lesson: always pre-drill for long screws near board ends. I’ve also over-applied film finishes that trapped moisture; now I use penetrating sealers on close-to-ground pieces. I recommend dry-fitting assemblies before glue and test-fit finishes on scrap pieces for drying and appearance. For outdoor loads, I learned to choose stainless hardware for coastal areas; galvanized fasteners corroded quickly in one of my seaside projects.
Finish: compact project checklist and when to call a pro
- Checklist: accurate cut list, pre-drilled fastener holes, 120/180 grit sanded surface, two coats of exterior finish where required, drain holes for plant boxes, stainless or galvanized hardware for exterior use.
- Call a professional if: local permit-required structural work (decks, pergolas), you lack tools for 4×6 posts or concrete footings, or your time constraints demand faster completion with guaranteed load-bearing capacity.
Transition: after building, precise cost tracking and material sourcing keeps budgets predictable—see the next section for a line-by-line 2024 cost breakdown and budgeting strategies.
Detailed Material Costs and Budgeting Tips for Outdoor Wood Projects
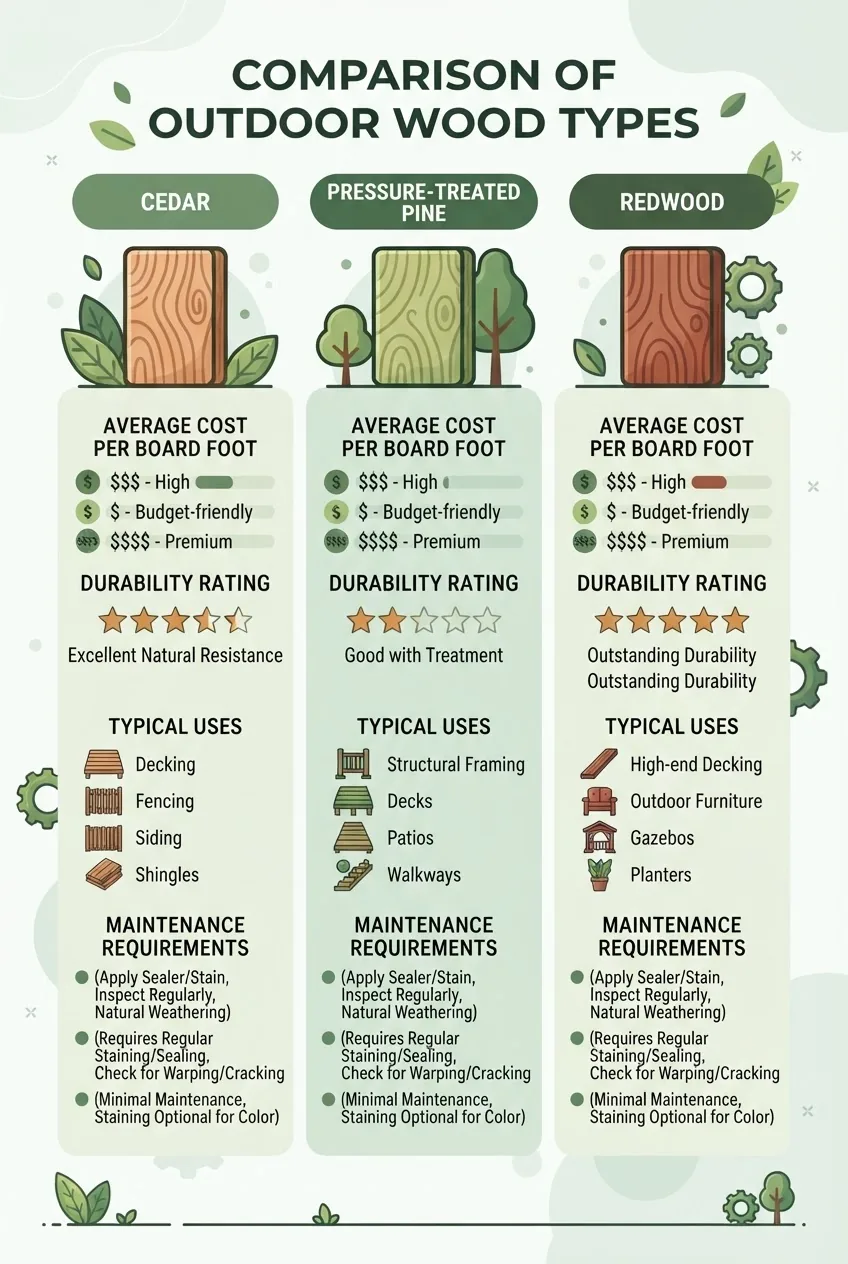
Below are itemized cost estimates updated for 2024 (retail prices vary by region and grade). Costs shown are material-only and exclude labor. For many homeowners, materials represent 60–80% of total DIY project expenses (tools amortized separately). According to a 2024 industry report, national building material prices have varied by ±8% year-over-year; use local quotes for final budgeting.
| Material | Typical 2024 Price (material only) | Best Uses | Maintenance |
|---|---|---|---|
| Cedar (2×6, per 8′ board estimate) | $18–$28 per board (regional variance) | Benches, raised planters, siding | Re-stain/seal every 1–3 years |
| Pressure-treated pine (2×8, 8′) | $9–$15 per board | Decks, pergola posts, ground contact | Seal after 30–60 days; recoat every 2–4 years |
| Redwood (2×6, 8′) | $25–$40 per board | Premium benches, decorative structures | Re-stain every 2–4 years |
| Tropical hardwoods (ipe, teak) | $10–$30 per board foot | High-end decking, furniture | Oil annually; check for splintering |
| Exterior finish (semi-transparent stain) | $20–$45 per quart | Benches, planters, pergolas | Recoat 1–3 years |
Sample project cost breakdowns (2024 estimates)
All prices are approximate retail; expect ±15–25% regional variation. For small projects, buy extra 10% lumber to cover mistakes and grain defects.
| Project | Materials | Estimated Cost |
|---|---|---|
| 48″ Cedar Bench | 3× 2×6 cedar, 2× 2×4, screws, finish | $110–$170 |
| 24×48 Planter Box | Cedar/treated boards, posts, soil | $125–$165 |
| 10×10 Pergola (treated lumber) | 4×6 posts, 2×8 rafters, hardware | $480–$950 |
How I estimate costs (methodology)
Step 1: create a cut list with board dimensions and quantities. Step 2: convert to board feet for species priced by board foot (length × width × thickness / 144). Step 3: add hardware and finish quantities (screws by box, stain by quart). Step 4: add 10% waste. For regional price checks, call two local suppliers and one big-box retailer; compare delivery fees. For wider budgeting resources, see affordable home improvement tips, or consult broader home renovation cost planning.
Cost-saving tips
- Buy untreated lumber for above-ground projects and apply a preservative instead of using expensive treated lumber when structural ground contact is not required.
- Use standard board lengths (8′, 10′, 12′) to minimize waste when planning cuts.
- Source a mixed-lumber pallet from local mills for reclaimed pieces; dress and plane them for rustic furniture.
- Rent specialty tools (planer, table saw) rather than buying for one-off projects.
- For big purchases, negotiate contractor pricing with local lumberyards or buy in bulk with neighbors to reduce per-board cost.
Transition: having built and budgeted, protecting wood with correct finishing and maintenance extends service life—details next.
Wood Finishing and Weatherproofing Techniques
Finishing choices decide how long your outdoor wood project lasts and how it will age. The core trade-offs are aesthetics, UV protection, water resistance, and maintenance frequency. For durability-focused exterior improvements see best home improvements for durability. For older structures and refinishing techniques see old home restoration and finishing tips.
Choosing between stain, sealer, and paint
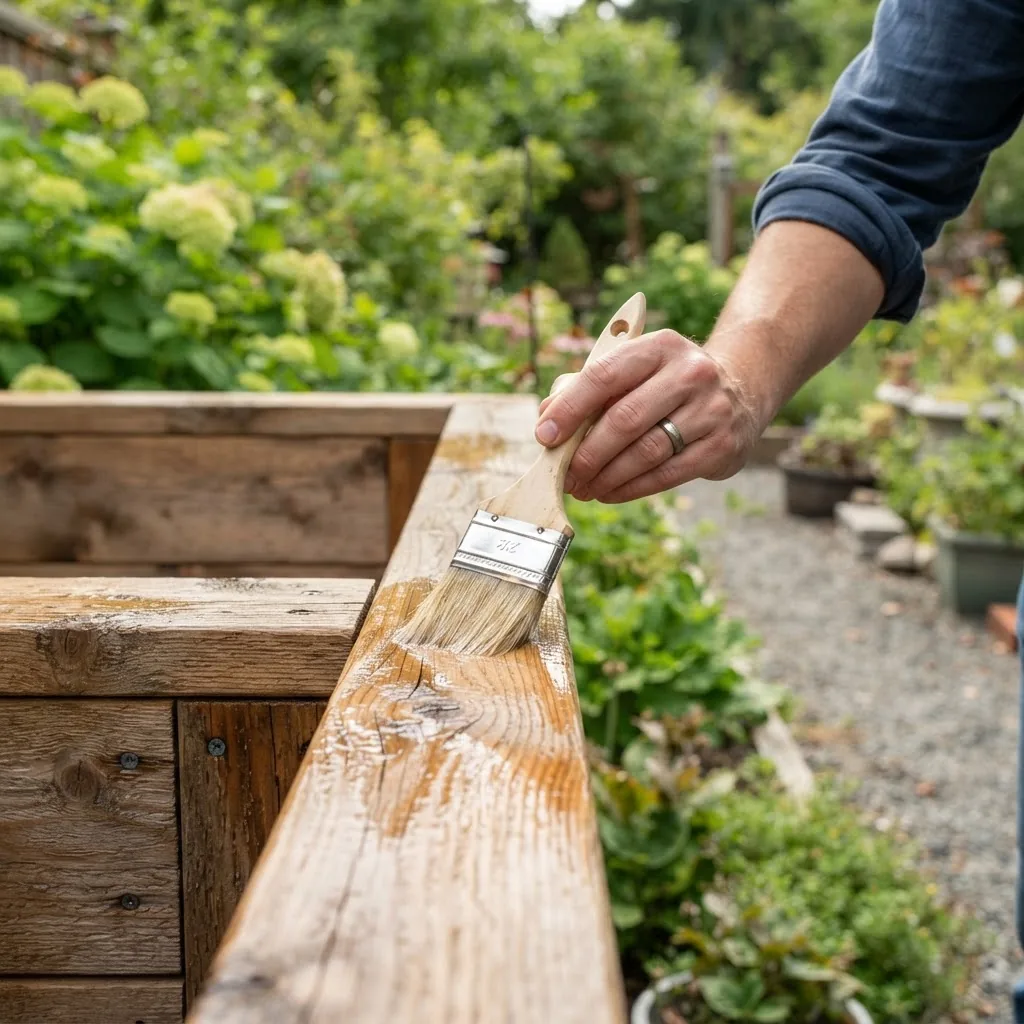
Stain (semi-transparent): penetrates and highlights grain; moderate UV protection; recoat every 1–3 years. Solid stain or paint: forms a film and offers strong UV/color protection but hides wood grain; expect 3–7 years before major repainting. Penetrating oil sealers: easiest to reapply and keep wood looking natural; need more frequent maintenance.
Step-by-step finishing application (practical protocol)
- Dry and prep the wood: wood must be below 15% moisture (use a moisture meter) and clean; pressure-treated wood requires 30–60 days of air-dry time after purchase before finishing.
- Sand progressively: start with 80 grit for rough cuts, move to 120, then 180 for a smooth finish. For softwoods, avoid over-sanding which reduces ability to accept stain.
- Test finish on scrap: always apply your chosen finish to an offcut to check color and absorption; drying times vary by product (manufacturer technical sheets recommended).
- Apply first coat: follow manufacturer coverage rates; typical semi-transparent stain: 200–300 sq ft per gallon per coat. Apply thin coats and wipe excess in grain direction.
- Drying and recoat: allow manufacturer-specified drying (often 4–24 hours); for oil-based products, allow longer cure times. Sand light between coats with 220 grit if film-forming.
- Edge protection and maintenance: coat end grains twice (ends absorb finish faster) and recoat high-wear areas yearly; document dates and product batches for future reorders.
Manufacturer technical sheets provide precise coverage, dry times, and VOC data—consult them before application. Manufacturer technical sheets
Trade-offs: a film-forming finish (varnish) protects better against abrasion but requires longer prep and eventual removal for refinishing; penetrating oils require more frequent maintenance but are easier to refresh.
Transition: finish choice impacts safety and maintenance—addressing safety next keeps your builds safe to use and maintain.
Safety and Best Practices in Outdoor Woodworking
Adopt measured safety practices for both tool operation and environmental protection. OSHA standards cover workshop safety and PPE; consult their guidance for formal requirements. OSHA
- Wear eye protection, hearing protection, N95 dust mask or respirator when sanding or cutting treated lumber, and cut-resistant gloves when handling rough lumber.
- Use push sticks and featherboards on table saws; never remove guards while cutting. Set blade height to 1/8″ above material; use riving knives for safety against kickback.
- For structural projects (decks/pergolas) follow local code and fastener specifications; improper fastener selection reduces structural capacity.
- Store finishes in cool, dry places away from children; follow manufacturer disposal/cure instructions for rags soaked in oils to avoid spontaneous combustion.
- Environmental considerations: collect sawdust and finish waste responsibly; avoid washing solvent-heavy residues into storm drains.
Practical safety checklist:
- All guards in place on saws and routers.
- Fire extinguisher within 10 ft of finishing area.
- First-aid kit accessible and a phone for emergencies.
- Tool maintenance schedule: sharpen blades, check cord insulation monthly.
- Follow the home remodeling process and safety tips and adopt expert home improvement strategies for larger projects.
Transition: even with good safety, outdoor wood projects can face common problems—learn how to troubleshoot them next.
Troubleshooting Common Issues in Outdoor Wood Projects
Repair and preventative maintenance extend the life of outdoor wood structures. Below are common problems and precise fixes.
Wood rot prevention and repair
- Identify early: soft, discolored, or crumbly wood indicates rot; probe suspect areas with a screwdriver—if it sinks more than 1/8″, remove and replace local timber.
- Repair: for small rot patches cut back to sound wood, treat surrounding area with a borate preservative, and replace with new piece sealed on all faces prior to installation.
Warping and cupping fixes
- Prevention: seal all faces (including ends) before installation to slow moisture movement. For decking, use proper spacing (1/8″–3/16″) for drainage.
- Correction: if minor warp, allow wood to acclimate in place for dry weeks; for severe warp, replace and ensure balanced sealing on all faces.
Fastener corrosion
- Use correct hardware: stainless fasteners in coastal areas; hot-dipped galvanized for general exterior; do not use plain steel with cedar—accelerated corrosion may occur.
Pest damage
- Inspection and mitigation: inspect for boreholes or frass; treat with appropriate insecticidal borate for active infestations and replace heavily damaged members.
For ongoing maintenance and small repairs see home repair and maintenance tips.
Transition: wrap up key takeaways and encourage your first build.
Conclusion and Encouragement to Start Your Woodworking Journey
Handcrafting outdoor wood projects gives lasting value: personalized pieces, lower long-term costs compared with buying prebuilt, and growing carpentry skills. Start with a small bench or planter to practice measuring, joinery and finishing. Document costs as you go—this guide’s 2024 estimates and sourcing tips will keep budgets honest. Now pick one plan, gather materials, and begin—your yard, seasonal enjoyment, and craftsmanship will thank you.
Final CTA: Ready to begin? Choose a project above, print the materials list, and start measuring this weekend. When the build grows into something larger, consider seeking professional help for structural anchoring and permit guidance.


