


By the end of this guide you will have a full DIY home renovation plan, a realistic budget, and step-by-step workflows for a kitchen, bathroom, flooring and painting project. Expect to complete a medium-sized room remodel in 2–6 weekends (skill level: confident beginner to intermediate).
Introduction to DIY Home Renovation
DIY home renovation is the process of updating or repairing parts of your house using personal labor with or without hired help. This hands-on guide focuses on practical execution: defining project scope, budgeting, materials, safety, permits, and the exact order of operations you’ll follow. By treating each task as a small, scheduled project you reduce cost overruns, delays, and avoidable rework.
Definitions you’ll see often: a permit is an official authorization from local authorities to perform construction; drywall is gypsum board used for interior walls and ceilings; a load-bearing wall supports structural weight and cannot be removed without engineered reinforcement.
Before you start
- Prerequisites: clear project goals, access to workspace, basic hand tool set, and 1–2 helpers for heavy lifting.
- Minimum materials: primer, paint, fasteners, safety gear, and drop cloths (quantities in project steps).
- Skill check: if you cannot measure, cut, and fasten materials to +/- 1/8″, hire a pro for structural or electrical work.
For extended project ideas and inspiration, see this resource:
DIY Home Improvement Projects Guide with Tips and Ideas
Transition: With scope and prerequisites set, the next step is precise planning—timeline, permits, and a realistic budget.
Planning Your DIY Home Renovation Project
- Set a clear scope and goals. List outcomes (e.g., “replace kitchen cabinets, update lighting, paint walls”). Limit scope to what you can finish within 6–12 weekends if doing weekends only. Write measurable success criteria: function, finish, and target budget.
- Break the project into phases. Typical phases: prep & demo, rough electrical/plumbing, structural work, drywall/insulation, finish carpentry, painting, final fixtures. Assign each phase a duration—demo (1–3 days), rough-ins (1–7 days), finishes (2–10 days).
- Create a task-by-task timeline. Use a simple spreadsheet with columns: task, owner, start date, duration (hours), dependencies. Buffer 20–30% time for unexpected issues. For complex jobs, schedule inspections between rough and finish phases.
- Estimate labor resource needs. Decide which jobs you’ll do vs. hire: electrical, plumbing, and structural work usually require licensed pros. For everything else, allocate people-hours: painting 2 people × 8 hours per 12×12 room; cabinet install 2 people × 16–24 hours.
- Research permit requirements. Check local requirements early: structural changes, adding circuits, plumbing relocations typically require permits. home improvement remodeling cost and process tips and consult your municipal building office. For a direct government reference, see your local permits guide.
- Make a budget allocation. Allocate funds by category: materials 50–60%, tools/rental 5–10%, permits/inspections 2–5%, contingency 10–20%, paid subcontractors 15–30%. For example, for a $12,000 kitchen remodel: materials $6,000–7,200; subcontractors $1,800–3,600; contingency $1,200–2,400.
- Source reliable price references. Use industry cost guides and local suppliers to price items accurately—plan first, then buy. For national averages, consult an industry cost report like those compiled annually. According to a 2024 industry report, average kitchen material costs rose 6–9% year-over-year.
- Create a purchase plan and schedule deliveries. Order long-lead items (appliances, custom cabinets) 6–12 weeks in advance. Smaller items can be local pickup. Stagger deliveries to avoid storage issues at the job site.
- Plan for waste removal and site protection. Rent a 10–15 yd dumpster for medium kitchen demo. Protect floors with rosin paper and doors with temporary barriers to reduce cleanup time.
- Document and photograph condition before work. Take dated photos of the work area and any existing damage—useful for permits, insurance, and troubleshooting.
- Insurance and neighbor notification. Notify your homeowner’s insurance for major works and inform neighbors of noisy work windows to reduce complaints.
- Use checklists for each phase. Create a checklist per phase: demo checklist, rough-in checklist (include required inspections), finish checklist (caulking, touch-ups).
- Budget sign-offs and change control. Establish a rule: any change >$200 or >2 hours requires written approval and contingency reallocation.
- Consider alternative project routes. If budget is tight, explore house kit or modular components—see guidance on house kits cost and building requirements as an alternative approach.
- Track costs daily. Use a simple ledger or app and reconcile weekly to spot overruns early. According to a 2024 industry report, projects with weekly cost tracking reduce budget overruns by ~25%.
- Plan for testing and commissioning. After finish stages, plan 1–2 days for functional tests (appliances, water supply, electrical outlets) and one final inspection if permits were required.
Transition: With a plan, timeline, and permits considered, we can move into practical cost estimation for the most common DIY remodels.
Estimating Costs for DIY Home Renovation
Accurate budgeting starts from detailed line items. Below are average cost ranges (materials + incidental expenses) for common DIY projects. Regional prices vary—these figures are current as of 2024 and sourced from industry cost reports and national job boards.
| Project | Typical DIY Cost Range (materials + rentals) | Notes |
|---|---|---|
| Kitchen—cabinet refinish & hardware | $1,500–$6,000 | Cost depends on cabinet count; appliances excluded. |
| Bathroom—tile refresh (small) | $800–$4,000 | Includes tile, thinset, grout; plumbing not moved. |
| Flooring—laminate/engineered hardwood (200 sq ft) | $600–$2,200 | Includes underlayment and trims; subfloor repairs extra. |
| Painting—single 12×12 room (prep + 2 coats) | $120–$450 | Depends on primer, paint quality, and equipment rental. |
| Drywall repair—single 4×4 patch | $30–$150 | Includes tape, compound, sanding, and primer. |
Breakdown methodology: list materials and quantities, price each line using supplier quotes, add rental equipment rates, then add 10–20% waste and 10–20% contingency. According to a 2024 industry report, unexpected costs average 12% of small-to-medium DIY remodel budgets.
Cost-saving techniques:
- Buy overstock or clearance tiles and stain-matched paint in larger batches to save 8–15%.
- Rent a compact table saw and a floor sander instead of buying—rental typically pays off for one-off projects.
- Reuse existing fixtures where safe; refinishing cabinet faces often costs less than replacement by 40–60%.
For deeper cost-saving strategies, consult our affordable strategies:
affordable home improvement cost strategies
If you’re weighing renovation versus new construction costs, see industry guidance on full home builds:
home building process and cost breakdown
Design-focused cost perspectives are helpful when choosing finishes; for that see:
home interior remodeling design and cost guide
Transition: Knowing costs, you need the right tools and materials to execute efficiently and safely.
Essential Tools and Materials for DIY Remodels
Deciding between tool purchase and rental depends on frequency: buy if you’ll use a tool >3 times/year. Always prioritize safety gear first.

- Measuring & layout: 25-ft tape measure, 6-ft level, laser distance measurer (±1/8″ accuracy for cabinetry).
- Cutting tools: circular saw (blade: 40–60T for plywood), jigsaw, utility knife, coping saw. Buy quality blades and keep a spare set.
- Power tools: cordless drill/driver (18V brushless), impact driver, random-orbit sander (120–220 grit), oscillating multi-tool.
- Fastening: pneumatic brad/finish nailer (or manual if budget tight), screw sets (various lengths), construction adhesive.
- Drywall & plaster: 12″ and 6″ taping knives, hawk, corner trowel, drywall saw, joint compound and paper/mesh tape.
- Tiling: tile cutter or wet saw rental, notched trowel, grout float, sponge, 1/8″ and 1/16″ spacers.
- Plumbing basics: adjustable wrench, basin wrench, silicone caulk and caulking gun, plumber’s tape. For pipe changes, use PEX tools or call a licensed plumber.
- Electrical basics: voltage tester, wire strippers, insulated screwdrivers. Major electrical rewiring should be performed by a licensed electrician.
- Safety gear: N95 or better masks for dust, safety goggles, hearing protection (ANSI S3.19), nitrile gloves, work boots. Reference safety recommendations at OSHA.
- Materials selection: choose mid-grade finishes for longevity: 3/4″ plywood for cabinets, 1/2″ cement board for wet-area tile, medium-density fiberboard for trim only if sealed properly.
- Tool rental vs purchase: rent a wet saw (typically $40–$70/day) and floor sander ($60–$100/day) for one-off jobs; buy basic cordless set if you plan multiple projects.
For woodworking basics and project tutorials see:
simple carpentry tutorials and material lists
Transition: Having tools and materials listed, we’ll apply them in hands-on, project-specific steps next.
Step-by-Step Guide to Popular DIY Renovation Projects
Below are practical, ordered procedures for four common projects: a sample kitchen cabinet refresh (detailed case study), a bathroom tile install, laminate flooring installation, and drywall replacement + painting. Each project lists time estimates, tool settings, and specific quantities.
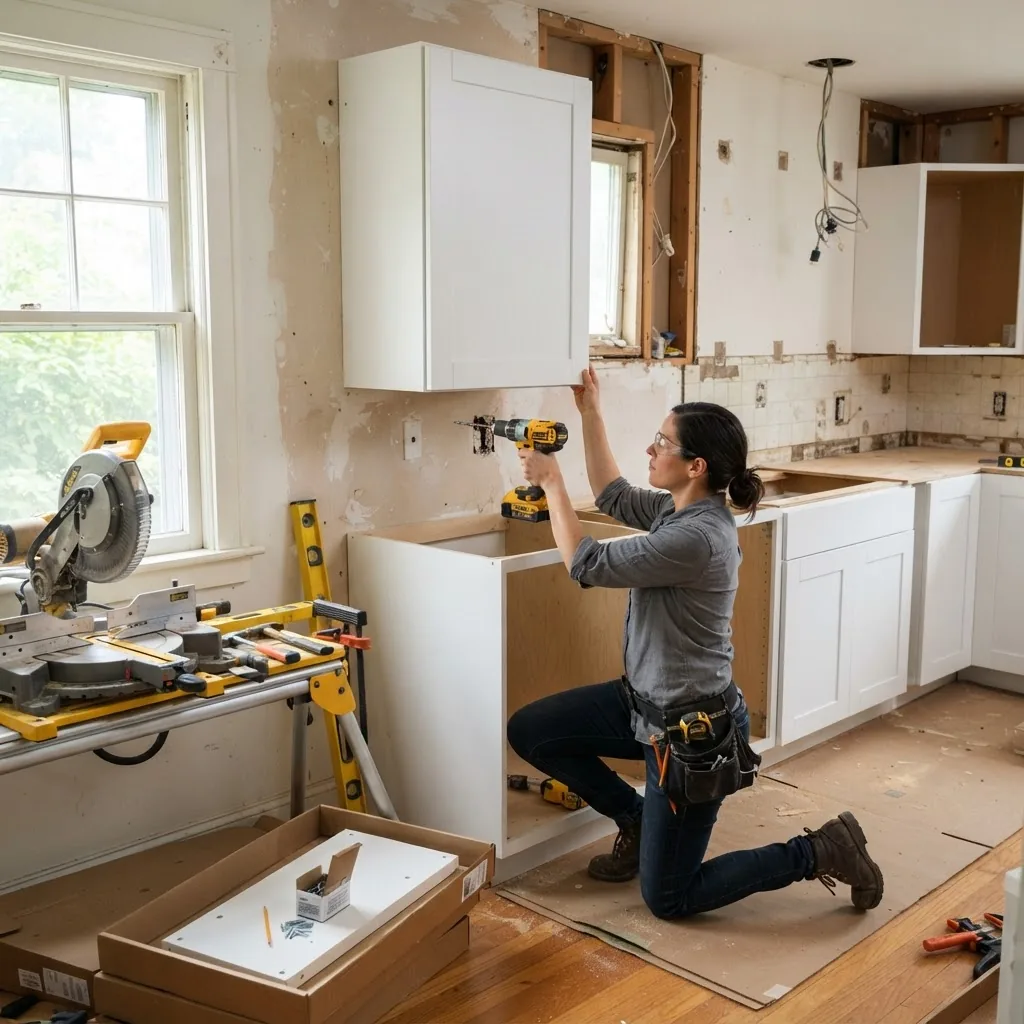
Project A — Case study: Kitchen cabinet refresh (first-person walkthrough)
What I achieved: refinished 10 standard base and wall cabinet doors, replaced hardware, and installed a new quartz backsplash over 4 weekends. Total out-of-pocket: $4,750 materials and rentals; contingency used: $350. I documented purchases and adjusted when I found warped drawer boxes requiring replacement.
- Remove cabinet doors and label. Time: 3 hours for two people. Remove hinges, take photos, label each door and its location with masking tape and marker. Store screws in labeled bags.
- Prep surfaces. Sand doors with 120 grit then 220 grit (orbital sander) for 10–15 minutes per door to remove old finish. Clean with TSP substitute and dry 24 hours.
- Fill and repair. Use wood filler on dents (apply, sand to feather 220 grit after 2 hours). Replace any warped drawer boxes—I purchased two replacement boxes at $48 each.
- Prime and spray or roll. Apply shellac-based primer (1 coat), then two topcoats of acrylic enamel using an HVLP sprayer (sprayer setting: 30–40 psi). If brushing, use a foam brush and apply thin coats, drying 4–6 hours between coats.
- Reattach hardware and install new pulls. I used 10 new handles at $8 each; measure back-to-back center-to-center distances to avoid re-drilling. Tighten to 20–25 in-lbs torque to avoid stripping.
- Install backsplash. For a 10 sq ft backsplash I used adhesive mortar, 8″ quartz slab cut to fit—set with 1/8″ spacers and caulk edges with silicone (24-hour cure).
- Final cleanup and commissioning. Rehang doors, check clearances (1/8″ min), and run appliances to verify electrical connections.
Materials & time totals I recorded: primer 1 qt, enamel 2 gals, sandpaper packs (5 sheets 120/220), sprayer rental $45/day × 3 days, total labor 48 person-hours (me + partner). Contingency applied when I replaced two drawer boxes ($96).
Complement this with broader guidance on project selection:
best home improvement projects for maximum impact
DIY home improvement projects
Project B — Bathroom tile install (small 5×8 layout)
- Measure and subtract waste. For a 40 sq ft area buy 45–50 sq ft to allow 10–20% waste. Order tile and transition trim before demo.
- Prepare substrate. Remove old finishes, install 1/2″ cement board with 1/4″ gap and corrosion-resistant screws every 8″. Tape seams with mesh tape and thinset.
- Dry-fit tiles. Lay tiles without adhesive to check layout and cuts. Make a centerline and keep the least-favored cuts to edges.
- Apply thinset and lay tile. Use a 1/4″ x 1/4″ square-notched trowel for wall tile; spread thinset at a 45° angle. Set tiles, spacers 1/16″–1/8″, and let cure 24–48 hours.
- Grout and seal. Use sanded or unsanded grout per tile gap; clean with sponge. After 72 hours, apply a penetrating sealer for porous tiles.
Project C — Laminate flooring installation (200 sq ft)
- Acclimate planks. Store unopened boxes in the room for 48–72 hours.
- Prepare subfloor. Ensure subfloor is level within 3/16″ over 10 ft; repair dips with leveling compound (mix per manufacturer; cure 24 hours).
- Install underlayment. Roll 6 mm foam underlayment, tape seams. Leave 1/4″ expansion gap at perimeter.
- Lay planks. Start along the longest wall, stagger seams at least 12″. Use a pull bar to lock end joints. Average installation speed: 60–100 sq ft/hour for two people.
- Install trims. Fit quarter round and thresholds; caulk gaps with paintable silicone if needed.
Project D — Drywall replacement (4×8 sheet) and painting
- Cut out damaged area. Remove damaged drywall to studs and clean framing; cut a full stud-to-stud section for easiest patching.
- Install new drywall. Use 1/2″ drywall screwed 16″ on center. Screws: 1-1/4″ coarse-thread for wood studs. Countersink screws ~1/32″ below surface.
- Tape and mud. Apply tape and first coat of joint compound (embed tape completely). Sand between coats with 120 then 220 grit; three coats total. Drying: 8–24 hours between coats depending on compound.
- Prime and paint. Apply primer (one coat) then two topcoats. Coverage: 1 gallon covers ~350 sq ft; plan 1 qt primer + 1–2 gals paint for a single room.
Transition: Even the best plans encounter problems—next, I cover the most common issues and how to resolve them quickly.
Common mistakes and how to avoid them (from my experience)
I once started a tile backsplash without ordering matching grout; I had to remove and re-grout, costing a weekend and $75. I learned: always order all consumables before demo. Another time I underestimated cabinet door drying time—air temperature matters; I now add 24 hours per coat in cool weather.
Compact verification checklist (post-project):
- All fixtures operational and watertight for 24 hours.
- No visible gaps greater than 1/8″ at trim junctions.
- Paint coverage uniform with no drip marks; caulks cured per product directions.
- All permit-required inspections passed and documentation stored digitally and in the job folder.
When to call a professional: structural wall removals, major electrical panel changes, whole-house plumbing reroutes, or if you cannot achieve measurements within 1/8″. For permitting questions contact your local building office or consult a licensed contractor.
Transition: projects succeed when you can identify and overcome common roadblocks—read on for troubleshooting and durability tips.
Common Challenges and How to Overcome Them
Renovations routinely encounter delays and technical snags. Below are numbered actionable tips to resolve frequent problems.
- Unseen structural issues: If you uncover rot or compromised framing during demo, stop work and evaluate. Get a structural assessment if load-bearing elements are involved. According to a 2024 municipal building guide, unpaid structural fixes are a leading cause of permit delays.
- Project delays from deliveries: Mitigate by ordering long-lead items early and confirming delivery windows. Keep a local backup plan for essential items to avoid idle labor days.
- Incorrect measurements: Re-measure three times before cutting; use a square and chalk line. If a cabinet gap occurs, use 1/8″ shims rather than sanding down cabinet faces.
- Tile lippage and uneven flooring: Use a straightedge frequently during tile lay and choose flooring installers who use leveling systems for tiles over 12×12.”
- Paint adhesion failures: Ensure surfaces are cleaned, scuffed, and primed. For glossy surfaces, degloss with 120-grit sandpaper and use a bonding primer.
- Electrical/trade coordination: Schedule plumbing and electrical rough-ins before insulating and drywall—coordinate with subcontractors and book inspections in advance.
- Dust and contamination control: Create negative-pressure with a box fan and HEPA-rated air scrubbers for significant demo; seal vents to avoid HVAC contamination.
- Permitting surprises: If an inspector requests additional work, get a written scope and a cost estimate before proceeding. Reference local codes at your municipal office or the government permits guide.
- Budget creep: Freeze scope after two change orders; use contingency only for documented unforeseen items and log every change.
- Tool malfunctions: Keep a small spare parts kit (extra blades, bits, belts). For specialized tool failures, rent a replacement the same day to keep schedule.
For additional professional strategies and troubleshooting guides, see:
expert home improvement advice and strategies
Transition: after finishing work, set routines to preserve your renovation investment.
Post-Renovation Tips and Maintenance
After a renovation the work isn’t finished until you protect it. Implement simple maintenance routines and keep records.
- Clean and inspect seals and caulk every 6 months; re-caulk if shrinkage >1/8″.
- Warranties: file appliance and manufacturer warranties immediately; photograph serial numbers and receipts. Keep a digital folder.
- Surface care: for wood floors, use manufacturer-recommended cleaners and recoat every 5–10 years depending on wear.
- HVAC and vents: clean filters monthly for the first six months post-construction to remove fine dust.
- Schedule minor touch-up paint sessions annually for high-traffic areas.
For styling and finishing touches after your renovation, consider these resources:
DIY home decor ideas to personalize your space
handmade crafting for unique decor
home repair tips and maintenance cost estimates
For additional DIY project ideas to refresh spaces later on see:
DIY project ideas and tips for home
Transition: small preventative actions protect your investment and reduce long-term costs.
Conclusion and Encouragement for DIY Enthusiasts
DIY home renovation can be both rewarding and cost-effective when approached with a clear plan, conservative budgeting, correct tools, and respect for permits and safety. Start small, document your process, and iterate—this approach builds confidence and reduces risk. Take one well-planned project from start to finish, and you’ll be ready for the next.
Ready to start? Draft your scope today, order long-lead items, and commit to weekly cost tracking. For a full list of project ideas and extended tutorials, return to the pillar resource:


