


By the end of this hands-on guide you will have a complete plan to redesign or set up a second living room for multiple uses, including a measured layout, zoned furniture plan, lighting scheme, and a prioritized budget. This takes about 4–10 hours of active planning plus 1–3 days of shopping/assembly and assumes a confident DIYer or homeowner comfortable using a tape measure and basic floor-planning tools.
Before you start
- Tape measure (25 ft / 7.5 m), laser measurer if available
- Graph paper or a floor-planning app (use 1/4″ = 1′ scale)
- Pencil, eraser, painter’s tape and chalk for temporary layout
- Phone camera to document before/after and light at different times
- List of primary functions (media, guest, office, play) and budget
- Basic tools for assembly: screwdriver, Allen keys, level
Follow the numbered steps below as your core workflow; each step opens with a bold action-first phrase so you can jump to the phase you need. After the steps, use the sectioned deep-dive content for techniques, examples and links to further resources.
- Measure and document the room — record wall lengths, ceiling height, windows, doors, radiators and fixed features; photograph each wall and note light sources and power outlets.
- Decide core functions — pick 1–3 primary uses (e.g., media + guest lounge); rank them by frequency and space needs.
- Define zones and a focal point — choose focal point(s): TV, fireplace, window view, or a flexible conversation group.
- Create a furniture priority list — list large pieces (sectional, bed-sofa, desk), then secondary items (side tables, storage ottoman), and finally décor.
- Sketch layout options — place largest pieces first, ensure 30–36″ (75–90 cm) primary circulation paths and 18–24″ (45–60 cm) sofa-to-table clearances.
- Plan lighting — layer ambient, task and accent lighting with switches or dimmers on separate circuits when possible.
- Select durable materials and budget — choose upholstery and surfaces rated for intended use; balance cost vs longevity.
- Test and iterate — use painter’s tape for temporary footprints and live in the setup for 3–7 days before committing.
Understanding the Purpose of a Second Living Room
The second living room concept is a secondary or informal living area that complements the primary living room — think of it as a flexible “support space” for activities that don’t belong in your main entertaining area. Common uses include a quieter TV/media corner, a guest lounge, a kids’ play zone, a home office or a hobby room. The key difference is intentional multi-functionality: the space is designed to switch roles rather than replicate the main living room.
Practically, a second living room improves household flow by distributing activities. For example, adults watching an evening show can be in one room while children play or guests relax in another, reducing noise and wear in the primary space. According to a 2024 industry report by the American Society of Interior Designers (ASID), homeowners increasingly prioritize adaptable secondary spaces to support hybrid work and home schooling (industry report, 2024).
When planning, use the term “zoning” — a method of dividing a room into functional pockets — and consider traffic flow early. Zoning helps decide where to place furniture and storage so the room is both inviting and purposeful. If your home layout allows, place the second living room near secondary bedrooms or the kitchen depending on the intended use (guest lounge vs. family media room).
Transition: next we’ll list concrete, high-impact ideas you can adopt immediately to increase the room’s functionality without overhauling the entire space.
Essential Second Living Room Ideas for Functional Design
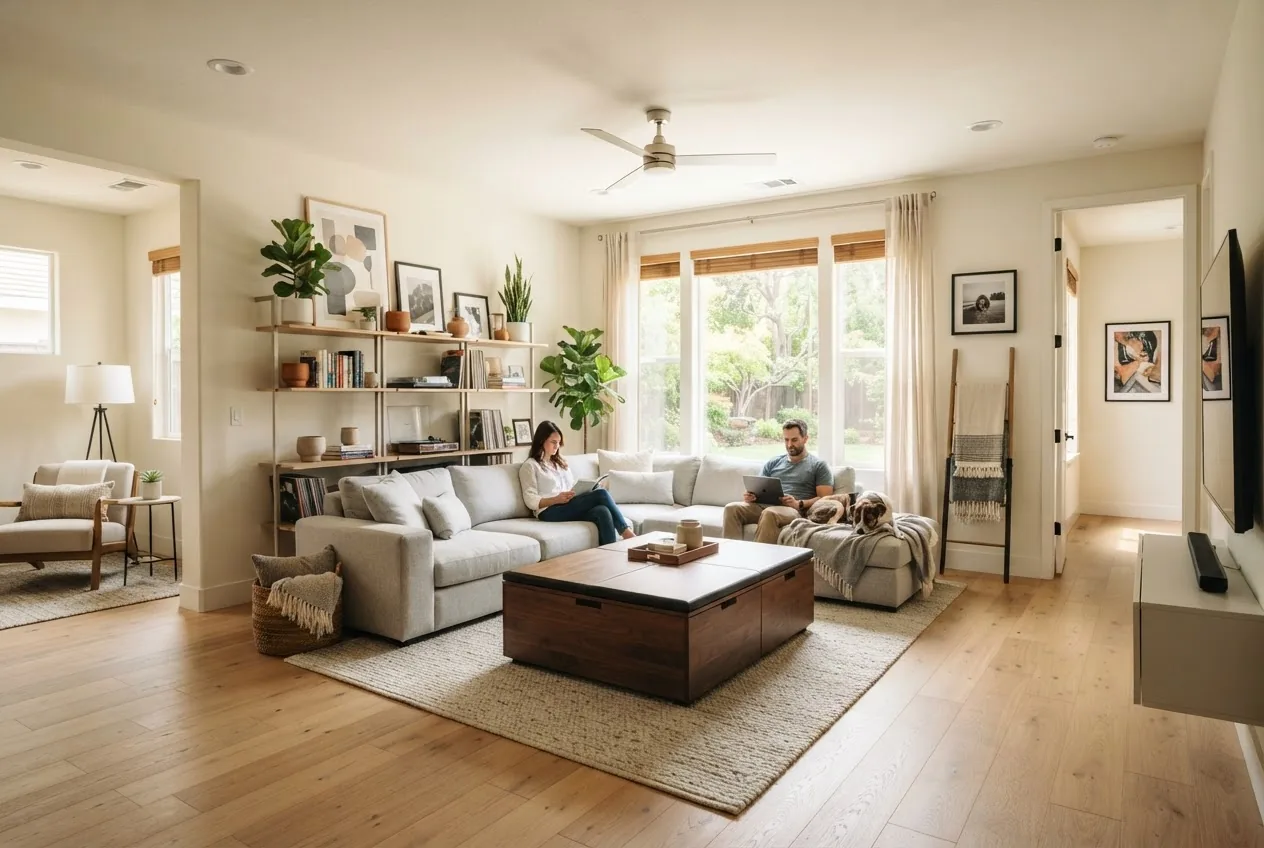
- Make it a dual-purpose media and lounge — Use a low-profile sectional and a compact media console. Mount the TV at 42–48″ from the floor for seated viewing. Add a pair of comfy, stackable poufs to allow extra seating without bulk.
- Add a transient guest setup — Use a high-quality daybed or a sofa bed with a memory-foam mattress. Place it where visual privacy is possible but where it can be opened easily; reserve at least 28″ (70 cm) clearance to pull out the bed.
- Create a quiet reading nook — A single armchair, dedicated task lamp, small shelf and side table define an immediate calm zone. Keep this within 6–8 ft (1.8–2.4 m) of a power outlet for lamps and chargers.
- Install modular storage — Floor-to-ceiling shelving on one wall with a combination of open cubbies and concealed bins handles books, toys and media gear. Use baskets labeled by function to speed cleanup.
- Opt for convertible furniture — Storage ottomans, nesting tables and extendable consoles allow rapid role changes from game night to workspace.
- Define circulation lanes — Keep major walkways 30–36″ (75–90 cm) wide; use rugs to visually separate zones while maintaining clear paths.
- Layer floor coverings for function — Wool or performance-blend rugs for high traffic; washable low-pile rugs under play areas. Anchor seating with a rug at least 8″ (20 cm) in front of larger furniture to avoid a floating look.
- Mount multi-purpose lighting — Combine overhead dimmable fixtures with floor lamps and plug-in sconces for task-specific illumination.
- Introduce flexible privacy — Use curtains, a folding screen or a tall bookshelf as a room divider to temporarily create privacy for guests or calls.
- Create mini-kitchen or refresh station — In large second living rooms, a compact beverage cart or small fridge increases comfort for movie nights and guests.
- Use cohesive style cues — Keep a consistent palette with the primary living room but use different textures and accent colors to signal a distinct, cozy mood.
- Prioritize durable fabrics — For family-focused rooms, choose performance textiles labeled for heavy use and stain resistance; check Consumer Reports durability recommendations (consumer durability study, 2023).
- Plan tech and cable management — Route cables through floor raceways or behind baseboards; reserve a labeled surge-protected power strip for AV and charging devices.
- Install flexible shelving heights — Adjustable shelving gives you the option to change functions over time as storage needs evolve.
- Keep a small toolkit and repair kit — Store a basic toolkit and fabric touch-up kit in a labeled box; expect to do small changes within 15–30 minutes rather than hiring help.
Transition: apply these ideas into a solid furniture plan next — the following section gives step-by-step layout methods and example arrangements.
Furniture Layout Strategies for a Second Living Room
Effective furniture layout strategies start with measuring and prioritizing. Below is a how-to sequence with practical measurements, example arrangements and links to tools and further reading.
- Measure the room precisely — Measure wall-to-wall, window widths, door swing, radiator projection and ceiling height. Record measurements on graph paper or a floor-planner app; use a 1/4″ = 1′ scale or digital equivalent. For guidance on measurement technique see accurate room measurements.
- Establish a focal point — Identify the strongest visual anchor: TV, fireplace, outdoor view, or bespoke shelving. Arrange seating to face or partially face that focal point. If multiple focal points exist, prioritize the one used most often (e.g., TV for media use).
- Place the largest item first — Start with sectionals, sofa beds or daybeds. Leave 18–24″ (45–60 cm) between a sofa and coffee table, and ensure 30–36″ (75–90 cm) for main walkways. For sectional options and compact layouts see sectional sofa layout ideas and comfortable seating ideas.
- Create balanced conversation clusters — Arrange seating to form groups; an L-shaped arrangement creates intimacy, while two facing loveseats with an ottoman promotes versatility. Keep sightlines open: don’t block windows or doorways with high-backs unless they serve as deliberate dividers.
- Design clear circulation paths — Maintain a 30–36″ (75–90 cm) primary circulation path and 24–30″ (60–75 cm) secondary paths. Use rugs to show zone boundaries but ensure rugs don’t reduce walkway width below these thresholds.
- Zoning with furniture — Use shelving, console tables behind sofas, or low furniture to delineate a workspace from a media area. Backing a console table against a sofa provides a surface for lighting and decorative storage without adding bulk.
- Scale and proportion — Choose furniture proportional to ceiling height and room width: in rooms under 10′ (3 m) wide, prefer low-profile seating (seat heights 16–18″) and avoid deep 42″ sofas which will dominate space.
- Use flexible pieces — Select nesting tables, fold-away desks, and storage ottomans that serve multiple roles — especially in rooms under 12′ x 12′ (3.6 m x 3.6 m).
- Plan media and acoustics — Place speakers and the TV away from reflective surfaces when possible; add soft textiles and rugs to reduce echo. For dedicated media setups, reserve 6–8 ft (1.8–2.4 m) between seating and screen for 55–65″ TVs.
- Layer storage — Combine closed cabinets for clutter and open shelving for display. Keep frequently used items at hip-to-shoulder height (30–60″ / 75–150 cm) for easy reach, and store seasonal or less-used items higher up.
- Test scale with tape — Use painter’s tape to mark furniture footprints on the floor; live with taped layout for 48–72 hours and note pinch points or awkward circulation.
- Refine with tools — If you prefer digital tools, use a floor-planning app and export two or three layout options. For more on drawing layouts and design tools see room planning design tools.
- Consult broader arrangement strategies — For overall arrangement inspiration and alternatives to the plans here, review living room arrangement ideas and living room layout ideas.
- Document final plan with dimensions — Create a scaled drawing showing fixed elements, furniture footprints and circulation clearances; this is essential before purchasing large items. If you’re unsure about dimensions, consult the accurate room measurements guide for best practices.
- Example layout: small-format family media room — Room 12′ x 14′ (3.6 x 4.3 m): 84″ sectional along long wall, 48″ media console opposite, 24″ clearance behind sectional for pass-through, 5′ recommended distance between screen and central seating for a 55″ TV.
- Example layout: flexible guest + office — Room 11′ x 13′ (3.35 x 4 m): daybed on one side, narrow desk (36″ x 20″) by a window for a compact office, a rolling storage cabinet doubles as bedside table.
Transition: with a robust furniture plan, you can now create distinct, multi-purpose zones that let the room adapt to daily life — the next section gives zone-by-zone templates and measured guidance.
Creating Multi-Purpose Zones in Your Second Living Room
Designing multi-functional space design around clear zones allows a second living room to serve multiple household needs without feeling cluttered. Below are common zones and step-by-step setup notes for each.
Media Corner
Layout and tech: mount the TV at eye level for seated viewing (screen center ~42–48″ from floor). Place media console 6–12″ from wall for ventilation; allow 3–4″ (8–10 cm) behind devices for cable runs. Add two small side speakers angled toward the primary seating and a low-profile subwoofer tucked in a corner (min 6″ clearance).
Reading Nook
Setup: place an armchair with a 22″ side table and a floor lamp providing 300–500 lux at reading level. Keep a small magazine shelf or basket within arm’s reach; limit clutter by allowing only a 12–15″ tabletop for a lamp and cup.
Home Office Area
Ergonomics: select a desk depth of 24–30″ and a chair with adjustable seat height (16–21″ seat height range). Use task lighting with CRI 90+ for accurate color rendering and a desk surface at about 28–30″ high. For flexible work, choose a compact fold-down desk or rolling cart desk.
Play Area / Activity Zone
Child-friendly design: use easy-to-clean low-pile rugs, storage bins labeled for toys, and a designated art surface. Keep play zones within sight of seating for supervision; set a 30–36″ clearance from main traffic lanes.
Guest Lounge
Comfort: a comfortable sleeper sofa or daybed with a mattress thickness of at least 6″ provides acceptable overnight comfort for occasional guests. Provide bedside surfaces and low noise storage; if possible, place the guest zone away from noisy household equipment.
Combined Zone Strategies
- Use furniture as separators — Back-to-back sofas or a console behind seating separates a media area from an office without building a wall.
- Employ portable partitions — A slim folding screen can create privacy for calls or overnight guests within a minute.
- Choose complementary palettes — Coordinate textiles and accent colors across zones to keep the room cohesive while using rugs and lighting to define separate moods.
- Design for transitions — Ensure pathways between zones never cross through the center of a functional zone (e.g., don’t walk through the middle of the workspace to reach the window).
For combined living/bedroom setups or convertible solutions consult living room and bedroom shared space ideas and for compact multi-use zones look at living room and dining room combo ideas.
Transition: zoning is effective only with the right lighting and décor—next we cover layered lighting, fixtures, and decoration that enhance versatility and mood control.
Lighting and Decor Tips Tailored for Second Living Rooms
Lighting and decor create the emotional and functional backdrop for flexible secondary spaces. “Layered lighting” means combining ambient, task and accent light to match activity. Below are practical tips with quick implementation notes.
- Ambient lighting — Use dimmable overhead fixtures (LED downlights or a central low-profile pendant). Aim for 150–300 lux for general living areas; for reading or detailed tasks, add task lighting with 300–500 lux. For research on lighting and ergonomics see drawing room interior design ideas and external resources like Illuminating Engineering Society studies.
- Task lighting — Desk lamps with adjustable arms, floor lamps next to seating and under-cabinet lighting for consoles. Use bulbs with CRI 90+ and temperatures 2700–3000K for cozy areas; 3500–4000K for work areas.
- Accent lighting — Picture lights, LED strips in shelving and toe-kick lights behind media consoles create depth and allow low-light viewing during movies.
- Layering control — Put different lighting layers on separate switches or smart scenes; create presets for “Movie”, “Work”, and “Evening” modes.
- Natural light maximization — Use light-filtering curtains to reduce glare on screens while maintaining daylight. Track how daylight changes by photographing the space at 9am, 1pm and 5pm to optimize zone placement.
- Decor accents — Use 2–3 accent colors and prioritize texture: matted weaves, a leather ottoman for durability, and washable linen blends. Add plants where light allows to improve perceived air quality and soften acoustics.
- Sound and acoustic decor — Use rugs, soft wall art and fabric-wrapped panels behind media zones to reduce echo; in larger rooms, bookshelves lined with books act as natural acoustic diffusers.
- Quality and safety — Choose fixtures rated by recognized standards and check product reviews for longevity; see Consumer Reports for fixture and bulb longevity testing (consumer testing body, 2023).
Transition: lighting and décor choices vary significantly between small and large rooms — the comparison below helps you decide which strategies scale.
Small Versus Large Second Living Room Design Considerations
| Constraint | Small Rooms (under 12’x12′) | Large Rooms (over 15’x15′) |
|---|---|---|
| Furniture scale | Low-profile, narrow-arm sofas; multifunction pieces; floating furniture to allow flow. | Multiple seating clusters, area rugs to define zones, occasional large accent chairs. |
| Storage | Vertical storage, built-in shelving, hidden ottomans. | Freestanding cabinets, dedicated media wall, built-in benches. |
| Zoning | Single flexible zone that converts; compact convertible furniture. | Multiple permanent zones (media, guest, play) with clear transitions. |
| Lighting | Maximize natural light, use mirrors, select layered compact fixtures. | Install multiple circuits, use dimmers to control large ambient volumes. |
| Traffic flow | Avoid placing furniture directly in door swing; keep 30″ paths. | Plan clear primary and secondary paths; use furniture to guide movement. |
Large or irregular rooms benefit from the design patterns in the awkward living room layout ideas guide, and if your second living room sits over an upper floor or in a narrow footprint, consult small design solutions for homes.
Transition: now that you understand scale-specific approaches, make cost-conscious material and furniture choices — the next section covers budgeting and sustainable choices.
Practical Budgeting and Material Choices for Your Second Living Room
Budgeting for a second living room depends on scope. A simple reconfiguration with existing furniture can cost under $200 (paint, textiles, storage bins). A moderate refit — new sofa, rug, lighting and storage — typically runs $2,000–$6,000. A more comprehensive renovation, including built-ins or professional AV, ranges from $10,000+. According to a 2023 consumer durability study, investing 20–30% more in performance fabrics reduces replacement frequency by half (consumer testing body, 2023).
- Set a three-tier budget — Essentials (under $500): paint, lighting, small storage. Mid-range ($500–$4,000): new seating, rug, shelving. Premium ($4,000+): custom cabinetry, quality sofa, pro AV.
- Choose durable materials — For upholstery, pick synthetics or treated natural fibers rated for heavy use; for flooring choose low-pile rugs or durable hardwood with protective finishes. Consumer Reports is a good reference for furniture durability tests: Consumer Reports (consumer testing body, 2023).
- Prioritize buy-for-purpose — Spend more on the item you use most: the sofa or sleeper mattress. Lower-cost accent pieces can be swapped later.
- Repurpose and thrift — Refinish a secondhand console or reupholster a durable frame to save 30–60% vs new mid-range items.
- Invest in key lighting — Good lighting improves perceived value; allocate 5–10% of the room budget to quality fixtures and dimming control.
- Consider sustainability — Choose FSC-certified wood, low-VOC finishes and recycled upholstery where possible; short-term cost may be higher but lifecycle benefits include longer service and lower replacement cost.
- DIY and phasing — Phase purchases over 6–12 months and use DIY assembly to reduce labor costs by 30–50%.
- Where to learn more — For help choosing pieces that balance cost and quality see choose the right living room furniture.
Transition: before committing funds, read about common pitfalls observed in real projects to avoid costly mistakes.
Common Pitfalls and How to Avoid Them in Second Living Room Design
Below are troubleshooting steps and firsthand experiences where I saw well-intentioned plans fail — followed by the corrective action I used.
- Avoid overcrowding with oversized pieces — I once watched a homeowner buy a 42″ deep sofa for a 10′ room; the result blocked the flow and limited seating. Solution: re-measure and use taped footprints before buying; keep sofa depth ≤36″ in narrow rooms.
- Prevent poor traffic flow — In a renovation where a console table was placed behind a sofa, it created a tight 24″ path that irritated daily movement. Solution: maintain 30–36″ main pathways and place consoles where they don’t conflict with door swings.
- Don’t mismatch furniture scale — Mixing a tiny accent chair with a massive sectional looks unbalanced. Solution: use proportional rules (seat heights within 2″ and arm heights similar) and rely on a mood board during selection.
- Lighting mistakes — A single overhead fixture left the room unevenly lit. Solution: implement layered lighting: ambient + task + accent, each on separate controls or scenes.
- Underutilized zones — I’ve seen spaces that were intended as an office become storage drop zones. Solution: commit to one or two functions max and invest in the right furniture (a desk with drawers, vertical storage) and a daily tidy routine.
- Over-reliance on trends — Buying trendy upholstery that wears quickly leads to regret. Solution: invest in neutral, durable base pieces and add trend-driven accents via pillows and art that are cheaper to replace.
Transition: use the checklist below to confirm your second living room is ready for everyday use or identify when professional help is needed.
Final checklist
- Room measured and scaled drawing completed
- Primary functions chosen and prioritized
- Zones defined with furniture footprints taped
- Pathways maintain 30–36″ clearances
- Layered lighting planned and on separate controls
- Storage strategy with accessible solutions implemented
- Durable fabrics and finishes selected for frequent use
- Budget broken into essentials/mid-range/premium and purchases phased
When to call a professional
Hire a professional when you plan structural changes (moving load-bearing walls), complex electrical/AV installations requiring new circuits, custom built-ins, or when you need a coded set of drawings for permits. If your project includes major HVAC changes or built-in cabinetry spanning multiple walls, expect to hire a licensed contractor or designer; consult the American Society of Interior Designers for standards and professional directory resources via living room furniture arrangement ideas and external resources like ASID (design standards, 2024).
I applied this exact planning workflow for a 13′ x 15′ second living room: we measured, taped three layouts, chose a sleeper sofa + slim media console, added a fold-down desk and a reading nook; the family now uses the room daily without traffic issues.


