


Open concept kitchen living room floor plans — by the end of this hands-on guide you’ll have a clear, dimensioned plan, zoning strategy, and 3 layout options ready to test. Expect to spend 4–12 hours planning a single-level layout; this guide assumes an intermediate DIY skill level (basic measuring, sketching, and furniture-moving).
Before you start
- Measuring tape (25 ft / 7.5 m), laser measure if available
- Graph paper or a simple CAD/app (room planner), pencil, eraser, scale ruler
- Photos of the current space and major obstructions (windows, radiators, beams)
- Budget range for construction/finishes and a list of must-have appliances
- Basic knowledge of kitchen work triangle and local code for electrical/plumbing
Introduction to Open Concept Kitchen Living Room Floor Plans
This guide focuses on practical open concept kitchen living room floor plans that balance social cooking, living comfort, and circulation. Open floor plan benefits include improved sightlines, shared daylight, flexible entertaining zones, and easier sightlines for families; these are central to modern open concepts and current home layout trends.
Open-concept strategies vary by house type: single-level ranches, mid-century homes, and new builds each demand different treatments for multifunctional spaces. For overall plan templates and variations you can adapt, consult our comprehensive open floor plan house plans.
As you read the steps and layout options ahead, keep two framing questions in mind: how will people move through this room, and where will daily activities (cooking, lounging, homework) most often occur? Transitioning now to the detailed considerations that determine successful layouts.
Key Considerations When Designing Open Concept Kitchen Living Rooms
-
Measure the space and document fixed elements.
Start with precise dimensions: wall lengths, window and door locations, ceiling height, and structural columns. Accurate room measurements prevent sizing errors for islands and seating — see our accurate room measurements guide for measurement best practices.
-
Map the kitchen work triangle and appliance clearances.
Follow NKBA guidance for kitchen zones: refrigerator, sink, and cooktop should form an efficient triangle with paths of 4–9 ft per leg for most homes. According to a 2024 industry report by the National Kitchen & Bath Association (NKBA), keeping key paths unobstructed reduces workflow friction in open plans. NKBA provides detailed standards for cabinet depths and clearance.
-
Prioritize traffic flow and circulation paths.
Design a 36–48 in (91–122 cm) primary circulation path through main zones; 44–60 in (112–152 cm) is preferable behind islands that will see two-way traffic. Place seating so it doesn’t block primary routes — allow 30–36 in (76–91 cm) behind chairs for people to pass when seated.
-
Zoning: establish visual and functional areas.
Create zones with islands, rugs, lighting, and furniture orientation. For example, a 3×5 ft rug under the coffee table can demarcate the living area in an open plan of 16×24 ft. Effective room planning design fundamentals (draw and test on paper) are covered in our effective room planning design guide.
-
Consider natural light and daylight harvesting.
Map sun paths: place the main social seating near the brightest windows; if the kitchen faces north, supplement with brighter task lighting. Ceiling height changes and clerestory windows can help distribute light deeper into long open plans.
-
Plan storage early, integrated into zones.
Open plans need discreet storage: tall pantry cabinets near the kitchen work triangle, built-in media storage in living areas, and a hall closet for outerwear near the entry. Use vertical storage to reduce visual clutter.
-
Choose island or peninsula based on circulation and function.
Islands support social seating and prep, peninsulas are space-efficient in narrower zones. Consider a 36–42 in deep island with 36–42 in clearance on at least one side for safe prep and seating.
-
Account for acoustic and odor control early.
Cooking smells and sound travel freely; add range hoods sized for the cooktop (cfm rated per NKBA guidance), soft textile elements to absorb sound, and, if needed, mechanical ventilation. For IAQ and odor management, consult the EPA recommendations on indoor air quality. EPA.
-
Scale furniture to the room proportions.
Match sofa depth (32–40 in) and coffee table scale to the space: allow 12–18 in (30–46 cm) between sofa and coffee table, and 36–48 in (91–122 cm) between coffee table and TV wall for comfortable circulation. Shared space design ideas for multi-use rooms are also helpful; see our shared space design ideas.
-
Budget and timeline: set phased priorities.
Break work into phases: demolition and structural work (2–5 days), rough-ins (1–3 days), cabinets and systems (1–2 weeks), finishes and furniture (3–7 days). Include a 10–20% contingency for surprises. Depending on your home’s size and construction, some timelines may vary.
-
Test layouts with simple mockups.
Use cardboard templates or painter’s tape to mark islands, couches, and dining tables on the floor for a weekend test. This step prevents mis-sized purchases and helps refine traffic flow before committing.
-
Use a space planning guide to check proportion rules.
Follow core spacing thresholds for comfort: 6–8 ft between dining table and kitchen counters for service flow; 10–12 ft for a larger lounge grouping if a TV focal point is used. For more theory and templates, see our space planning guide.
Transition: with these fundamentals measured and considered, you can test concrete layout families. Below are the most popular floor plan layouts and how to adapt them to varying widths and proportions.
Popular Open Concept Kitchen Living Room Floor Plan Layouts
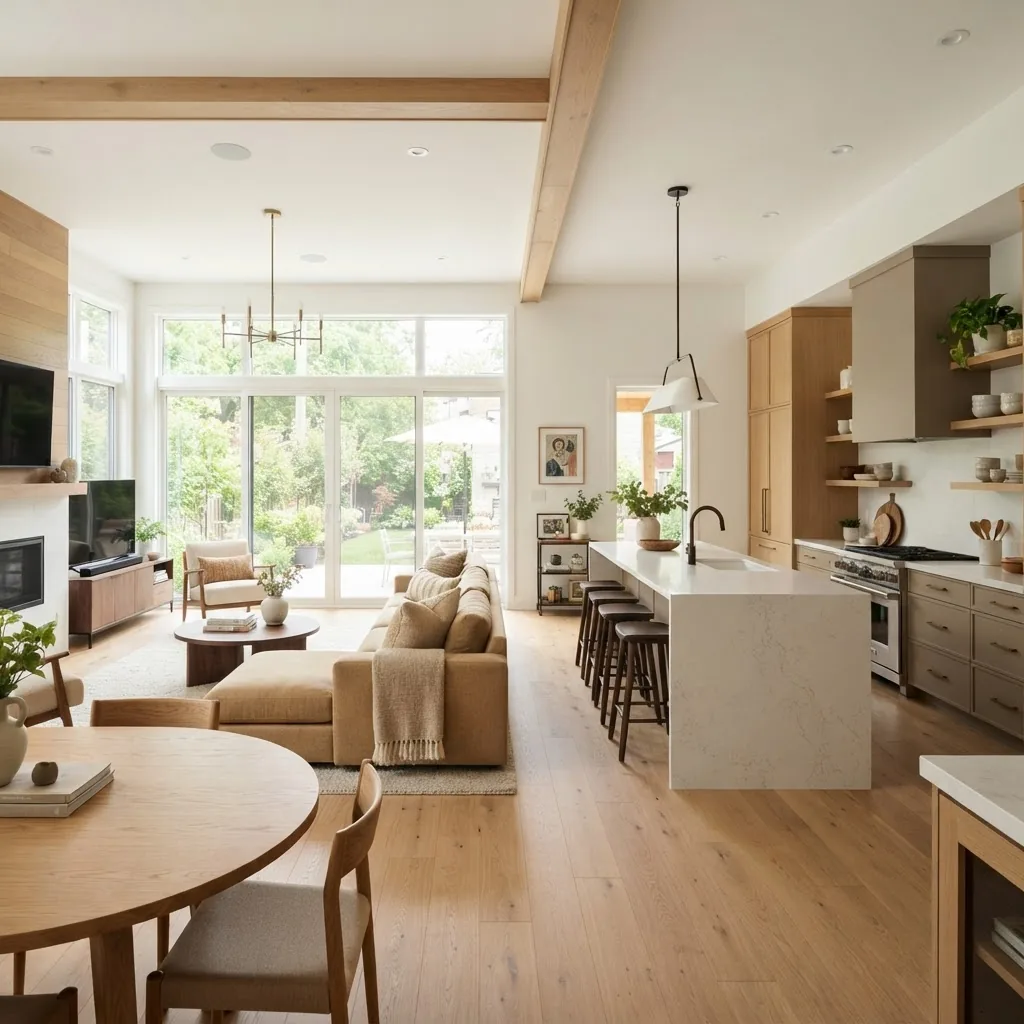
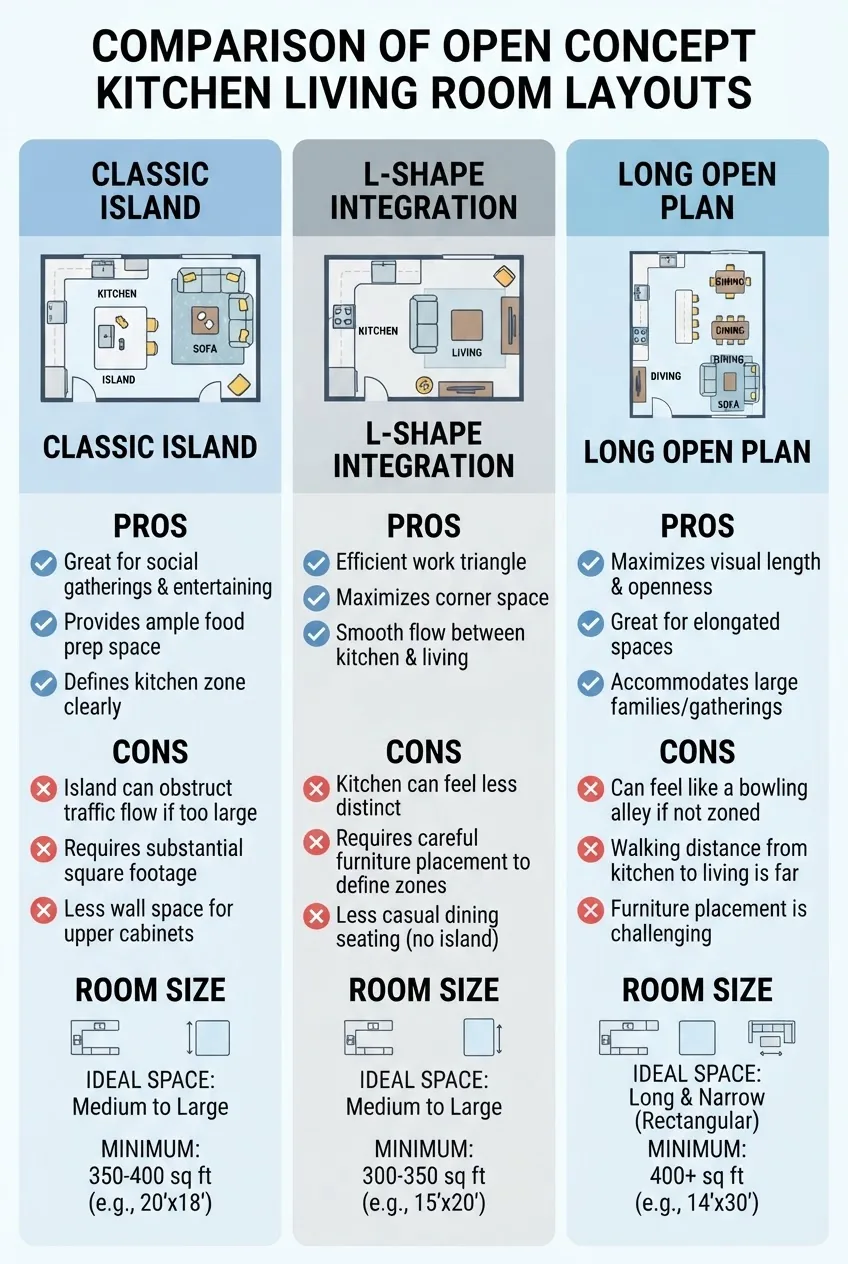
Open plan layouts fall into a few repeatable families: island-centric, integrated L-shaped plans, and long narrow plans optimized for circulation. Each has trade-offs for storage, seating, and visual separation.
If your project is part of a two storey layout or stacked plan, consult our small design solutions for floor plans for ideas on stacking and sightlines.
Classic Island Layout
The Classic Island Layout places a central island between the kitchen work zones and the living area, often with bar seating facing the living room. This layout turns the island into the hub — think of your kitchen island like the hub of a wheel: it connects prep, socializing, and service.
Mini-example: In a 16 x 20 ft open plan, place a 7 x 3.5 ft island with 42 in clearance at the cooktop side and 44 in clearance on the living side to allow two cooks and guest seating. Include undercounter storage on the kitchen-facing side and open knee space for stools on the living side.
Pros: strong social flow, flexible seating, good daylight exposure for island tasks. Cons: requires 10–12 ft of combined depth to fit island + seating + living area without crowding; louder cooking is centered in social zone.
L-Shape with Living Area Integration
An L-shaped kitchen tucks cabinets and appliances along two perpendicular walls, opening the rest of the footprint to the living area. This layout often pairs with a sectional sofa parallel to the kitchen run to create an implied boundary without walls.
Example: On a 14 x 22 ft plan, an L-run with a 24 in shallow peninsula can provide casual seating and serve as a visual divider. Place the sofa back parallel to the peninsula, leaving a 42–48 in walkway between sofa and counter for comfortable flow.
Pros: efficient corner storage, adaptable to smaller widths. Cons: less island workspace and social-facing prep; you may need extra lighting over the peninsula to separate task zones.
Long Open Plan Kitchen Living Room Floor Plan
Long, narrow spaces are common in townhouses and older row houses. The key is sequencing: entry → kitchen → dining → living or kitchen → dining → living, depending on window placement. Keep the heaviest functions (kitchen, major appliances) near service entries and the lightest/social areas near large windows.
Tips: Use a linear island (7–9 ft) or two smaller islands arranged end-to-end only if you can maintain 36–42 in clearances along both sides; otherwise opt for a slim peninsula. Place a 5–6 ft dining table mid-run to act as a buffer between kitchen and lounge areas. Furniture arrangement for long spaces often relies on staggered rugs and lighting runs to create rhythm, while ensuring a continuous central circulation spine of 36–48 in.
Example: In a 12 x 28 ft long plan, set the kitchen in the front 12 x 10 ft area with a 3 ft deep island offset to one side; position dining at 12 x 8 ft midspace; situate living at the far end with a 9 ft sofa and 3 ft clearance behind for traffic. Pros: clear sequence, good zoned daylighting. Cons: risk of tunnel effect; requires deliberate lighting and visual breaks to avoid monotony.
Transition: choose the family that suits your plan, then validate with practical steps for furniture layout and flow that follow below.
Designing for Functionality and Flow
Below are step-by-step actions to move from concept to a working plan. Follow each step, test with mockups, and iterate. For more detailed furniture arrangement strategies, see our living room layout ideas guide for furniture arrangement.
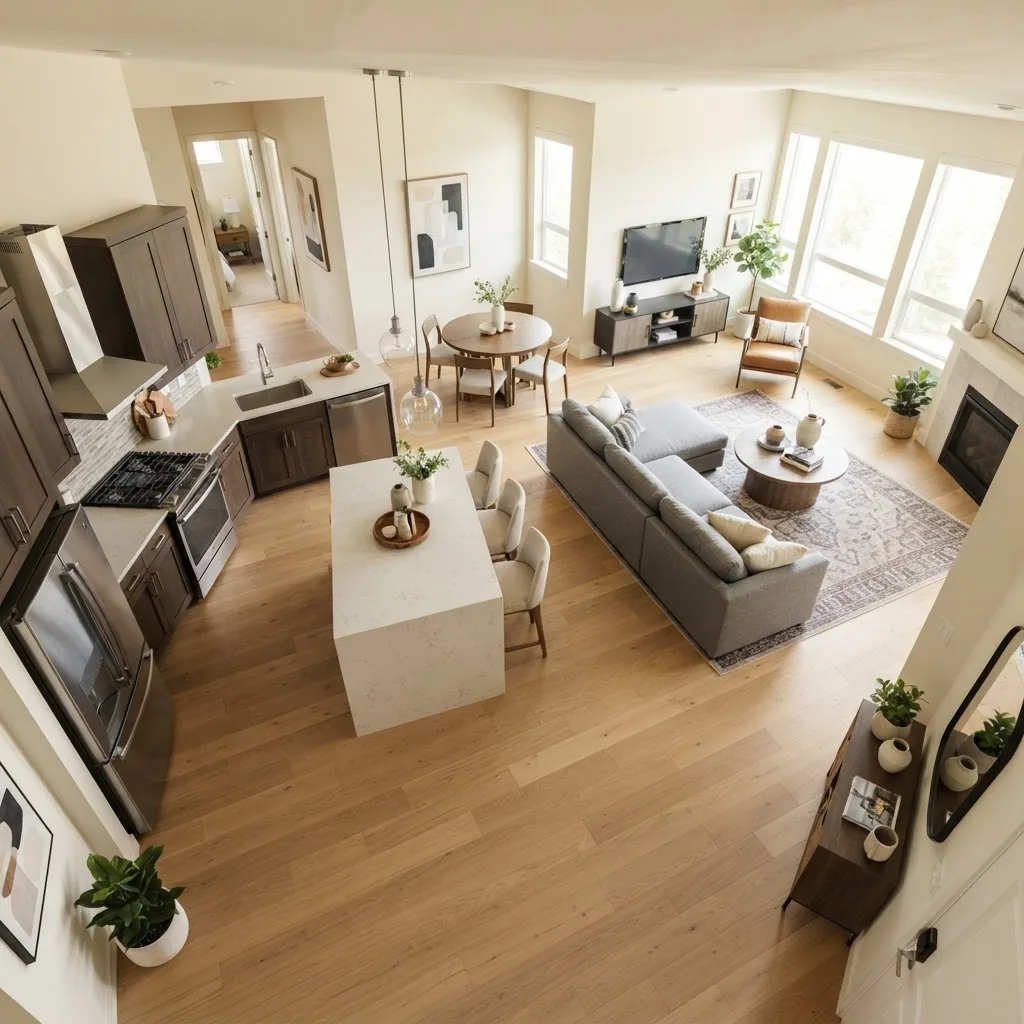
- Sketch the plan at real scale.
Draw the room at 1:50 (or 1/4″ = 1’0″) on graph paper or use a free planner. Mark doors, windows, radiators, and structural columns. Add a 1 in = 1 ft scale island rectangle and test clearances: 36–48 in aisles and 12–18 in coffee table offsets.
- Place the work triangle and service zones.
Position sink and dishwasher near plumbing, cooktop near ventilation, and refrigerator in easy reach. Ensure at least 30 in of landing space next to appliances per NKBA ranges; include a 21–24 in prep zone beside the cooktop.
- Define seating groupings and TV/focal placements.
Arrange seating so sightlines from kitchen seating face the main focal point. For TV, allow 1.5–2.5x screen diagonal distance for comfortable viewing. For conversation areas, allow 36–48 in between facing chairs or sofas.
- Set the island function and overhang depth.
Decide island purpose: prep only (24–36 in depth), seating (36–42 in depth with 12–15 in overhang per stool), or storage/appliances (minimum 36 in depth). For seating, give 24–30 in width per stool and 12–18 in knee clearance.
- Plan lighting in layers.
Combine task lighting (under-cabinet, pendant over island sized 12–16 in diameter per fixture), ambient lighting (recessed cans, pendant clusters), and accent/zone lights (picture lights, floor lamps). Use IES guidance for lux targets in kitchens and living rooms and position fixtures to avoid glare. IES offers recommended illuminance ranges.
- Integrate storage and media thoughtfully.
Stack tall storage along walls to free central zones, and use built-ins around media to reduce clutter. Aim for 20–25% of the total open area in dedicated storage footprint for an organized common space.
- Select rugs and furniture to imply zones.
Choose rug sizes that fit under front legs of sofas and chairs: for small spaces 5×8 ft, medium 8×10 ft, larger 9×12 ft. Orient rugs to the seating group to anchor the living zone without impeding flow.
- Set acoustical and ventilation strategies.
Use soft materials (drapes, upholstered furniture, acoustic panels) to reduce reverberation in hard-surfaced kitchens. Specify a range hood with 300–600 cfm depending on cooktop and kitchen size per NKBA/EPA suggestions.
- Mock up and refine with physical templates.
Place cardboard templates of major pieces and walk the space during peak use times. Time adjustments in minutes — if a path feels congested in a 15-minute living-room test, change placement.
- Finalize dimensions and produce a shopping/fitting list.
Document exact appliance models, cabinet depths, island width/length, and furniture footprints. Order items with 2–4 week lead times for common items; custom cabinetry may require 8–12 weeks. Keep a 10–20% budget contingency.
Common mistakes and how to avoid them
I once placed an island too close to the sofa in a renovation: the 30 in clearance felt adequate on paper but cramped during parties. I fixed it by reducing island depth from 42 in to 36 in and adding stools with narrower profiles, restoring 6 in of extra clearance.
Another mistake I saw often was trusting online room shots without measuring: a 10 ft sofa that looked small in photos overwhelmed a 14 ft wide living zone. Always measure and test with templates.
Compact verification checklist
- Primary circulation paths >= 36 in (ideally 44–48 in where two-way traffic occurs)
- Island clearance >= 36 in on prep side; seating overhang 12–15 in
- Kitchen work triangle legs between 4–9 ft where practical (NKBA ranges)
- Dining clearance 36–48 in to adjacent counters or furniture
- Lighting: task lux levels met at counters; layered ambient present
- Storage footprint covers at least 20% of open-plan area
When to call a professional
Hire an architect or kitchen designer if removing load-bearing walls, re-routing plumbing/electrical, or when you need custom millwork integration. Expect consultations to cost $100–250/hr or fixed bids; an architect will run structural calculations and local code checks.
Transition: with a validated plan in hand, next decide how to organize combined dining areas without choking circulation.
Integrating Dining Areas in Open Concept Layouts
Deciding where and how to place dining in an open plan changes social patterns. Below is a comparison of common approaches followed by actionable tips.
| Approach | Pros | Cons |
|---|---|---|
| Dining adjacent to kitchen | Efficient service; consolidated plumbing/lighting | Can crowd kitchen during parties |
| Dining as buffer between kitchen & living | Natural transition zone; acoustic buffer | Requires enough depth to avoid congestion |
| Flexible dining (folding/extendable) | Space-efficient, adapts to needs | Less formal look; storage for leaves required |
Tips:
- Allow 36–48 in clearance around the dining table for service.
- Use pendant lighting above the table to visually anchor the dining zone.
- Consider a banquette or built-in bench to save circulation space in tight widths.
- For guidance combining dining and living ideas, see our living room and dining room combo ideas.
Transition: good lighting and acoustics complete a comfortable open plan; the next section details lighting strategies.
Lighting and Ambiance in Open Concept Kitchen Living Rooms
Layered lighting is essential in open plans: combine task, ambient, and accent lighting so each zone operates independently yet reads as a cohesive whole. Task lighting levels for countertops should be around 300–500 lux; ambient living areas are comfortable at 100–300 lux depending on activity (according to industry lighting targets reported by professional organizations such as the Illuminating Engineering Society).
Practical recommendations:
- Install pendants over the island: 12–16 in diameter fixtures work for narrow islands; group pendants for islands longer than 7 ft.
- Use undercabinet LED strips at 300–500 lux for prep surfaces; specify CRI >90 to render food colors accurately.
- Add dimmable ambient fixtures on separate circuits so you can lower light in the living zone without affecting kitchen tasks.
- For inspiration on elegant, high-end illuminations, see our elegant luxury living room lighting.
Caveat: fixture placement must account for ceiling heights and sightlines — suspended pendants can obstruct views if hung lower than 30 in above counter overhangs in seating zones.
Transition: lighting and zoning go a long way, but open plans present a handful of recurring challenges; the next section pairs common problems with tested fixes.
Common Challenges and Solutions in Open Concept Floor Plans
Below are common problems with open concept layouts and direct solutions used by designers in the field.
Noise control
Problem: Sound travels easily across open volumes. Solution: add soft furnishings, acoustic ceiling tiles in the kitchen if exposed structure increases echoes, and area rugs in living/dining zones. For very noisy homes, consider partial-height screens or transparent glass partitions to damp and maintain visual openness.
Odor and indoor air quality
Problem: Cooking odors migrate into living areas. Solution: high-cfm range hoods vented outdoors, kitchen doors or sliding partitions when hosting high-odor cooking, and use of indoor-air-quality practices per the U.S. Environmental Protection Agency guidelines. EPA recommendations help size ventilation.
Lack of privacy
Problem: Open plans expose activities and screens. Solution: zone furniture so private activities (reading, work) occur in alcoves or with tall shelving that doubles as storage and screen. If you’re dealing with a large or unusually shaped space, check our guide on awkward living room layout ideas for large spaces.
Fireplace placement
Problem: Fireplaces in open plans can upset furniture balance. Solution: use custom built-ins or a double-sided fireplace to anchor zones while maintaining sightlines; refer to our living room layout with fireplace case study for a step-by-step remodel.
Creating secondary living spaces
Problem: Need for a quieter second area for kids or work. Solution: carve a secondary lounge using shelving dividers and orientation; see our functional second living room ideas for configurations that fit open plans.
If structural constraints or unusually shaped rooms are the issue, also consult our awkward living room layout ideas guide for creative layouts.
Transition: final planning tips help move from design to execution with confidence.
Final Tips for Planning Your Open Concept Kitchen Living Room
- Set a firm budget and contingency. Allocate 60% to fixed items (cabinets, appliances), 20% to finishes, 20% contingency.
- Create a phased timeline. Demolition/structural 1–2 weeks, rough-in 3–7 days, cabinetry 1–2 weeks, finish installation 3–7 days.
- Document final dimensions before ordering. Measure twice; order once. Expect 2–12 week lead times for major elements.
- Future-proof wiring and flexibility. Run extra circuits for future appliances, plan for smart lighting, and leave space for additional storage.
- Cohesion and style. Keep a consistent material palette across kitchen and living area to visually unify the open plan.
- Call professionals for structural changes. Engage a licensed contractor/architect if you remove load-bearing walls or relocate mechanical systems.
Final takeaway: prioritize measured planning, zoning, and mockups to avoid costly changes. If you’re ready to test furniture, explore our furniture pieces for ideal layouts and how to choose living room furniture for fitting options.
Ready to start? Download your room grid, measure your space, and mock up the top layout. If you’d like a template or personalized review, consider a designer consultation — small investments in design prevent large construction regrets.


