


By the end of this guide you’ll have a clear, step-by-step renovation roadmap for an older house: a prioritized scope, realistic costs by room, a design direction that preserves character, and a decision matrix for DIY vs hiring trades. Expect planning and small projects in 2–8 weeks; full structural and systems work typically takes 3–9 months. Skill level assumed: intermediate DIY plus ability to manage contractors.
Understanding Old Home Renovation Basics
Start with the fundamentals: old home renovation differs from modern remodeling because you are working with legacy materials, undocumented changes, and original construction methods. That changes how you approach structural repairs, systems upgrades, and finishes.
Old house renovation challenges often center on hidden issues (rot, outdated wiring, lead paint), and the need to respect historic home restoration priorities while bringing the home up to current building code updates. Early decisions influence cost, timeline and final style: preserve original millwork or replace it? Rewire the entire house or recondition circuits?
This section covers the big-picture planning you’ll return to as each step unfolds: prioritizing structural safety, identifying character elements worth saving, and setting an energy-efficiency baseline. Think of the project like restoring a classic car: keep the defining parts that give it value, but modernize the engine and brakes for daily use.
Key baseline concepts (defined on first use): insulation R-value — a number that measures thermal resistance; load-bearing wall — a wall that supports structural weight above; and historic preservation — practices and standards for keeping significance while allowing repair or limited replacement.
Before you start
- Project binder: site photos, permit copies, contractor contact list.
- Essential tools: flashlight, stud finder, multimeter, moisture meter, pry bar, basic carpentry set.
- Safety gear: N95 respirator (or P100 for lead/asbestos), gloves, eye protection.
- Estimated budget cushion: set aside 20–35% contingency for hidden issues.
- Access to local building codes and historic district rules (if applicable).
Transition: With basics clear, move into a systematic inspection and planning phase that defines scope and unlocks accurate cost estimates.
Assessing Your Old Home: Pre-Renovation Inspection and Planning
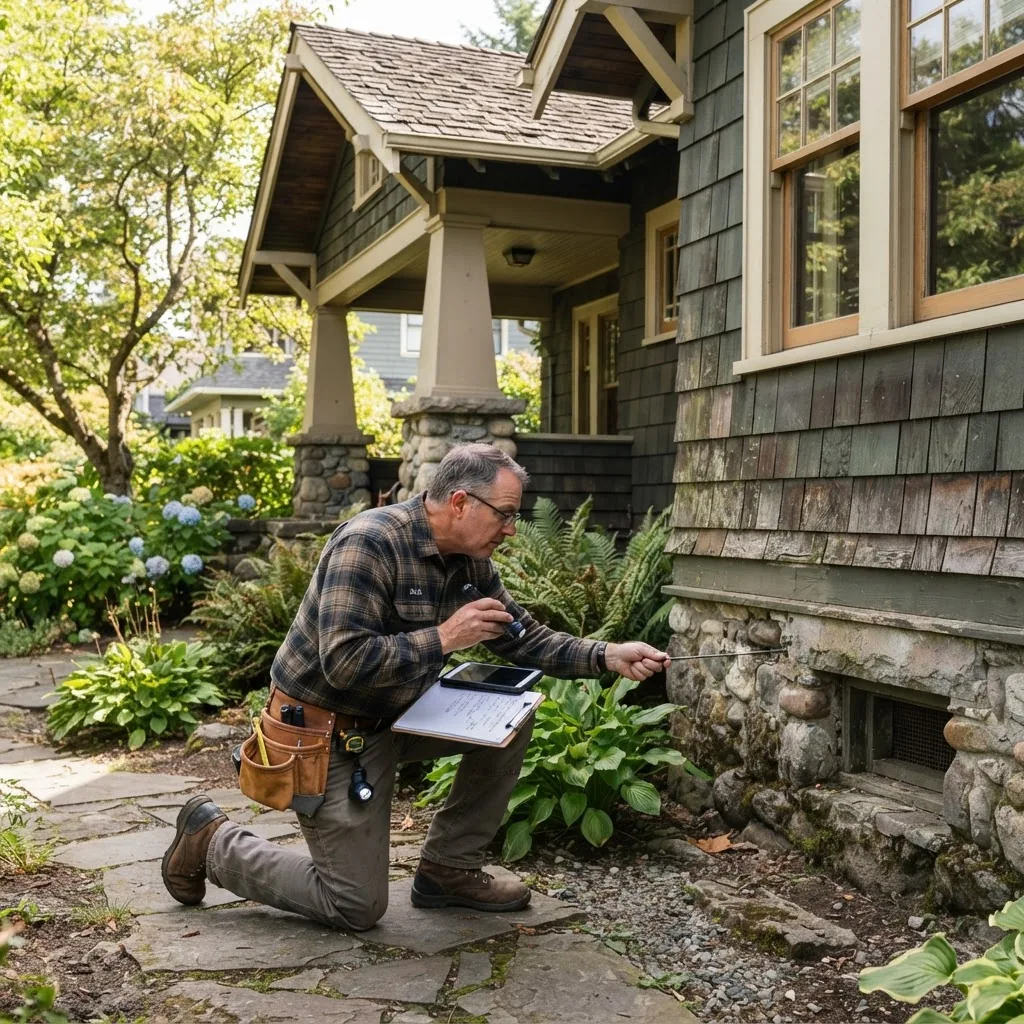
- Hire or perform a full structural assessment. Check foundation stability, roof framing, load-bearing walls, and signs of settlement. If DIY, document cracks wider than 1/8″ in brick mortar, stair-step cracks in masonry, and doors that no longer latch squarely. For complex signs, call a structural engineer.
- Complete systems inspections: electrical, plumbing, HVAC. Use a licensed electrician to test panel capacity and knob-and-tube or cloth-insulated wiring. For plumbing, inspect main stack, supply lines, and drain pitch. Document locations where replacing cast-iron or galvanized pipe would be necessary.
- Look for hazardous materials. Test for lead paint and asbestos-containing materials (insulation, vinyl flooring adhesives, old plaster joint compound). If present, plan for certified abatement contractors — DIY removal is often illegal and unsafe.
- Assess insulation and energy loss. Use a blower door test or infrared scan if possible. Identify attic insulation levels (R-value), wall cavity types, and single-pane windows that may need repair or storm windows.
- Inventory historic features and determine preservation priority. Photograph and catalog original trim, doors, built-ins, stair details, and exterior elements. Decide what must be preserved for historic value versus what can be sympathetically replaced.
- Check permits and zoning constraints. Confirm requirements with your local building department and, if applicable, the historic preservation office. According to a 2024 national building code update, some electrical and structural changes now require updated inspections and documentation. International Code Council and your local authority are primary references.
- Create a phased plan and budget. Prioritize safety and weatherproofing first, then systems, then interior finishes. Phasing example: Phase 1 (foundation, roof, exterior envelope) 2–8 weeks; Phase 2 (systems) 2–6 weeks; Phase 3 (interiors, finishes) 4–12+ weeks.
Step-by-step tool walkthroughs:
- Checking a foundation: Use a 4-foot level and straightedge inside; check for vertical displacement, measure cracks (mark and monitor), and note water entry points. Photograph and measure baseline crack widths monthly.
- Evaluating electrical service: Turn off branch breakers and test with a multimeter at outlets for proper grounding; document any aluminum wiring or retrofitted fuses that need upgrading to a modern breaker panel.
- Inspecting plumbing: Run water to check pressure and watch for leaks under sinks; measure drain speed and listen for gurgles that indicate venting problems.
Transition: After inspection you’ll have a scope and prioritized list — next, use that to build a cost breakdown and realistic budget.
Useful references before you finalize plans: home improvement remodeling guide, and for major rebuild alternatives house kits guide or how to build a home guide.
Cost Breakdown for Old Home Renovation Projects
Accurate budgeting for an old home hinges on inspection findings and the balance between preservation and replacement. Based on Remodeling Magazine’s 2023 Cost vs. Value report and regional contractor averages, expect higher labor and contingency percentages compared with newer homes. Costs vary significantly by region; include a 20–35% contingency.
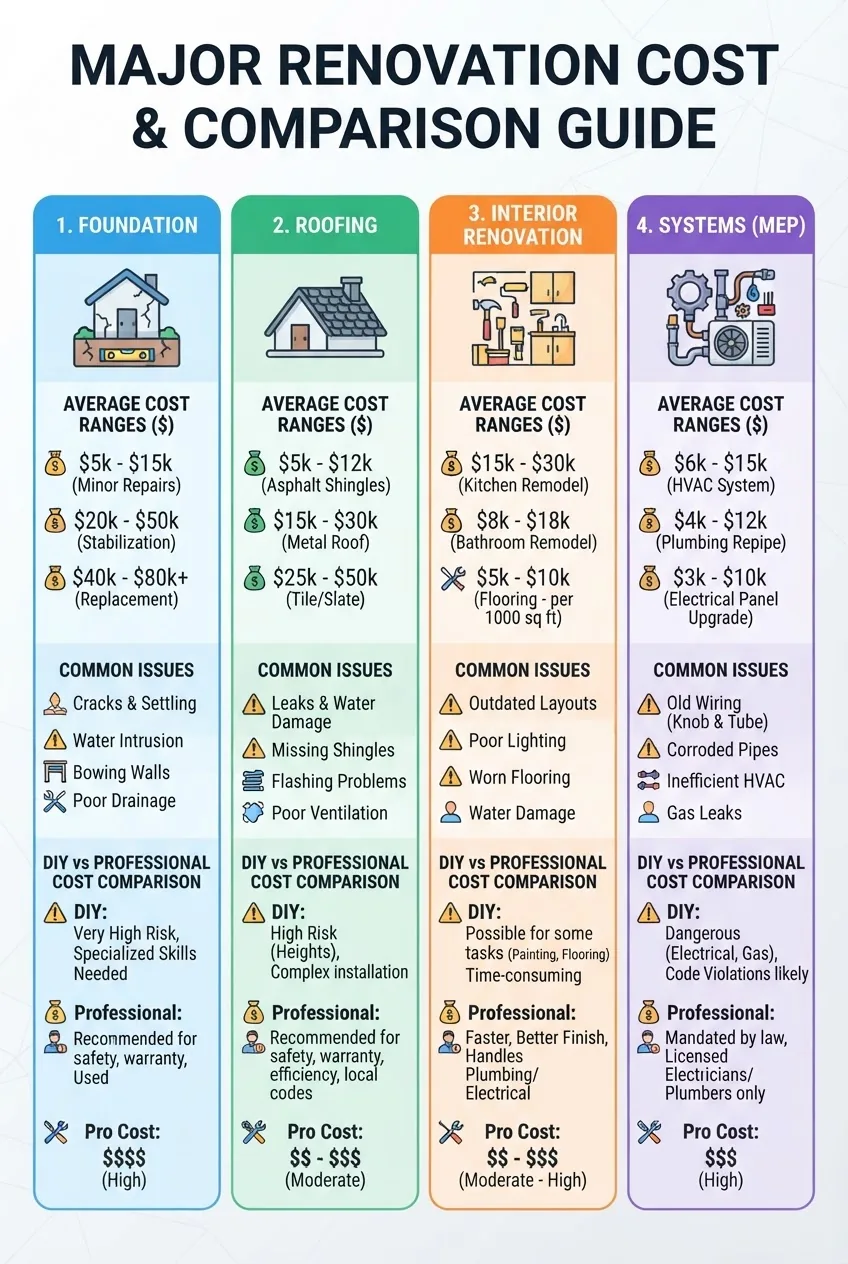
Comparison tables below give typical ranges. All figures are illustrative; substitution and regional labor rates will change totals. According to a 2024 industry report, foundation and systems work account for the largest share of unpredictable costs in older homes.
| Room / Project | Typical Range (USD) | Key Cost Drivers |
|---|---|---|
| Foundation repairs | $3,000 – $25,000+ | Settling, underpinning, drainage |
| Roof replacement | $5,000 – $20,000 | Pitch, historic shingles, structural repairs |
| Full electrical rewire (older homes) | $8,000 – $25,000 | Panel upgrade, knob-and-tube replacement |
| Plumbing system update | $4,000 – $18,000 | Pipe replacement, sewer line |
| Kitchen remodel (mid-range) | $20,000 – $60,000 | Appliances, cabinetry, structural changes |
| Bathroom remodel | $8,000 – $30,000 | Plumbing relocation, waterproofing |
| Flooring restoration | $3 – $10 per sq ft (refinish) / $6 – $20+ per sq ft (replace) | Board salvageability, subfloor repair |
Major project cost comparisons (DIY vs. professional): foundation, roofing and full systems upgrades are almost always professional; cosmetic painting, cabinet refacing, and certain flooring refinish tasks are realistic DIY when you have the right tools and safety precautions.
If you need budget options, consult our affordable home improvements and our DIY home renovation guide. For strategies on stretching dollars, see our home renovation on a budget.
Methodology note: cost ranges above combine contractor quotes, material indices, and data from industry sources. Based on Remodeling Magazine’s 2023 Cost vs. Value report, ROI varies by project and locality; always get three local bids for major trades.
Transition: With a budget framework in place, choose design choices that respect the home’s character while delivering modern comfort.
Design Tips and Ideas for Renovating Old Homes
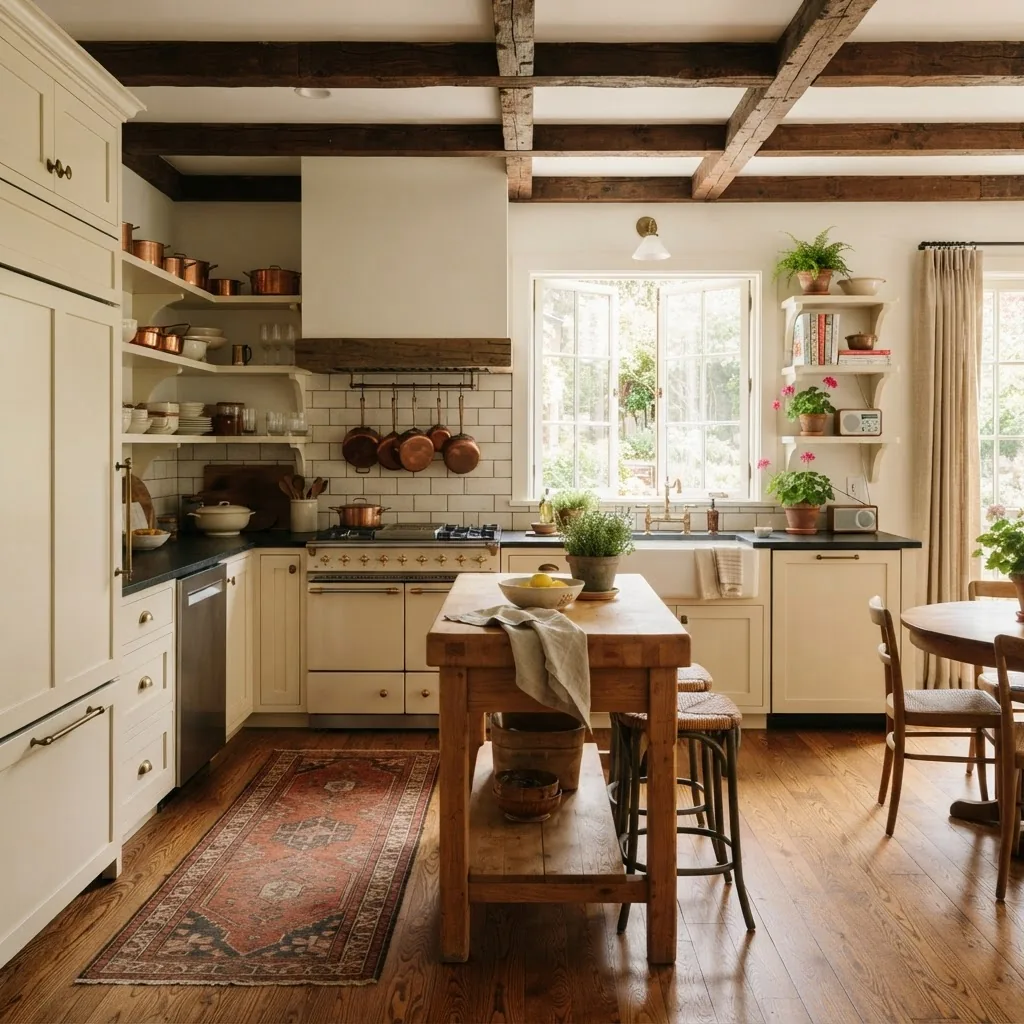
Renovation design for old homes balances preservation and modernization. Old house renovation aesthetics include vintage, farmhouse, craftsman, and classical period looks; picking one primary style helps you make consistent choices about trim, hardware, paint, and lighting.
Key design trade-offs: restoration fidelity (using period-accurate profiles and materials) increases upfront costs but preserves value. Modern convenience (open-plan kitchens, integrated HVAC) improves livability but may require careful interventions to avoid losing character.
Design ideas and practical tips:
- Preserve trim and restore rather than replace: strip and recoat woodwork, or have replicas milled if damaged.
- Match new moldings to existing profiles — keep corner returns and proportional heights consistent.
- Restore hardwood floors by sanding to 80–120 grit and recoating with oil-based poly or water-based for quicker curing (allow 24–48 hours between coats).
- Blend modern appliances into vintage cabinetry with paneled refrigerator fronts and inset doors for a seamless look.
- Use layered lighting: task, ambient and accent to compensate for smaller historic windows while highlighting architectural details.
- Refinish original windows when possible; add interior or exterior storm windows to improve energy efficiency while preserving sash.
- Choose color palettes that highlight original plaster and wood tones: muted historic colors, warm creams, deep greens and indigos for period appeal.
- When replacing, select materials that visibly age gracefully (e.g., brass, blackened steel, solid wood) rather than plastics that look out of place.
Design resources and complementary reading: for high-impact upgrade ideas see best home improvements. For DIY finishing and decor projects that personalize restored spaces, explore DIY home decor ideas, handmade crafting ideas, and home interior remodeling guide.
Project examples and style-specific notes:
- Craftsman: open built-ins, tapered porch columns, mission-style lighting. Retain exposed beams; use warm stain finishes.
- Victorian: patterned wallpapers, layered trim, period tilework in bathrooms. Restore decorative brackets and corbels.
- Farmhouse: shiplap walls, apron sinks, practical finishes. Modernize plumbing and appliances while keeping simple, robust materials.
Creative project inspiration: home renovation ideas guide, outdoor wood projects guide, things to make at home guide, and handmade crafting ideas.
Transition: Design choices are selected — now decide which tasks you can realistically DIY and which require professionals.
DIY Old Home Renovation: What You Can Do and When to Hire Professionals
This hands-on section explains practical, safe DIY tasks and where to draw the line. For further project ideas and basic tasks, see our pillar resource: DIY Home Improvement Projects Guide with Tips and Ideas.
- Do: Refinish floors and repair trim. Tools: random-orbit sander, belt sander for large runs, 80/120 grit sanding progression. Timing: allow 1–3 days per major room for sanding and 2–4 days for finishing coats (allow 24–48 hours dry time between coats).
- Do: Replace fixtures and non-load-bearing cabinetry. Remove and reinstall cabinets over 1–3 days per kitchen; pre-fit appliances before final cabinet installation. Use shims to keep doors square and a level for countertop installation.
- Do: Add insulation to attic and weatherstrip windows. R-value target: in many climates aim for attic R-38 to R-60 (check local code). Use blown-in cellulose for attic upgrades (typical cost and time: one day, $500–$1,500 depending on attic size).
- Don’t DIY: Major electrical rewiring or service upgrades. Risk: shock, code violations, insurance issues. Hire a licensed electrician for panel upgrades, knob-and-tube replacement, or 240V appliance circuits.
- Don’t DIY: Asbestos or lead abatement. Use certified abatement contractors; abatement permits are often required and improper removal increases exposure risk.
- Do: Paint, wallpaper removal, and small carpentry. Save money with DIY for finishes; set aside 10–20% of project time for surface prep, which determines final appearance.
- When to hire a contractor: structural modifications, roof framing, foundation underpinning, full HVAC replacements, major plumbing reroutes, and anything requiring a permit under local building codes.
- Selecting contractors: Get three bids, verify licenses, ask for insurance certificates and local references, and require a written scope and payment schedule (holdback of 10–15% until final sign-off).
- Simple carpentry for DIYers: small built-ins, trim replication, and shiplap installation. Time: small built-in 1–3 weekends. For more guided DIY carpentry help see simple carpentry projects guide.
Pros and cons summary:
- Pros of DIY: save labor costs, personal control, learning value.
- Cons of DIY: time investment, potential to void warranties or violate code, safety risks on systems work.
Transition: Even with careful planning and selective DIY, old houses present recurring challenges — here’s how to handle the most common ones.
Common Challenges and Solutions in Old House Renovation
Old homes commonly show similar problems. Use the problem/solution pairs below and reference expert strategies in our home improvement tips.
Problem: Mold and moisture intrusion. Solution: Identify and stop the source (slope grade away from foundation, install gutters/downspouts, repair plumbing). Dry and remediate with dehumidification; for large infestations, use a remediation contractor and follow protocol for HEPA containment.
Problem: Asbestos and lead. Solution: Test materials using certified labs. If positive, hire licensed abatement professionals; document removal and keep records for future buyers. Never sand or torch suspect materials.
Problem: Outdated wiring and overloaded circuits. Solution: Replace knob-and-tube or cloth-insulated wiring and upgrade service capacity. If panel replacement is required, budget $3,000–$8,000 depending on service size and meter/utility coordination.
Problem: Structural movement or sagging floors. Solution: Inspect joists and rim joist for rot; sister joists where minor, or install new support posts/beams for major sag. A structural engineer should design solutions for significant settlement.
Problem: Preserving decorative finishes during modern upgrades. Solution: Remove and label original pieces, store safely during work, and reuse or replicate using reclaimed-material sources and millwork shops.
Transition: After repairs and upgrades, maintain the investment with a consistent maintenance plan to prevent recurrence of problems.
Tips for Maintaining Your Old Home After Renovation
- Seasonal roof and gutter checks (spring & fall). Clear debris, inspect flashing, and repair minor shingle loss within 2 weeks to prevent water intrusion.
- Annual systems service. Oil furnace or service heatpump in spring/fall, have HVAC contractor change filters every 90 days, and inspect plumbing for slow drains or leaks annually.
- Exterior paint and siding maintenance every 5–10 years. Touch-up peeling paint within 30 days to prevent wood rot; replace damaged clapboard within 1–2 months of discovery.
- Maintain humidity levels indoors: 35–55%. Use dehumidifiers in basements and attics to reduce mold risk; install or check ventilation fans in bathrooms.
- Document changes and store manuals/warranties. Keep a digital folder of contractor receipts, permit sign-offs and materials used — helpful for resale and warranty claims.
- Periodic preservation of finishes. Re-oil wood finishes annually (if oil-finished) and tack-clean built-ins quarterly to keep dust and grit from damaging surfaces.
When you need repair guidance, consult our ongoing reference home repairs guide.
Summary and Next Steps for Your Old Home Renovation Journey
You now have a hands-on roadmap: inspect, prioritize safety and envelope, plan systems upgrades, select a design approach that honors character, and balance DIY with licensed trades. Start by creating a three-phase plan, securing permits, and getting three bids on major trades. Financing options include home-equity loans, renovation mortgages, and specialized preservation grants in some districts.
Next steps call to action: take photos, compile your inspection notes, and create a prioritized punch list. If you need help narrowing scope or sourcing contractors, start with two local references and a structural engineer for any foundation or major framing work.
Hands-On Core Steps (Detailed numbered steps)
Follow these practical steps in sequence for a typical full-renovation workflow.
- Document and photograph the entire house. Create baseline photos and a room-by-room inventory; this takes 1 full day for a medium house. Save images at high resolution for future restoration reference.
- Complete professional inspections. Book structural, HVAC, electrical, and plumbing inspections within 2 weeks. Expect inspection reports within 5–10 days. Use these reports to produce an itemized scope and estimate.
- Create a phased scope and budget. Phase 1: envelope, roof, and foundation. Phase 2: systems (electrical, plumbing, HVAC). Phase 3: interiors and finishes. Assign budget ranges using the tables above and add 20–35% contingency.
- Secure permits and approvals. Apply for building permits after finalizing plans. Allow 2–6 weeks for permit processing depending on municipality; include historic district review when necessary. Consult official standards such as local historic office and external guidance from the National Trust: National Trust for Historic Preservation.
- Address structural and water-management priorities first. Schedule contractors to complete foundation stabilization and roof repairs; typical timeline: foundation 1–4 weeks, roof 1–2 weeks. Ensure proper site drainage is installed (slope away from foundation: minimum 5% for first 10 feet).
- Upgrade systems to current code. Electrical panel upgrades and full rewires typically require 1–3 weeks per trade and must be permitted. For budgeting, reference industry averages and the Remodeling Magazine data: Remodeling Magazine Cost vs. Value report.
- Restore or replace windows and insulation. Restore sashes when possible; add interior storm windows if original sashes must remain. Target attic insulation R-value per local climate (commonly R-38 to R-60 in cold climates).
- Complete interior finishes and trim work. Refinish floors, restore millwork, install kitchen and bathrooms. Leave final painting until dust-generating trades are complete; allow 2–3 weeks of final finishes for a standard house.
- Final inspections and punch list. Obtain final inspections and certificate of occupancy where required. Create and close a punch list within 30 days of substantial completion.
Common mistakes and how to avoid them
I once underestimated the depth of rot under an original porch and began cosmetic work too early; the required structural repair extended the timeline by four weeks and doubled the temporary scaffolding costs. Avoid this by prioritizing invasive inspections under porches and eaves before ordering finish materials.
Another error I observed was trying to blend new modern HVAC ducts into original attic framing without consulting a structural pro; the solution required reinforcing rafters. Lesson: consult a structural engineer before routing large ducts or creating new penetrations in historic framing.
Verification checklist
- Inspection reports completed and documented.
- Permits applied for and approved where required.
- Contingency fund of 20–35% set aside.
- Contractor bids compared (3+), licenses and insurance verified.
- Preservation inventory and photographs stored digitally.
- Final inspections and paperwork received.
When to call in a professional
Call a licensed professional for major structural repairs, full electrical rewires, HVAC replacements, mold remediation, asbestos or lead abatement, and any permit-triggering work. For preservation-sensitive elements, consult a conservation specialist to avoid irreversible damage.


