


Home improvement remodeling — by the end of this hands-on guide you’ll be able to plan a mid-size remodeling project, estimate realistic costs, and run the construction stages from demolition to final inspection. Expect to spend 2–16 weeks on most projects and have intermediate DIY skills or the ability to manage tradespeople.
Before you start, gather the essentials below so you begin with a clear scope and fewer surprises.
Before you start
- A written project brief: room(s), goals, non-negotiables, and a high/low budget.
- Site access plan: temporary storage, parking for trades, and protection measures.
- Permitting contacts: your city or county building department and plan submission requirements.
- Tools and PPE list: measuring tape, laser measure, adjustable wrench, pry bar, utility knife, N95 masks, safety glasses, gloves.
- Decision schedule: deadlines for finishes, selections, and contractor sign-offs.
Introduction to Home Improvement Remodeling
This guide is a practical primer on home improvement remodeling, how it differs from simple renovation, and what you should expect when moving from idea to completed work. While “renovation” often means restoring or updating finishes, “remodeling” implies altering the layout or structure — such as moving walls, changing plumbing locations, or adding new electrical circuits. These structural changes bring greater value and complexity, which this guide addresses with construction-focused advice.
Benefits of remodeling include improved functionality, increased home value, and targeted energy efficiency upgrades. Construction remodeling basics start with a clear scope and unfold through regulated trade work—framing, electrical, plumbing, insulation, and finishes—each requiring different approvals and expertise. This article balances DIY accessibility with professional insight, so whether you’re tackling partial demo or full layout changes, you’ll know what to do next.
If you want more idea-level projects and step-by-step mini-tasks to prep or complement your remodel, check the full project library.
DIY Home Improvement Projects Guide with Tips and Ideas
Transition: Now that you understand what remodeling achieves, let’s plan your project so the build goes smoothly and stays within your financial and time targets.
Planning Your Home Improvement Remodeling Project
- Define the project scope — Write a one-page brief listing rooms, layout changes (e.g., remove a 6′ non-load-bearing wall), systems affected (electric, plumbing, HVAC), and finish-level (basic, mid-range, high-end). Use square footage and linear feet: e.g., “Kitchen: 150 sq ft, remove wall 6 ft long, relocate sink 4 ft.”
- Set realistic timelines — Break the project into phases: design & permitting (2–6 weeks), demolition (1–3 days), rough-ins (1–3 weeks), finishes (2–6 weeks). Larger structural jobs add an extra 2–4 weeks for inspections. Always add a 15% schedule contingency for permitting and unforeseen repairs.
- Build a prioritized budget — List costs by category: demolition, framing, mechanicals (electrical/plumbing/HVAC), insulation, drywall, finishes, fixtures, permits, and contingency. Allocate 10–20% contingency for mid-size remodels; for older homes or structural changes use 20–30%.
- Create a decision calendar — Deadlines for selections: flooring, cabinetry, lighting, paint, and appliances. Lock finishes 4–6 weeks before installation to avoid shipping delays.
- Research permits and codes — Confirm local permitting requirements early; structural, electrical, and plumbing changes usually require permits and inspections. For national code references consult authoritative resources like the International Code Council.
- Select working delivery method — Decide between full contractor-managed delivery, design-build, or managing subcontractors yourself (owner-builder). Each approach changes responsibility for scheduling, warranty, and permits.
- Get 3 written estimates — For contractor bids, request the same scope and finish-level; require line-item estimates (labor vs. materials) and timelines. Compare using a simple spreadsheet—don’t pick on price alone.
- Vet contractors — Verify licensing, insurance, and references. Ask for recent project photos and contact details for two past clients with similar scopes.
- Decide DIY vs. pro tasks — Identify tasks you can do (paint, demolition, trim) and those requiring professionals (load-bearing changes, main electrical panel, gas piping). This improves budgeting and safety.
- Plan logistics — Site protection, dust control (zip walls, negative air), and storage for new materials. Schedule deliveries to arrive no earlier than two weeks before install to minimize damage and theft.
Transition: With a plan and budget in place, the next section walks through the construction process step-by-step so you know exactly what trades do and when.
home interior remodeling
DIY home improvement projects
house kits
Understanding the Remodeling Process Step-by-Step
This numbered, hands-on sequence treats the remodel like a recipe: each step prepares the next. Time estimates are for an average mid-size interior remodel (kitchen or bathroom).
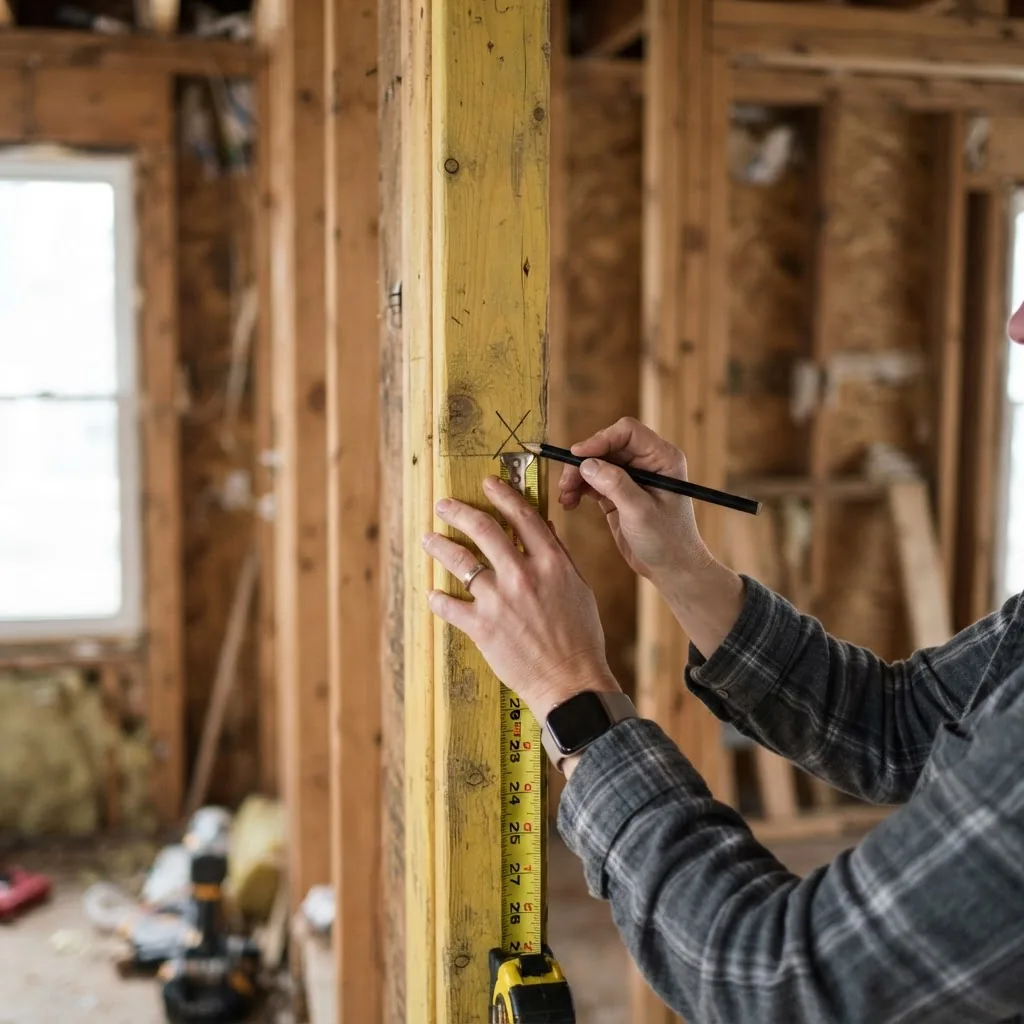
- Obtain permits and finalize plans — Submit framed drawings and scope to the permitting office. Typical permit turnaround: 7–21 business days. For structural changes include an engineer’s letter where required. Inspection checkpoints: footing/foundation, rough-in mechanicals, framing, insulation, and final.
- Prepare the site and protect the home — Install dust barriers, lay 6 mil visqueen on floors under high-traffic zones, and set up a disposal dumpster. Price: expect $300–$800 for protection and containment for a kitchen-sized job.
- Demolition — Remove finishes carefully to salvage materials you’ll reuse. Demo a kitchen: 1–3 days. Rent an enclosed dumpster (10–20 yd³). If removing load-bearing elements, install temporary supports per engineer specs before removal.
- Framing and structural modifications — Build new walls, headers, and blocking. A simple non-load-bearing partition: 1–2 days. Load-bearing header installs require engineered lumber or steel and can take 2–5 days including inspection scheduling. Define tolerances: walls plumb to 1/4″ over 8 ft.
- Rough-in electrical, plumbing, and HVAC — Electricians pull new circuits, run cable, and set boxes; plumbers reposition water lines and drains; HVAC techs relocate ducts or add returns. Each trade typically needs 3–7 days for a mid-size job. Test rough-ins with pressure and continuity checks and request pre-drywall inspections.
- Insulation and vapor barrier — Install insulation to current code R-values for your zone (e.g., R-13 for 2×4 walls, R-38 for attic in many zones). Use closed-cell spray foam for high air-seal needs; expect higher material cost but better performance. Ensure vapor barrier placement matches local code.
- Drywall installation and finishing — Hang and tape drywall in 1–3 days for a kitchen; allow 48–72 hours drying between coats. Sanding and three-coat finishing yields a Level 4 finish suitable for most paint jobs; Level 5 is recommended for glossy or critical lighting conditions.
- Trim, cabinetry, and built-ins — Install millwork and cabinetry after paint-primer or after painting depending on contractor sequencing. Cabinet install: 1–3 days. Confirm 1/8″ scribe gaps for uneven walls and 1/16″ reveal tolerances for appliance fits.
- Flooring and finishes — Lay tile, hardwood, or engineered flooring. Tile requires thinset cure times: grout after 24–48 hours, then sealant where recommended. For hardwood, acclimate boards 48–72 hours at in-situ humidity levels (35–55%).
- Final electrical, plumbing connections, and commissioning — Install fixtures, connect appliances, test circuits, seal plumbing joints, and run HVAC balancing. Commissioning should include a final inspection checklist: verify operation of GFCIs, AFCIs, smoke/CO alarms, and test water pressure (45–80 psi typical residential range).
- Final inspection and punch list — Coordinate the final inspection with the building department; correct punch list items within 7–14 days. Hold final payments until signed-off permits and lien waivers are provided.
Transition: With the process mapped out, understand how each choice affects your bottom line—labor, materials, permits, and the contingency that saves projects.
Cost Breakdown of Home Improvement Remodeling
Costs vary regionally and by scope. Below are average ranges and a comparison table to help you allocate budget lines. According to a 2024 industry report by the Remodeling Magazine Cost vs. Value survey, mid-range kitchen remodels and bathroom remodels show consistent labor-to-material ratios useful for estimates.
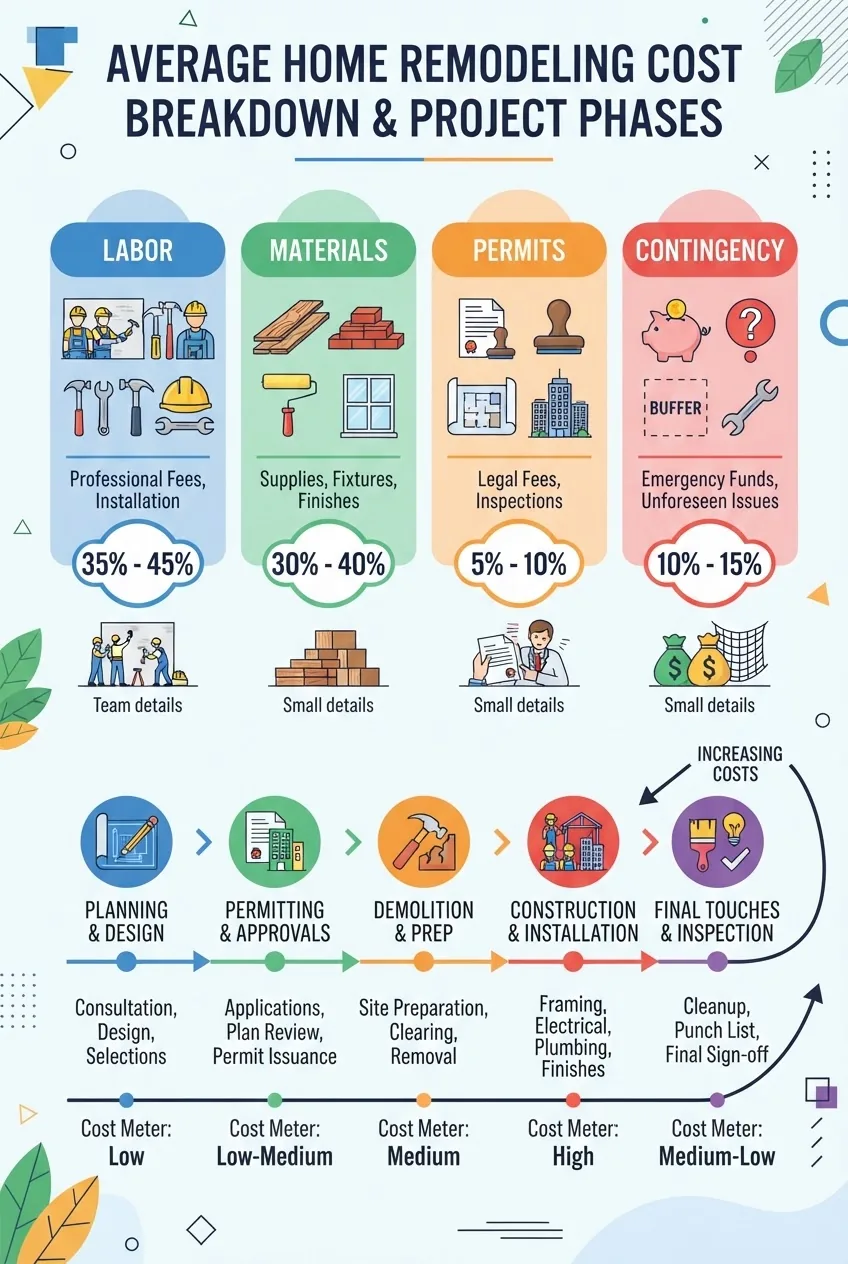
| Cost Category | Typical % of Total | Notes |
|---|---|---|
| Labor | 40–60% | Skilled trades: framing, plumbing, electrical dominate labor spend. |
| Materials | 25–40% | Quality levels impact costs: economy vs. premium finishes. |
| Permits & inspections | 1–5% | Fees vary by jurisdiction; structural work costs more to permit. |
| Contingency | 10–20% | Essential for hidden issues in older homes or structural work. |
Average ballpark costs (national):
| Project Type | Typical Cost Range | ROI / Notes |
|---|---|---|
| Kitchen (mid-range) | $25,000–$75,000 | High ROI in functional upgrades; see Cost vs. Value reports. |
| Bathroom (mid-range) | $10,000–$30,000 | Good ROI when modernizing plumbing and energy fixtures. |
| Basement finish | $15,000–$60,000 | Depends on egress, waterproofing, mechanicals. |
| Whole-home remodel (major) | $100,000–$500,000+ | Large projects require staged financing and strict contingency planning. |
Cost-saving strategies:
- Keep plumbing and electrical locations largely the same to avoid high rerouting costs.
- Choose mid-range materials with longevity (e.g., quartz or long-warranty laminates) for better life-cycle cost.
- Buy long-lead items early and shop for discounts on surplus or discontinued finishes.
- Perform demolition and site prep yourself if skilled; save 5–10% of total project on labor.
If you want low-cost remodel examples and detailed cost-saving tactics targeted to smaller budgets, see our affordable home improvements guide and the DIY home renovation guide for owner-managed cost models.
affordable home improvements
DIY home renovation guide
home renovation ideas
renovation ideas on a budget
Data and reference: According to a 2024 industry report by Remodeling Magazine’s Cost vs. Value, kitchen and bathroom remodels consistently show favorable long-term value when functionality and systems are upgraded. For permit fee ranges and code references, consult national code guidance and local building departments.
External resources:
- Remodeling Magazine Cost vs. Value Report — industry cost benchmark and ROI analysis.
- International Code Council (ICC) — building code and permitting standards reference.
- ENERGY STAR — guidelines for energy-efficient upgrades and certified products.
Transition: Next you’ll decide whether to do the work yourself or hire professionals — a decision that dramatically changes timelines, risk, and compliance obligations.
Choosing Between DIY and Hiring Professionals
Decide based on safety, code requirements, skill level, and time. Below is a comparison to help you choose.
| Decision Factor | DIY | Hire Professionals |
|---|---|---|
| Complexity | Simple cosmetic or finish work | Structural, electrical, gas, or major plumbing |
| Time | Longer (evenings/weekends) | Faster with trades scheduled |
| Cost | Lower labor cost but risk of rework | Higher labor cost; less risk if licensed |
| Permits & insurance | Owner responsible for compliance | Contractor typically handles permits and liability |
Practical rule: if a task affects structural integrity, primary electrical service, or gas systems, hire a licensed professional. Obtain written scope of work and warranty terms before signing contracts. Ask contractors to itemize labor and materials and to provide estimated timelines with milestone payments tied to inspections.
Transition: Whether DIY or pro, selecting the right materials and tools is the next essential step.
Materials and Tools for Construction Home Remodeling
Materials and tool choices influence durability, cost, and energy performance. For construction-focused remodelling, prioritize materials that meet code, provide warranties, and reduce long-term maintenance.
- Core construction materials: dimensional lumber (e.g., SPF #2 for studs), LVL or steel for headers, 1/2″ or 5/8″ drywall depending on fire or sound rating, 3/4″ tongue-and-groove plywood subfloor.
- Eco-friendly options: FSC-certified lumber, recycled-content insulation, low-VOC paints, and reclaimed or engineered wood floors. Consider closed-cell spray foam for air sealing if budget permits.
- Essential tools: laser distance meter (±1/16″ accuracy), circular saw, reciprocating saw, cordless drill (18V+), framing hammer, pry bar, combination square, and a multimeter for electrical tests.
- Tool rentals vs buying: Rent specialty tools (tile saw, floor nailer, compressor) when used < 5 times; buy hand tools and a quality cordless drill if you'll have ongoing projects.
- Estimating material quantities: Use standard formulas — wall studs: spacing at 16″ o/c, studs per wall = (wall length in inches / 16) + 1. Drywall sheets: total wall area / 32 sq ft per 4×8 sheet; round up 10% for waste.
For finishing touches and stylistic projects that complement a remodel, you might browse creative resources and small projects.
DIY home decor ideas
handmade crafting ideas
outdoor wood projects
simple carpentry projects
things to make at home
Example real-world case: I managed a client kitchen where switching to R-5 insulated exterior sheathing and high-efficiency windows reduced annual heating load by ~8%. The incremental cost was recovered in energy savings and resale messaging. Always check ENERGY STAR guidance when selecting windows and appliances.
Transition: Even with planning and the right tools, projects hit snags. The next section lists common challenges and mitigation strategies rooted in field experience.
Common Challenges and How to Avoid Them
From my time managing builds, these issues recur most often. I share them first-person to help you anticipate and reduce risk.
- Permit delays: I once scheduled cabinet deliveries before permits cleared; work sat idle for three weeks. Solution: wait for permit approval before ordering long-lead items or include buffer weeks.
- Budget overruns: I underestimated plumbing reroute costs in an older house; unexpected corroded pipes added $3,200. Solution: add 20% contingency and pre-inspect with a camera when possible.
- Hidden structural issues: Removing a wall revealed water-damaged sill plates. Solution: pre-demo exploratory cuts and allocate funds for remedial framing—estimate $1,000–$5,000 depending on decay.
- Trade coordination failures: Trades arriving out of sequence caused delays. Solution: create a milestone schedule and confirm trades 72 hours before arrival; hold payment milestones to completed inspections.
- Quality control drift: I found inconsistent grout widths across a backsplash. Solution: define tolerances (e.g., grout joints ±1/16″) in the contract and inspect at daily progress meetings.
Transition: Thoughtful choices on efficiency and resale can make your remodel pay back sooner and improve daily comfort.
Maximizing the Value and Efficiency of Your Remodel
Strategic upgrades improve comfort and resale value with relatively modest incremental cost. Focus on systems and functionality first, then finishes.
Energy efficiency upgrades with proven impact: install LED lighting (saves ~75% in lighting energy), add attic insulation to recommended R-values for your climate, upgrade to ENERGY STAR appliances, and seal the building envelope to 3–5 air changes per hour reduction using blower door-informed sealing. According to a 2023 industry energy report, targeted air sealing and insulation upgrades often deliver the fastest payback for thermal comfort and operating costs.
Design trends that add perceived value: open sightlines, durable low-maintenance surfaces, and integrated smart-home features (thermostats, lighting, security) that buyers recognize. For a curated set of high-impact projects that pay back in function and marketability, see the best home improvements resource.
Transition: You now have the tools to evaluate trade-offs. Below are final steps and a checklist to verify your project before closing it out.
Conclusion and Next Steps in Your Remodeling Journey
You should now be able to plan, budget, sequence, and supervise a construction-focused remodel, with clear flags for when to hire pros. Start by finalizing a written scope, collecting three bids, and securing permits. Keep a project log for change orders and receipts.
For ongoing maintenance and post-project repairs, keep this resource handy.
Common mistakes and how to avoid them (practitioner notes)
I once accepted a low bid from a contractor who missed permit pulls; rework and legal correction cost an extra 12% and four weeks. From that experience I now require proof of permit submission and active insurance before work starts. Another repeat problem I saw: homeowners not ordering long-lead elements early; a custom hood delay stalled finishing for three weeks. I now place those orders at permit approval.
Final checklist before closing out work
- All permits signed off and final inspection passed.
- Warranty and maintenance instructions for installed systems received in writing.
- All change orders documented and final payments only after lien waivers from trades.
- Punch list completed and photographed for records.
- Energy systems commissioned and operating within expected ranges (HVAC thermostat, water heater settings).
When to call a professional
Call a licensed contractor for load-bearing changes, gas and main electrical work, complex HVAC modifications, and any work requiring a structural engineer. If you encounter mold, asbestos, or lead-based paint, stop work and hire certified abatement professionals immediately.


