


diy home improvement projects you can finish confidently: by the end of this guide you’ll be able to plan, execute, and maintain several beginner-friendly upgrades — typical weekend projects take 2–16 hours, while larger room upgrades take 1–3 weekends. Skill level assumed: beginner to intermediate (no trade license required).
Before you start
- Basic safety gear: safety goggles, work gloves, dust mask (N95), ear protection
- Essential tools: cordless drill, tape measure, level, utility knife, hammer, screwdrivers
- Common consumables: painter’s tape, caulk (silicone for baths, acrylic for trim), 120–220 grit sandpaper, wood glue, screws and anchors
- Prerequisites: a flat workspace, clear timeline, and 1–2 helpers for lifting or alignment
- Files to prepare: photos of the area, measurements in mm/cm and inches, and local permit checks for electrical/plumbing
Think of your project as assembling a puzzle, one piece at a time. The sections below guide you from fundamentals to step-by-step procedures, troubleshooting, and when to call a pro.
Introduction to DIY Home Improvement Projects
This section outlines the definition, benefits, and realistic outcomes of diy home improvement projects. A DIY home improvement is any hands-on upgrade you undertake to improve function, comfort, or aesthetics without fully contracting the work. Benefits include skill-building, customization, and — when done carefully — measurable time and cost savings. According to a 2024 industry report from the National Association of the Remodeling Industry, many homeowners save time on scheduling and reduce overall spend by completing small upgrades themselves while reserving licensed work for structural or code-triggering tasks.
DIY ranges from minor improvements (replacing fixtures) to basic remodels (painting, shelving, tiling). This guide focuses on practical, safe, and beginner-friendly projects that improve daily living without requiring structural changes or specialist permits. Before you pick a project, confirm whether local building codes apply (electrical and plumbing often require licensed permit-holders). For guidance on safety and code basics, consult OSHA and local building departments.
For a broader strategic view, review the DIY Home Improvement Projects Guide with Tips and Ideas to align this hands-on plan with longer-term goals.
Transition: now that you understand what DIY can accomplish, let’s confirm the tools and materials that reliably deliver success.
Essential Tools and Materials for DIY Home Improvement
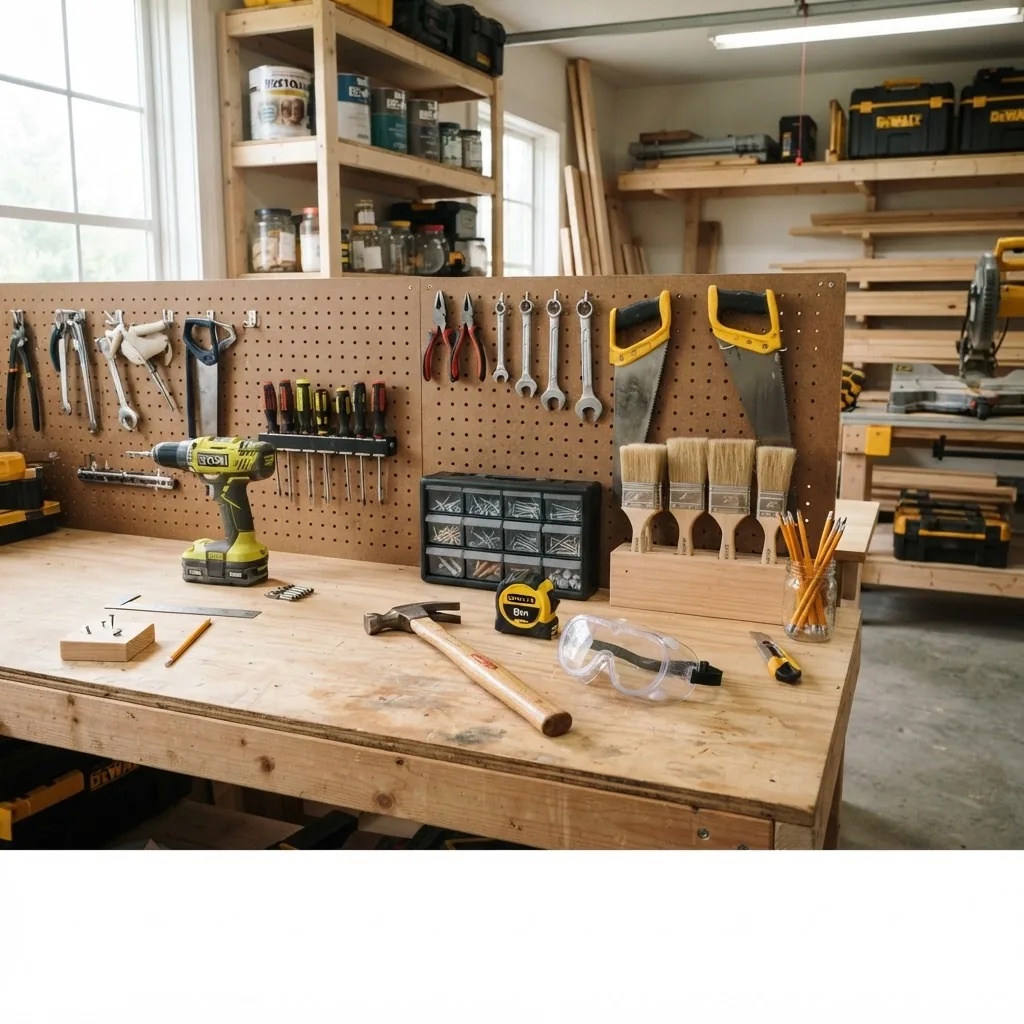
- Cordless drill and driver — 18V brushless recommended; bring two 2.0–4.0 Ah batteries. Use 1″ wood screws for assemblies and 1¼”–1½” for hanging drywall anchors.
- Tape measure and combination square — 5 m / 16 ft tape for most rooms; use a speed square for quick 90° cuts and layout.
- Level — 24″ box level for shelves and frames; a 4′ level if installing cabinets.
- Utility knife and sharpening stone — replace blades after ~8 hours of cutting; always score drywall and tile underlayment before snapping.
- Hammer and pry bar — 16 oz claw hammer for framing nails; 12–18″ pry bar for trim removal and demolition.
- Oscillating multi-tool — useful for flush cuts and plunge cuts (blade selection: wood or bi-metal). Use speed setting 3–4 for most trims.
- Basic power saw — a circular saw with a guide rail for straight cuts; a jigsaw for curves. Blade choice: 40-tooth general-purpose for plywood, 80-tooth for finish cuts.
- Painting kit — 2″ angled brush for trim, 9″ roller frame with 3/8″ nap cover for walls; painter’s tape (1″ and 2″) and drop cloths.
- Fasteners and anchors — box of #8 and #10 screws, 1/2″ and 3/8″ toggle or molly anchors, and 1″ finishing nails for trim work.
- Safety equipment — N95 dust mask, safety goggles (ANSI Z87.1 rating), and hearing protection; consult OSHA guidelines for respirator and hearing standards (OSHA).
- Adhesives and fillers — construction adhesive (bond strength 600–800 psi), caulk (silicone for wet areas), and water-based spackling for small holes.
- Materials by project — paint (one coat coverage: check manufacturer’s spread rate; often 350–400 sq ft/gal), MDF or pine trim (choose primed boards for painting), and 12″x12″ ceramic tile for simple backsplashes.
Tool usage tips: start with lower-speed settings on power tools and test cuts on scrap material. Always check for hidden services behind walls using a stud finder and non-contact voltage tester.
Transition: with the right tools at hand, planning prevents wasted time and rework — next, a practical planning framework.
Planning Your DIY Home Improvement Project
Good planning separates a satisfying weekend project from costly mistakes. This section covers selection, budgeting, timeline estimation, and preparation.
- Define the scope: write a one-paragraph project goal (example: “Replace bathroom vanity top and repaint walls to increase storage and refresh finishes”).
- Measure thoroughly: take three measurements for each wall (floor, midpoint, ceiling) and record them in both metric and imperial; allow 5% extra for waste on cutting materials.
- Set a realistic timeline: small jobs (paint, swap fixtures) — 2–16 hours; medium jobs (install shelves, tile backsplash) — 1–2 weekends; multi-room upgrades — multiple weekends across 2–6 weeks. Pad every schedule by 25% for drying, curing, and unexpected delays.
- Budgeting approach: separate parts into categories — materials, consumables, tool rental, and contingency (set 15% contingency for unexpected items). For deeper budgeting, see the affordable DIY home projects resource for cost-saving tactics.
- Permit/checklist: for electrical changes beyond swapping fixtures, and any plumbing that alters drainage, check local permit requirements. If in doubt, contact your local building department.
Practical planning checklist — keep these notes in a single document:
- Photos of space before work (wide and detail)
- Exact measurements + rough sketches
- Materials list with quantities and alternatives
- Tool list and rental needs
- Work schedule with buffer days
- Waste/disposal plan (bag counts or recycle center hours)
According to a 2023 homeowner survey by an industry research group, projects with a written plan were 40% more likely to finish on schedule; written goals reduce scope creep and surprise costs. For more cost-conscious renovation thinking, see the budget-friendly renovation ideas and home renovation on a budget references.
Transition: armed with a plan and supplies, choose a project that matches your time and experience — the next section lists approachable ideas with clear benefits.
Top Easy DIY Home Improvement Projects for Beginners
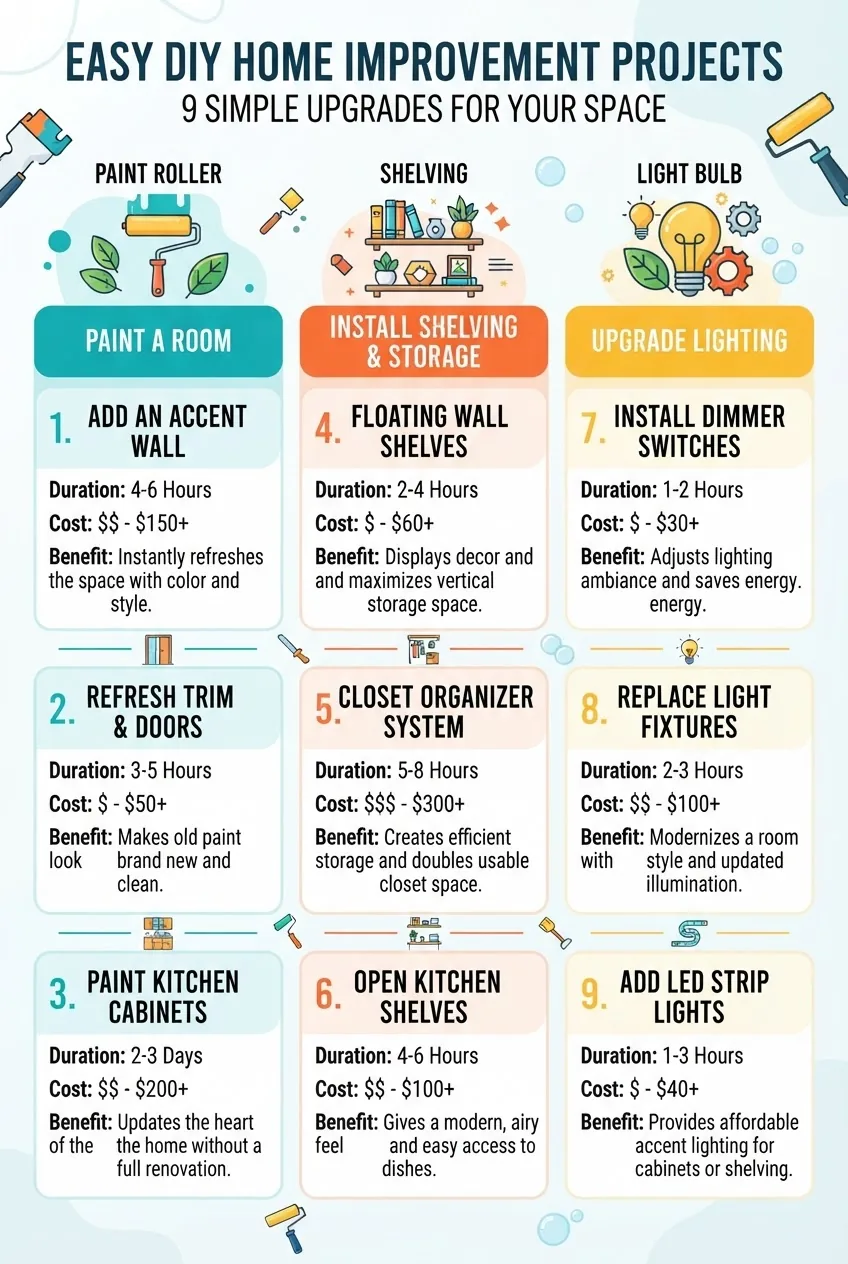
- Paint a room — Duration: 4–12 hours. Benefit: transforms mood and value quickly; great first-time project. See step-by-step below.
- Install floating shelves — Duration: 1–4 hours. Benefit: adds storage and display space; practice with anchors and leveling.
- Replace light fixtures — Duration: 0.5–2 hours (turn off breaker). Benefit: improves lighting quality and energy efficiency; only swap fixtures if existing wiring is code-compliant.
- Install a new faucet — Duration: 1–2 hours. Benefit: updates bathroom/kitchen look; shut off supply valves and use plumber’s tape (Teflon) on threads.
- Update cabinet hardware — Duration: 30–90 minutes per cabinet door. Benefit: big visual change for low cost and minimal skill.
- Lay peel-and-stick backsplash tiles — Duration: 2–6 hours. Benefit: quick kitchen facelift; ensure substrate is clean and dry.
- Seal gaps with caulk and weatherstripping — Duration: 1–3 hours. Benefit: improves comfort and reduces energy waste; use silicone in wet areas.
- Simple landscaping — raised planter — Duration: 4–8 hours. Benefit: curb appeal and small outdoor structure practice; follow soil and drainage guidelines.
- Replace door hardware — Duration: 30–60 minutes. Benefit: security and appearance upgrade; measure backset and bore holes before buying hardware.
Mini case study 1: I replaced a dated bathroom light fixture and swapped the mirror and hardware in a single afternoon. The result: 60 minutes of installation time for the fixture and $120 in new hardware led to a noticeably brighter, modern appearance.
Mini case study 2: A weekend peel-and-stick backsplash on a rental kitchen required 3 hours of prep and 5 hours of installation; the tenant reported no adhesive failures after six months when the wall surface was cleaned with isopropyl alcohol prior to bonding.
Project-specific links and inspiration: if you want room accents and styling ideas with step-by-step tutorials, see DIY home decor ideas and for small crafts that pair with improvements check handmade crafting ideas.
Outdoor and wood-focused projects: see outdoor wood projects and beginner carpentry options at simple carpentry projects. For additional quick inspiration refer to DIY project ideas and tips.
Transition: the next section gives hands-on, step-by-step instructions for four common projects — follow them in order and consult the common mistakes and checklist after the steps.
Step-by-Step Guide to Popular DIY Renovation Projects
The projects below are explained as actionable steps. Each project lists exact quantities, timings, and tool settings where applicable. For broader renovation planning and cost context, see the DIY home renovation projects resource and home interior remodeling tips.
Project A — Paint a room (single coat refresh)
- Prepare the room: remove furniture or center and cover with 7–9 oz drop cloths. Remove outlet covers and switch plates (keep screws in a labeled bag). Allow 30–60 minutes for prep in an average 12’x12’ room.
- Clean and sand surfaces: wash walls with TSP substitute (1 scoop per gallon) where greasy, rinse, then sand glossy spots with 220-grit; fill holes with spackling (apply up to 2 passes, 30-minute dry time per thin pass).
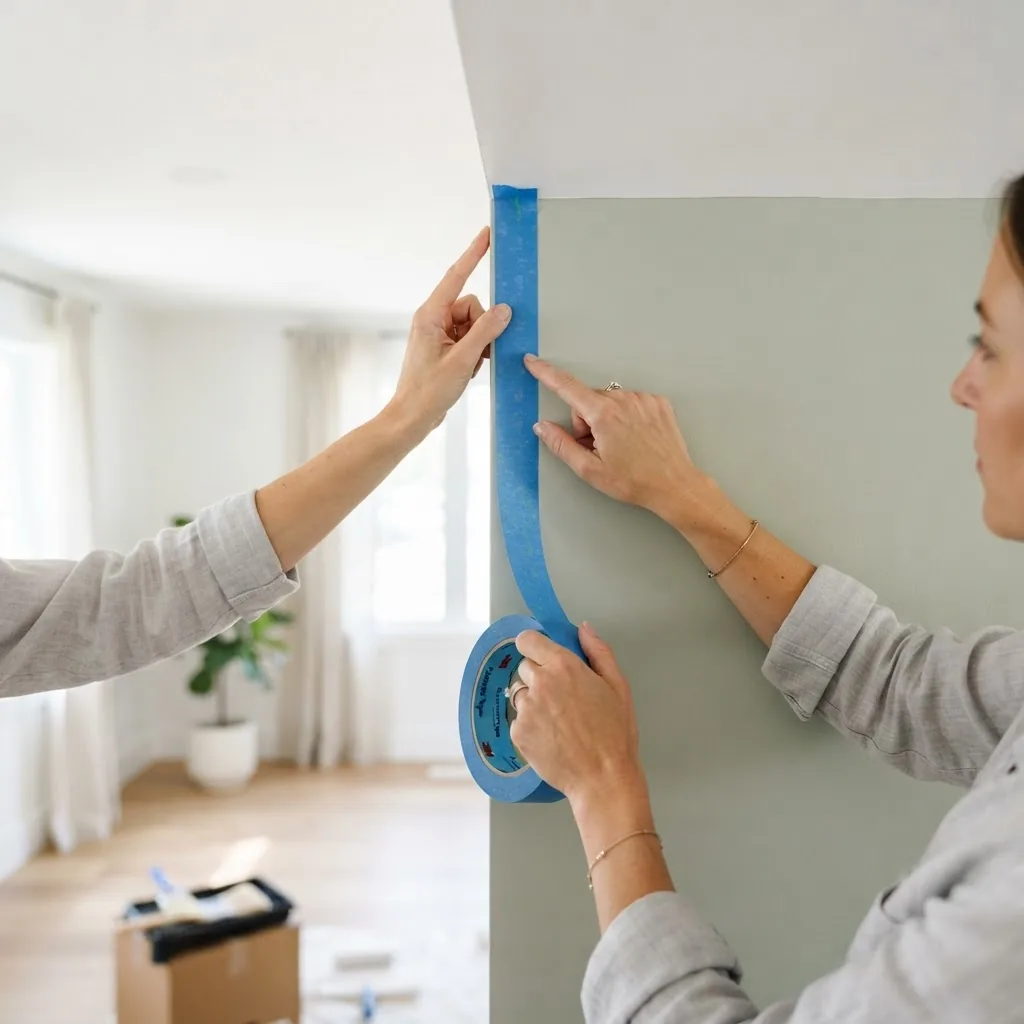
- Tape and protect trim: apply painter’s tape (1″ for trim) along baseboard and ceilings; press with a putty knife for seal. Mask windows and floors. Time: 20–40 minutes.
- Cut-in edges: use a 2″ angled brush; paint at a 45° angle along trim with 75% of the brush loaded and a smooth stroke. Coverage: 300–400 sq ft per gallon; dry time 2–4 hours depending on brand.
- Roll walls: use a 9″ roller with 3/8″ nap; apply two coats when changing color or for high-traffic walls. Roll in a “W” pattern for even coverage; reload roller every 20 linear feet. Time for two coats in 12’x12’: ~6–8 hours including drying.
- Remove tape and clean: remove tape after paint is tacky (about 30–60 minutes after final coat). Reattach plates once fully dry (24 hours recommended for latex; 48 hours for oil-based finishes).
Project B — Install floating shelves
- Locate studs and mark level: use a stud finder to mark two studs; if studs are >16″ apart, use heavy-duty anchors. Mark shelf height and use a 4′ level to draw placement line.
- Drill pilot holes and install brackets: use a 3/16″ bit in studs; if using anchors, insert toggle bolts rated for 75+ lbs. Use torque setting “3” on a cordless drill for driving screws into studs to avoid stripping.
- Fit shelf and fasten: slide shelf onto bracket and secure with 1¼” finishing screws; check level and adjust shims as needed. Total time: 1–3 hours for two shelves.
Project C — Replace a light fixture (non-power-tool electrical)
- Turn off power: switch off the circuit breaker and verify with a non-contact voltage tester. Confirm zero voltage at the fixture.
- Remove old fixture: unscrew mounting screws, lower fixture, disconnect wire nuts. Note wire colors and grounding — typically black (hot), white (neutral), green or bare copper (ground).
- Connect new fixture: attach ground to ground, then match hot to hot and neutral to neutral; use new wire nuts and wrap with electrical tape. Mount fixture per manufacturer instructions and restore power to test.
- Safety caveat: if wiring uses knob-and-tube, aluminum, or has multiple circuits in one box, stop and call a licensed electrician. Small fixture swaps are fine for beginners when wiring is modern and single-circuit.
Project D — Basic tile backsplash (small area)
- Measure and plan layout: for a 10 sq ft backsplash, order 12 sq ft of tile to allow 20% cutting/waste. Dry-lay tiles on a flat surface to determine cuts and pattern.
- Prepare substrate: ensure wall is clean, dry, and flat. Install 1/4″ cement backer board over drywall for wet areas; screw every 6″ and tape seams with thinset.
- Mix and apply thinset: mix per manufacturer to a peanut-butter consistency; apply with a 1/4″ notched trowel, combing in one direction. Work in 3–4 sq ft sections to prevent skinning.
- Set tile and grout: press tiles firmly, use 1/16″ spacers. After 24 hours, grout with unsanded for joints <1/8", sanded for wider joints. Seal grout after 72 hours with grout sealer.
Common mistakes and how to avoid them
I once started tiling without calculating waste and ran short mid-project — now I always order +20% material. I’ve also over-taped trim before paint and peeled finish; removing tape within 60 minutes of final coat avoided the issue. Measure three times, cut once.
Other issues I’ve seen: using wrong caulk (silicone in paint-only trim causing adhesion issues), overtightening screws (strips heads), and ignoring drying times. I now set timers: 2 hours for latex touch-dry, 24 hours for handling, 48 hours for full cure on many finishes.
Checklist — verify these before you call it done
- All fasteners tightened to torque (hand-tight + 1/4 turn for finish screws).
- Paint coverage consistent with no lap marks; touch-ups completed.
- Shelves are level under 1/8″ deviation across length.
- All electrical fixtures tested and breakers labeled.
- Grout sealed and cured for at least 72 hours before exposure to water.
- Disposal of waste completed and workspace cleaned.
When to call a professional
Call a licensed electrician for circuits with aluminum wiring, multi-circuit junctions, or when the job requires panel upgrades. Hire a licensed plumber for work that alters drainage, water lines, or requires cutting into main stacks. For structural changes (load-bearing walls, foundation work) consult a structural engineer and a licensed contractor.
Transition: once you’ve completed basic projects, you may want to expand into more ambitious, but still manageable, remodeling upgrades — read on.
Tips and Best Practices for Successful DIY Home Improvements
Successful DIY hinges on solid habits. Below are practical, experienced-based tips and best practices that reduce rework and improve quality.
- Plan in layers: break a project into preparation, installation, and finishing. Allocate 40% of time to prep, 40% to install, 20% to finishing touches and cleanup.
- Measure twice, cut once: always record three measurements and note obstructions like outlet boxes and studs.
- Use the right fastener: match screw length to material thickness (screw should penetrate substrate by at least 1″).
- Respect drying/curing times: set timers for paint recoat (usually 2–4 hours), grout cure (72 hours), and adhesive cure (per manufacturer’s instructions).
- Trade-offs: DIY vs. pro: DIY is excellent for cosmetic upgrades and non-code electrical/plumbing. Hire pros for structural, HVAC, major electrical, and complicated tile or waterproofing work. According to a 2024 industry report, homeowners who self-perform non-structural work save time and often preserve budget for professional trades where required.
- Documentation: photograph each stage for warranties and resale value; keep receipts for installed products.
- best home improvements for renovations and expert DIY home improvement tips offer advanced techniques for quality finishes.
Safety best practices: always follow manufacturer’s instructions and wear protective equipment. For regulatory safety information consult the Occupational Safety and Health Administration (OSHA) and your local building codes. When choosing materials, prioritize low-VOC paints and recycled-content underlayments for healthier indoor air.
Transition: ready for bigger ideas? Here are advanced but manageable upgrades and sustainable options.
Advanced DIY Remodeling Ideas and Upgrades
Once you’re comfortable with basics, consider higher-skill upgrades that still retain a DIY approach: window trim replacement, partial room re-flooring, installing a tile shower pan with proper waterproofing, or building bespoke built-in shelving. These projects require stricter adherence to waterproofing, flashing, and assembly tolerances.
- High-impact upgrades: partial kitchen cabinet refacing, replacing interior doors with solid-core options, and installing luxury vinyl plank (LVP) flooring on one room at a time.
- Sustainable improvements: add insulation to attic hatch (R-value target +5), install LED fixtures with dimmers, and use low-VOC paints and FSC-certified wood for millwork.
- Project ideas list:
- Convert closet to built-in office nook with electrical outlet and two floating shelves.
- Install under-cabinet LED strips (12V systems) with transformer located in ventilated cabinet.
- Replace old single-pane windows with double-pane retrofit units (intermediate; sometimes pro-install advised).
For deeper procedures and cost/process guidance see the home improvement remodeling guide. If considering DIY building kits or full builds, compare options in the house kits for DIY building or consult high-level overviews on how to build a home. For older structures, see old home renovation ideas.
Transition: after completing improvements, routine maintenance preserves value and function — here’s how to care for your work.
Maintaining and Caring for Your DIY Improvements
Maintenance extends the life of DIY upgrades. Wipe down painted surfaces monthly, inspect caulk and grout annually, and re-seal grout every 1–3 years depending on exposure. For mechanical fixtures, tighten fasteners after the first week and again at one month to account for settling.
Small-repair routine (quarterly): check for loose hardware, test GFCI outlets, inspect seals around wet-area fixtures, and touch up paint chips within 48 hours to prevent further peeling. For detailed upkeep and repair scheduling see the home repairs and maintenance tips.
Transition: keep learning and iterate on small wins — final thoughts and next steps.
Conclusion – Empowering Your DIY Journey
By following this guide you’ll gain practical skills to complete weekend upgrades, improve your living space, and save by self-performing non-structural work. Start small, document each step, and scale complexity over time. If you enjoyed these projects, bookmark the guide, keep a project log, and share before/after photos with a local DIY community to refine skills.
Call to action: pick one project from the “Top Easy” list, gather the listed materials, and schedule a focused weekend block. Small, consistent progress builds capability and confidence.


