


diy home decor ideas: by the end of this hands-on guide you will have completed three full beginner-friendly projects, a room-specific styling plan, and a shopping list—expect 3–12 hours for small projects or 1–5 days for room updates, assuming a beginner to intermediate skill level.
Before you start
- Clear workspace (2 m²), drop cloth, good lighting.
- Basic safety gear: gloves, goggles, dust mask.
- Measuring tools: tape measure, level, pencil, stud finder.
- Access to a simple toolkit: hammer, cordless drill, screwdrivers, sandpaper, utility knife, glue gun.
- Budget plan: set a max per-project cost (e.g., $20–$150) and buffer (15% contingency).
Introduction to DIY Home Decor Ideas
This guide covers practical, room-by-room DIY home interior design ideas and easy home decor ideas that balance style, budget, and sustainability. You’ll learn interior design principles for DIYers, step-by-step DIY home decor projects and how to pick tools and materials that deliver long-lasting results. For broader, structural or renovation-focused advice see DIY Home Improvement Projects Guide with Tips and Ideas, and if you’re weighing bigger upgrades compare to the best home improvements for effective renovations.
If you’re starting from new construction or a kit, review the house kits building requirements and, for a broader build context, the how to build a home process and costs.
Transition: next we’ll cover the exact tools and materials you’ll use most often and why they matter so your projects last beyond a weekend.
Essential Tools and Materials for DIY Home Decor Projects
A compact, well-chosen toolbox makes the difference between a neat result and wasted time. Below is a prioritized list of supplies for most diy home decor projects, with notes on usage, cost range, and alternatives for tighter budgets.
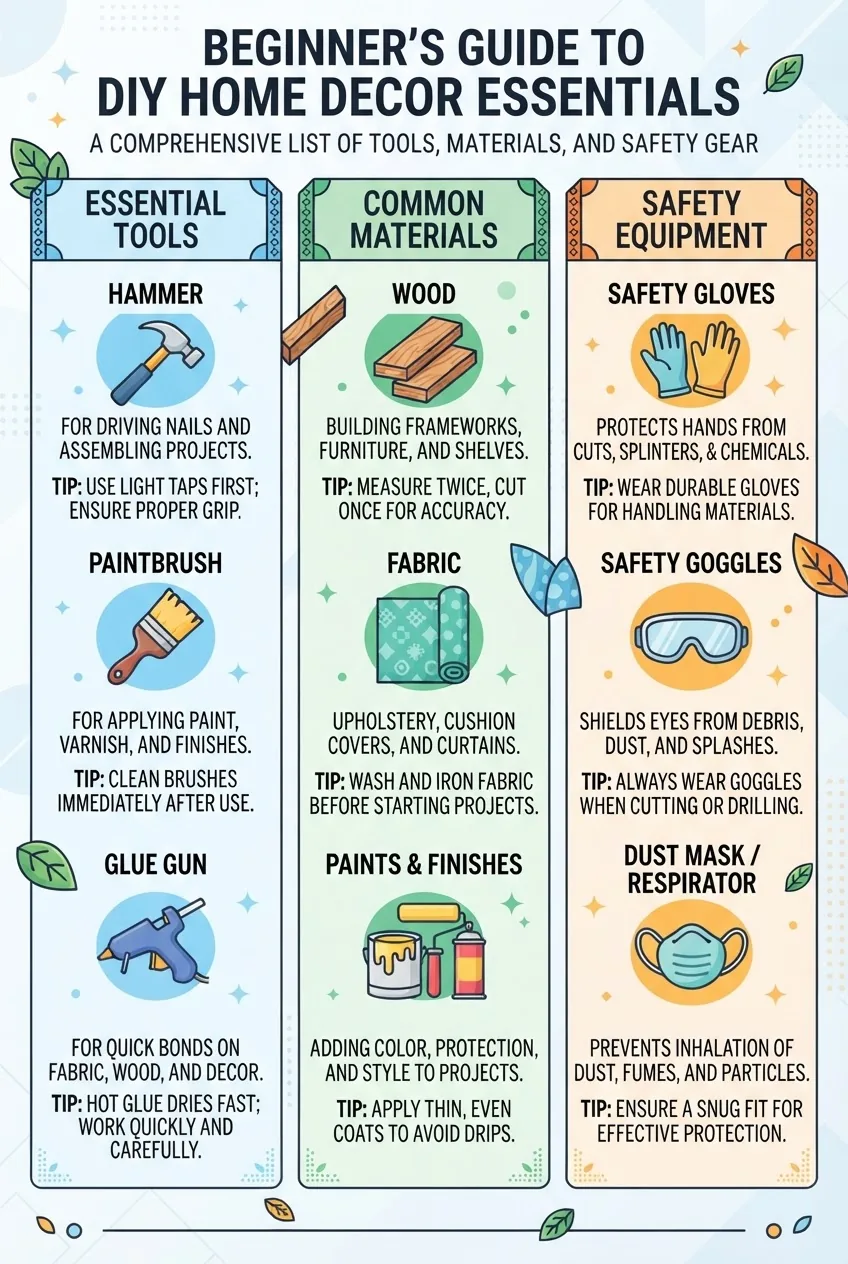
- Hand tools — Tape measure (16ft/5m), combination square, hammer, adjustable wrench. Use for layout, trim, and light carpentry; cost $40–$120 for a basic set.
- Power tools — Cordless drill (12–18V with 2 batteries), multi-bit driver set, orbital sander (120–220 grit pads). Ideal for shelf installation and surface prep; expect $80–$220 new.
- Painting supplies — Quality angled brush (2–3″), 9″ roller kit with medium nap, painter’s tape, primer (acrylic bonding). Good paint saves time: mid-grade acrylic latex $30–$60 per gallon.
- Adhesives & fasteners — Wood glue (PVA), construction adhesive tube, finishing nails, wood screws (various lengths: 1″, 1.5″, 2.5″). Choose stainless or coated for bathrooms/kitchens.
- Textile supplies — Heavy-weight fabric (upholstery), sewing kit, hot glue gun (20–40W), fabric scissors. Great for handmade cushions and soft accessories.
- Finishing materials — Sandpaper (80/120/220 grit), clear polyurethane (water-based for low odor), stain samples. Trade-off: oil-based stain gives deeper tone but longer cure time.
- Safety equipment — Safety glasses, nitrile gloves, N95 respirator for sanding/paint fumes, ear protection for power tools. Follow CPSC guidance on tool safety: CPSC.
Quick comparison: cost vs durability vs finish—see the table for typical choices and thresholds.
| Item | Budget | Durability | Use case |
|---|---|---|---|
| Cordless drill | $80–$150 | High (battery dependent) | Shelves, anchors, hardware |
| Acrylic latex paint | $30–$60/gal | Medium | Walls, furniture refresh |
| Plywood (3/4″) | $35–$60 sheet | High when sealed | Shelves, small furniture |
Transition: with tools selected, now follow three-to-four practical project tutorials that take those tools from the bin to the wall.
Step-by-Step DIY Home Decor Projects for Beginners
These are hand-tested, scalable projects for new homeowners and DIY interior decorating beginners. Each project lists time, cost, difficulty, materials and precise steps. For basic woodworking expansions see simple carpentry project tutorials or the wider DIY home improvement projects guide.
-
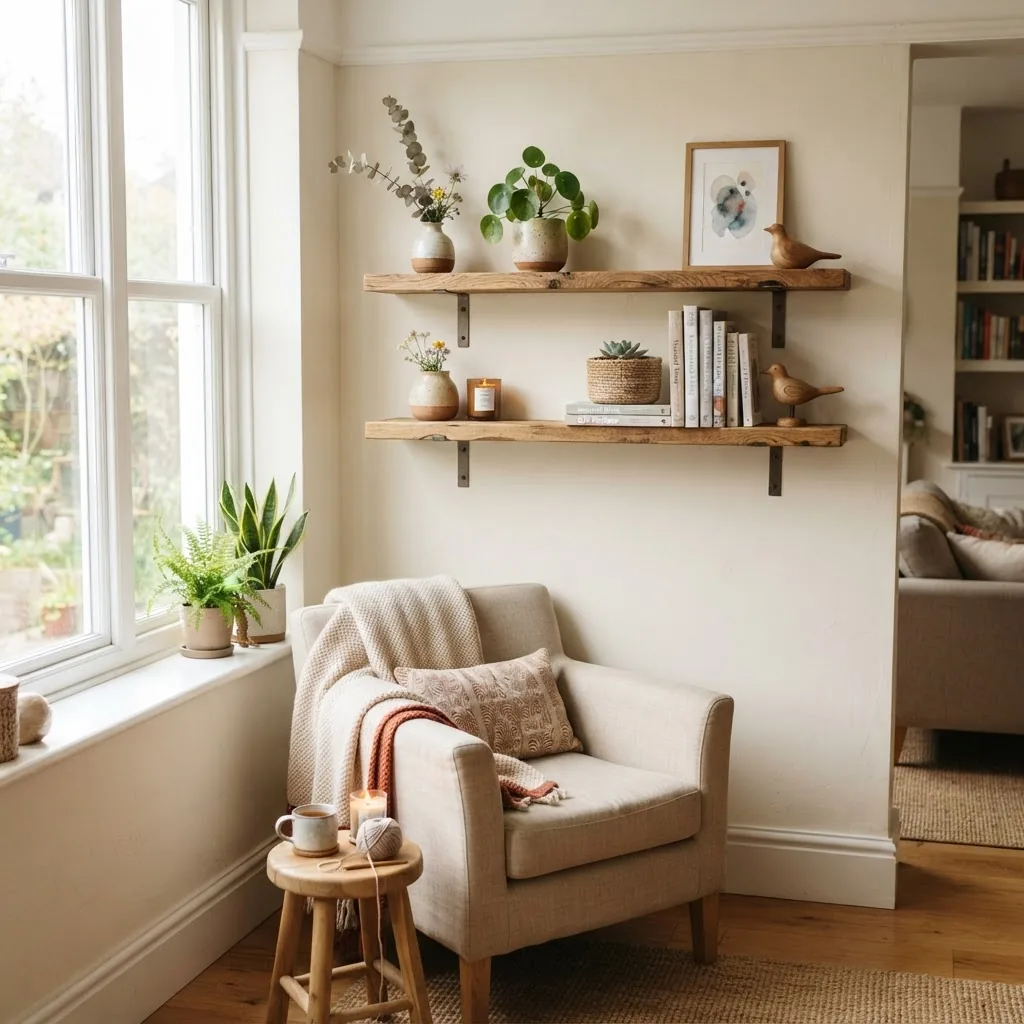
Build a simple floating shelf (Project A)
Outcome: One 36″ x 8″ floating shelf. Time: 2–4 hours. Cost: $25–$60. Skill: Beginner+
Materials: one 3/4″ plywood sheet (cut to 36″x8″), two 1″x2″ cleats, wood screws (1.5″), wood glue, sandpaper (120/220), water-based stain or paint, clear polyurethane.
Tools: cordless drill with 1/8″ & 3/8″ bits, countersink bit, level, stud finder, clamps, orbital sander.
- Cut and prepare the boards: Cut plywood to 36″x8″ and a 1.5″x34″ cleat. Sand edges with 120 then 220 grit (2–3 minutes per edge).
- Drill the mounting cleat: Pre-drill 3 holes in the cleat centered, countersink by 1/8″.
- Mount to studs: Find studs, screw cleat to wall with 2.5″ wood screws into studs (3 screws), torque moderate—do not over-tighten. Use a level; ensure top edge is precisely level.
- Attach shelf: Apply a 1/8″ bead of wood glue along the cleat, slide shelf onto cleat, clamp for 30–45 minutes, then add 2 finishing screws from underside if desired (use 1.25″ screws).
- Finish: Stain or paint: one coat primer, two thin coats paint or stain, sand lightly between coats. Dry times: water-based paint—2–4 hours touch-dry; full cure 24–48 hours.
-
Create an accent wall with patterned paint (Project B)
Outcome: One 8′ x 10′ accent wall. Time: 6–10 hours (including drying). Cost: $50–$120. Skill: Beginner to intermediate.
Materials: base paint (1 gal), accent paint (½ gal), painter’s tape (1″ & 2″), level, pencil, drop cloth.
- Prep: Clean wall, fill holes (spackle), sand smooth (120 grit). Prime any patched areas.
- Measure and mark: Decide pattern (e.g., vertical stripes 6″ wide). Mark with pencil and level every 6″ horizontally.
- Tape and paint: Apply 2–3 rows of painter’s tape for each stripe, burnish edges with a credit card. Paint base coat first (2 thin coats). Once dry (2–4 hours), apply accent color to alternate stripes—remove tape after paint is tacky, not fully dry, to avoid peeling.
- Clean edges: Touch up with a small angled brush where needed. Allow full cure 24–48 hours before hanging heavy items.
-
Make macramé plant hangers (Project C)
Outcome: Two plant hangers. Time: 1–2 hours each. Cost: $8–$25 each. Skill: Beginner.
Materials: 3–4mm cotton cord (30 ft per hanger), metal ring, scissors, small plant pots (4″–6″).
Steps:
- Measure and cut cord: Cut 8 lengths of 4–5 ft each for a 30″ finished hanger.
- Attach to ring: Fold cords in half, use lark’s head knots to attach to ring.
- Form the body: Tie square knots in sets of four, spacing knots 2–3″ apart to create a cradle.
- Finish and test: Tie a gather knot 6″ from bottom, trim ends to 2″ length. Test with a pot of water-saturated soil (up to 5 lbs); retie if slippage occurs.
-
Upcycle a thrifted side table (Project D)
Outcome: One refreshed side table. Time: 3–6 hours. Cost: $15–$60. Skill: Beginner+
Materials: sanding block, wood filler, paint or stain, new hardware (optional), protective top coat.
- Assess and prep: Check joints, tighten screws, glue any loose joints and clamp 30–45 minutes.
- Repair: Fill gouges with wood filler, sand smooth after 30 minutes cure.
- Refinish: Apply primer (if painting). Two coats paint or one coat stain + two coats polyurethane. Dry times as manufacturer indicates.
- Styling: Add felt pads to feet, consider replacing knob hardware with a modern pull for a fresh look.
Transition: after you’ve tried building and finishing, learn ways to personalize small accessories that make rooms feel lived-in and unique.
Creative DIY Home Accessories Ideas to Personalize Your Space
Handmade decor accessories bring personality and texture; these projects require small budgets and deliver high visual impact. For more crafting techniques see handmade crafting ideas for home decor and expand to outdoor pieces via outdoor wood projects plans and costs. If you want a wider list of simple projects see things to make at home diy projects and tips.
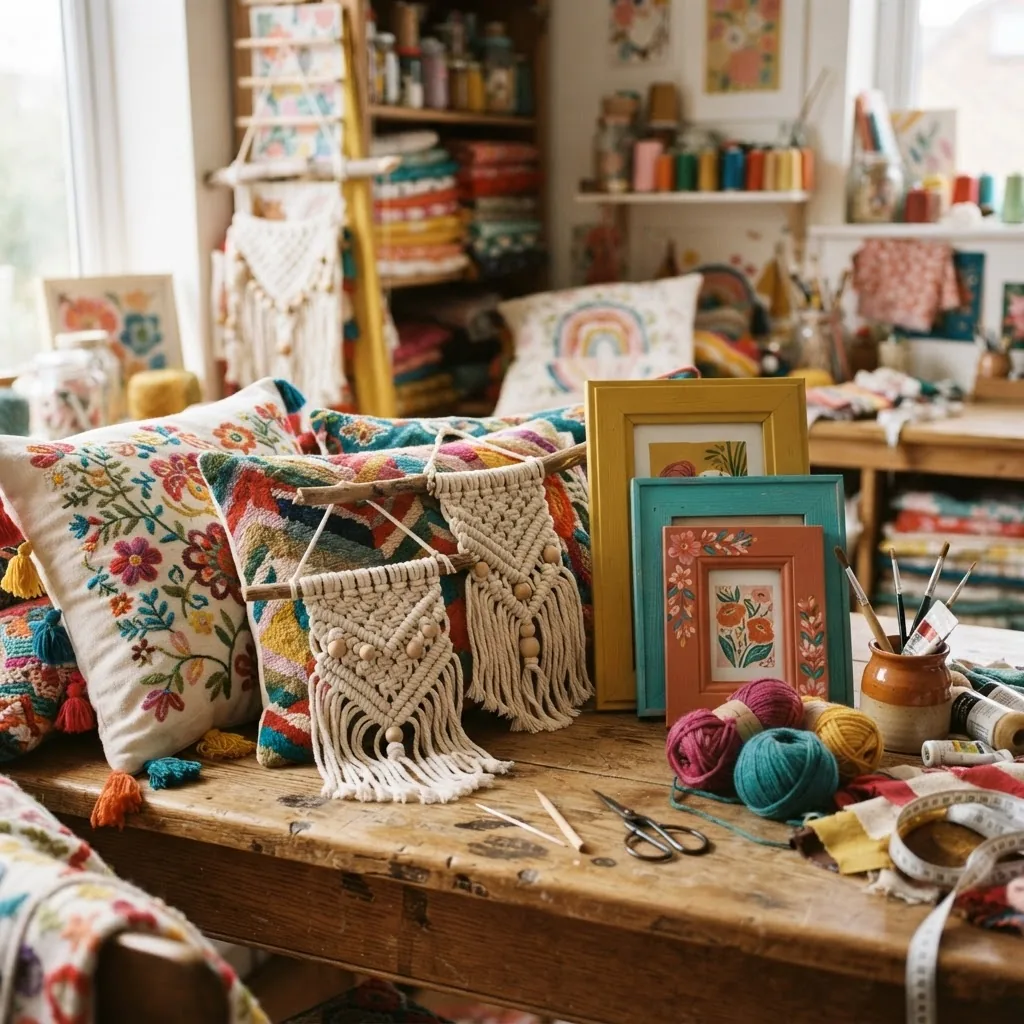
Examples and quick wins:
- Custom cushions: Sew a 20″x20″ cushion cover from upholstery fabric—allow 2.5″ seam allowance, use invisible zipper (14″) for a professional finish.
- Painted frames: Sand cheap frames, prime, and apply two thin coats of chalk paint; distress edges with 220-grit for modern farmhouse flair.
- Decorative trays: Refinish a wooden tray with wood stain and 2 coats of water-based poly for a coffee-table centerpiece.
- Textile wall hangings: Combine yarns and dowel rods; typical hangings use 5–10 skeins, 1–2 hours labor.
- Mini planters: Paint terra-cotta pots with two coats of acrylic, seal with matte spray for indoor use.
Transition: now apply these accessories and skills to specific rooms so your projects have cohesive impact.
Room-by-Room DIY Home Interior Design Ideas
This section gives focused, practical decorating ideas for each major room, including mini-projects, layout tips and design principles to guide decisions. For redevelopment that includes remodelling and cost planning, consult home interior remodeling design and costs.
Living room
Principles: anchor with a focal point (fireplace, TV or artwork), use layered lighting (ambient + task + accent), and keep circulation paths 30–36″ wide. Mini projects: install the floating shelf (Project A) at eye-level—mount shelf 4–6″ above a sofa back for balance. For soft furnishings, make two 18″x18″ cushion covers to tie color palette together.
Bedroom
Principles: prioritize comfort and scale—use soft textures and avoid heavy patterns directly behind the bed. Mini projects: create a painted geometric headboard wall (use 6″ painter’s tape) or sew a dust ruffle. Place bedside floating shelves 22–26″ above mattress top for ergonomics.
Kitchen
Principles: durability and easy-clean finishes trump delicate finishes. Mini projects: swap cabinet hardware (measure center-to-center screw distance—64mm common), install peel-and-stick backsplash tiles rated for kitchens, or upcycle open shelving using sealed plywood. When working near gas or electrical fixtures, follow manufacturer safety or call a pro.
Bathroom
Principles: moisture resistance and ventilation are priorities. Use water-resistant paints and sealed grout; add small shelves above toilet (mount at least 6″ above tank). For accessories, choose stainless or brass hardware and apply silicone bead (3–4 mm) where fixtures meet tiles.
Small spaces & entryways
Principles: maximize vertical storage and light. Mini projects: build a 24″ high shoe bench with storage (one 24″x12″ shelf plus cushion), mount floating hooks 60″ from floor for coats to avoid head bumps.
Transition: it’s possible to do all this on a budget and with sustainable choices—next we compare strategies and trade-offs.
Budget-Friendly and Sustainable DIY Home Decorating Ideas
Stretching your decorating dollars often aligns with sustainable choices: repurposing materials reduces cost and environmental impact. For costed upgrade options see Affordable home improvements and plan renovation budgets with DIY home renovation costs and tips.
Comparison and trade-offs:
- Upcycling furniture — low cost ($0–$50), high character; trade-off: more time and potential surface prep.
- Buying second-hand — moderate cost, often better materials; trade-off: may need repairs.
- New budget materials — predictable and quick; trade-off: shorter lifespan and more waste.
Sustainability guidance: According to a 2023 environmental guidelines summary, choosing low-VOC finishes and recycled or FSC-certified wood reduces indoor pollutants and environmental impact (source: Environmental organization report 2023). For government-level guidance on sustainable materials see the EPA: EPA.
For integrated budget and design planning, consult home renovation budget and design insights and use budget-friendly home renovation strategies when projects overlap with decorating. If working with older homes, reference old home renovation design and tips.
Transition: seasonal touches keep your decor fresh—here are easy, repeatable DIY ideas for holidays and seasons.
Seasonal and Holiday DIY Decorating Ideas
Rotate small, affordable projects each season to keep rooms engaging without big expense. Below are short project descriptions you can implement in 30–90 minutes.
- Spring: Make a floral wreath from silk stems (30–60 minutes); attach to door with ribbon.
- Summer: Create a citrus-scented centerpiece: dried orange slices on a tray with small candles (45 minutes).
- Autumn: DIY fabric pumpkins from leftover upholstery fabric, stuff with polyfill, add twine stem (30–60 minutes).
- Winter/Holiday: Paint glass jars metallic, add fairy lights for mantel displays (30–45 minutes).
- Year-round swap: Change cushion covers seasonally to refresh color temperature and texture (each swap: 15–30 minutes).
Transition: planning and execution choices determine whether a project succeeds; next are practical planning tips and common pitfalls.
Tips for Planning and Executing DIY Home Decor Projects Successfully
Successful DIY decorating is about planning, realistic budgets, and knowing when to stop. For deeper process-level guidance see home improvement remodeling process and tips and for expert strategies see home improvement expert tips. Keep a maintenance mindset and consult home repairs and maintenance tips for ongoing upkeep.
Practical planning tips:
- Set a scope and schedule: Define the project in three sentences, list tasks and allocate a realistic time block (e.g., “Paint accent wall: prep 2 hrs, paint 4 hrs, cure 24 hrs”).
- Budget per component: Break cost into materials, tools, and incidentals; reserve 15% contingency.
- Prototype first: Do a 12″ sample for finishes or patterns before committing to the whole surface.
- Prioritize safety: Follow tool manufacturer torque specs, wear protective gear, and ventilate when using finishes. For regulated safety rules consult CPSC.
- Document and label: Photograph step stages, label hardware and small parts in zip bags for reassembly.
Transition: the next section consolidates practitioner mistakes I’ve seen and how I fixed them.
Common mistakes and how to avoid them
I once installed a floating shelf without using a level—result: a crooked shelf and two re-drilled holes. From that and other projects, here are mistakes I regularly encounter and how I avoid them:
- “I underestimated drying time” — I now always add 24 hours to manufacturer-recommended cure times before heavy use.
- “I used too much paint in one coat” — I switched to thinner coats and longer drying to avoid visible brush marks.
- “I skipped a sample swatch” — I now always paint a 12″x12″ test on the actual wall to check light and color shifts.
- “I mounted hardware into drywall without anchors” — I use toggles or locate studs; for heavy items choose anchors rated >50 lbs.
Checklist: Verify your work
- All mounts are level and seated into studs or rated anchors.
- Paint and finishes have had at least 24 hours cure where specified.
- No visible gaps at seams; caulked joints are smooth and wiped.
- Electrical or gas work not attempted without licensed professional.
- Tools cleaned, stored, and consumables disposed according to local guidelines.
When to call a professional
Call a licensed professional if your decorating project requires electrical work, gas adjustments, load-bearing changes, or if you detect mold, asbestos, or structural cracks. For extensive remodeling and cost planning consult a professional remodeler or the relevant guides for process and budgeting.
Mini case study / testimonial: “I refreshed my living room using two painted accent walls and built-in floating shelves; total cost under $300 and one weekend of work,” — Sarah M., DIY homeowner. Her measured approach—sample paint, stud placement checks, and two thin coats—mirrors the steps above and produced durable, high-impact results.
Conclusion: Inspiring Your Own DIY Home Decor Journey
You now have a practical path to implement diy home interior design ideas: tool selection, three detailed project tutorials, accessory ideas, room-specific advice, and a sustainability mindset. Begin with one small project, track time and cost, and iterate—DIY decorating is like painting your personality on your walls. Ready to expand into larger projects? See the broader DIY Home Improvement Projects Guide with Tips and Ideas for next-level skill building.


