


By the end of this hands-on bedroom layout guide you will have drafted, tested and finalized a functional bedroom layout plan that optimizes flow, storage and comfort; expect 3–6 hours for a medium project (planning, measuring, mock-up) and 1–3 days for staged re-arrangement. Skill level: beginner to advanced DIY (basic measuring and moving skills required).
Before you start
- Measuring tape (25 ft), laser distance measurer (optional), pencil and graph paper or digital floor planner
- Phone camera to photograph the room and current layout
- Small furniture sliders or moving blankets, measuring stick, level
- Notepad to list priorities (sleep, dressing, workspace, storage)
- Optional: low-tack floor tape to mark clearances during mock-up
-
Start with core principles and a site survey:
Principles of Effective Bedroom Layout
Bedroom furniture arrangement begins with the fundamentals: understand the room’s usable floor area, the primary circulation path, and the focal point. Treat room flow like traffic flow—define arrival and circulation zones so people can move without detours. Core principles include purposeful space planning, deliberate furniture flow, and balanced composition.
Ergonomic layout basics: allow minimum clearances—24 inches (60 cm) on each side of a single bed, 30–36 inches (75–90 cm) for master beds if possible, and at least 30 inches (75 cm) for major walkways. I call this “ergonomic clearance” the rule-of-thumb to prevent cramped movement.
Room balance: anchor the space with a single focal point (typically the bed or a window) then balance mass with lighter furniture opposite it to avoid visual and physical crowding. Use negative space as an active element; intentional open zones improve perceived size and sleep quality.
Circulation path: map a continuous 24–36 inch corridor from door to bed and bed to closet; avoid routing walkways through seating or dressing areas. For multi-functional rooms, establish clear boundaries between sleep, dressing and relaxing zones (zoning).
Integrate lighting considerations and storage integration into the layout planning stage, not as afterthoughts. Combine built-in or multifunctional furniture with the circulation map to minimize overlap between storage doors (like wardrobe swings) and primary walkways.
For broader arrangement methods applicable to other rooms, see living room layout ideas for furniture arrangement.
Recommended external resources: National Sleep Foundation for sleep-environment advice and American Institute of Interior Designers for ergonomic guidance; check local safety standards at the International Code Council.
-
Measure, map and evaluate the room shape:
How to Choose the Best Bedroom Layout Based on Room Size and Shape
Choose the layout that responds to the room’s geometry: rectangular, square, L-shaped, or irregular. Begin by measuring: record room length, width, door swings, window placement and ceiling height; note fixed elements (radiators, built-in closets). If you need precise methodology, consult accurate bedroom dimensions.
Compare strategies by room size:
Room size Recommended bed Layout focus Small (under 10’x10′) Full/Double or single Maximize walkways, vertical storage, under-bed solutions Medium (10’x12′ to 12’x14′) Queen Zoning for sleep + small seating or desk Large (14’x16′ and up) King or multiple zones Separate dressing, lounge, and sleep zones How-to steps (practical):
- Draft to scale: sketch the room at 1/4″=1′ or use a digital planner. Mark doors, windows and fixed elements.
- Place the bed first: the bed is the largest piece. Try bed perpendicular to the longest wall or centered under the main window if light and view allow.
- Test clearances: maintain minimum 24–36 inches clearance around the bed as earlier noted. Use tape on the floor to simulate.
- Build zones: identify sleep, dressing and relaxing areas. For combined functions refer to “multi-functional space planning” strategies: multi-functional space planning.
Room-shape specific tips:
- Square rooms: center the bed on a wall and balance with a seating or desk opposite.
- Long narrow rooms: place the bed along the long wall to widen perceived space; create a headboard focal point to anchor the eye.
- L-shaped rooms: use the alcove for dressing or a small seating nook to separate functions.
- Irregular rooms with odd corners: convert recesses into built-in storage or a vanity—use custom solutions to avoid wasted space.
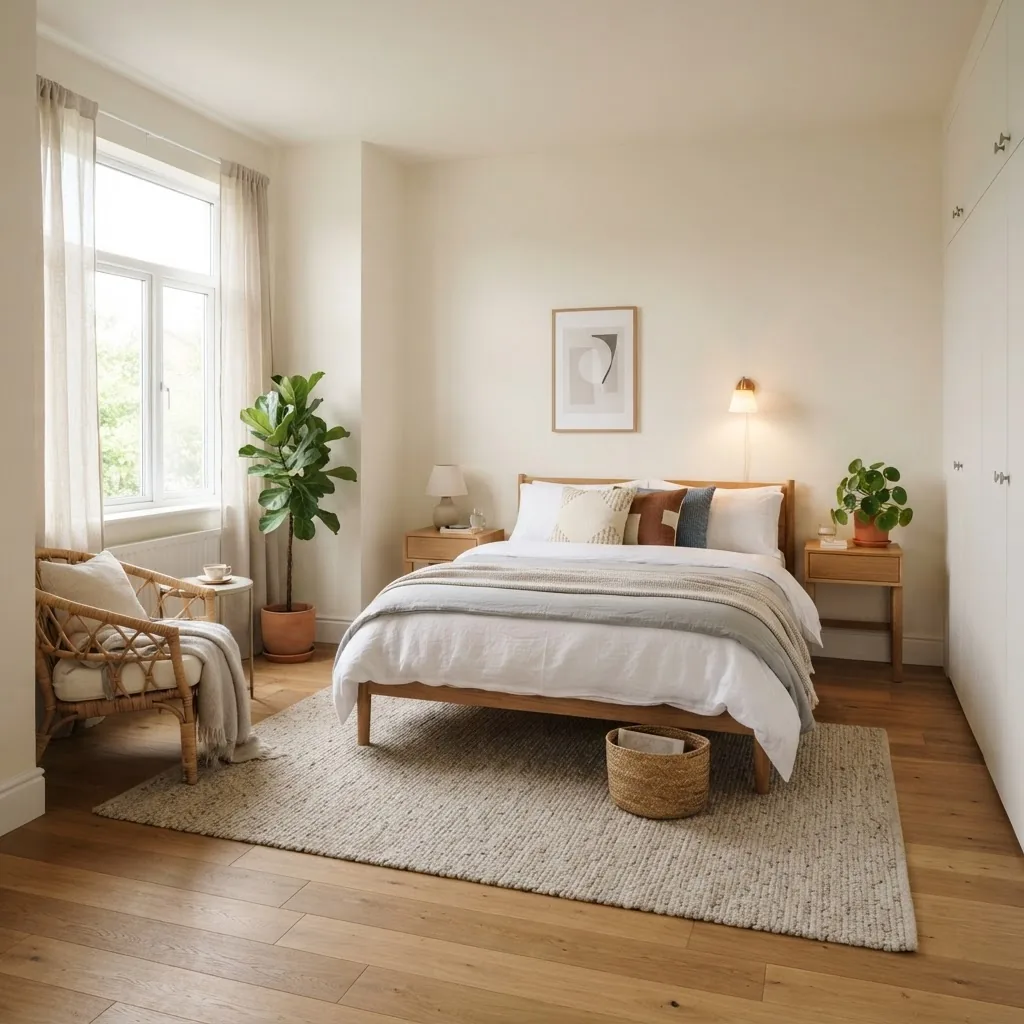
For small-room strategies in multi-storey homes, review small room design solutions for bedrooms. If your planning crosses into open-plan living, borrow concepts from open plan design concepts, and for adaptable strategies see flexible layout strategies.
-
Decide layout style and functional furniture:
Bedroom Furniture Layout Ideas for Different Styles and Functions
Style affects layout choices: minimalist arrangements favor fewer, multifunctional pieces, while traditional layouts allow symmetrical bedside tables and dressers. Below are practical ideas by style and function with examples for immediate application.
- Minimalist bedroom layout — place the bed on the longest uninterrupted wall, use a single low dresser and wall-mounted lights to free floor space. Keep circulation 30 inches (75 cm) minimum around the bed. Use under-bed drawers to replace a second dresser and maintain a calm visual field.
- Traditional bedroom arrangement — center the bed on a focal wall with matching bedside tables. Allow 36 inches (90 cm) between bed and dresser fronts for dressing clearance. Use area rugs to anchor bedside zones and reinforce symmetry.
- Multifunctional furniture solutions — incorporate a bed with built-in drawers or a headboard with shelving; use a fold-down wall desk or a compact armoire that doubles as a media cabinet. For integrated desk zones, maintain 30–36 inches clearance behind the chair for ease of use.
- Contemporary functional mix — create a micro-lounge with a small loveseat or two chairs opposite the bed (leave 30–36 inches between seating and circulation). For inspiration on seating, see comfortable seating options.
- Luxury and elegant layouts — position a chaise or upholstered bench at the foot of the bed to form a seating focal point, incorporate a dedicated dressing area with a freestanding wardrobe and vanity. For motifs and luxury references see elegant room design concepts.
- Small-room multi-use layout — combine a work surface near natural light, choose vertical storage, and use sliding doors to save swing space. For sectional or compact seating in small rooms, consider sectional furniture options and choosing ideal furniture pieces.
- Modern furniture-forward layout — use low-profile beds and modular storage; anchor the bed with a slim platform and use open shelving to reduce visual bulk. For modern furniture cues see modern furniture style inspiration.
- Family or guest bedroom layout — prioritize flexibility: a daybed or twin-over-twin bunk fits different needs. Keep a small chest or cubbies for guests’ storage and a chair for luggage.
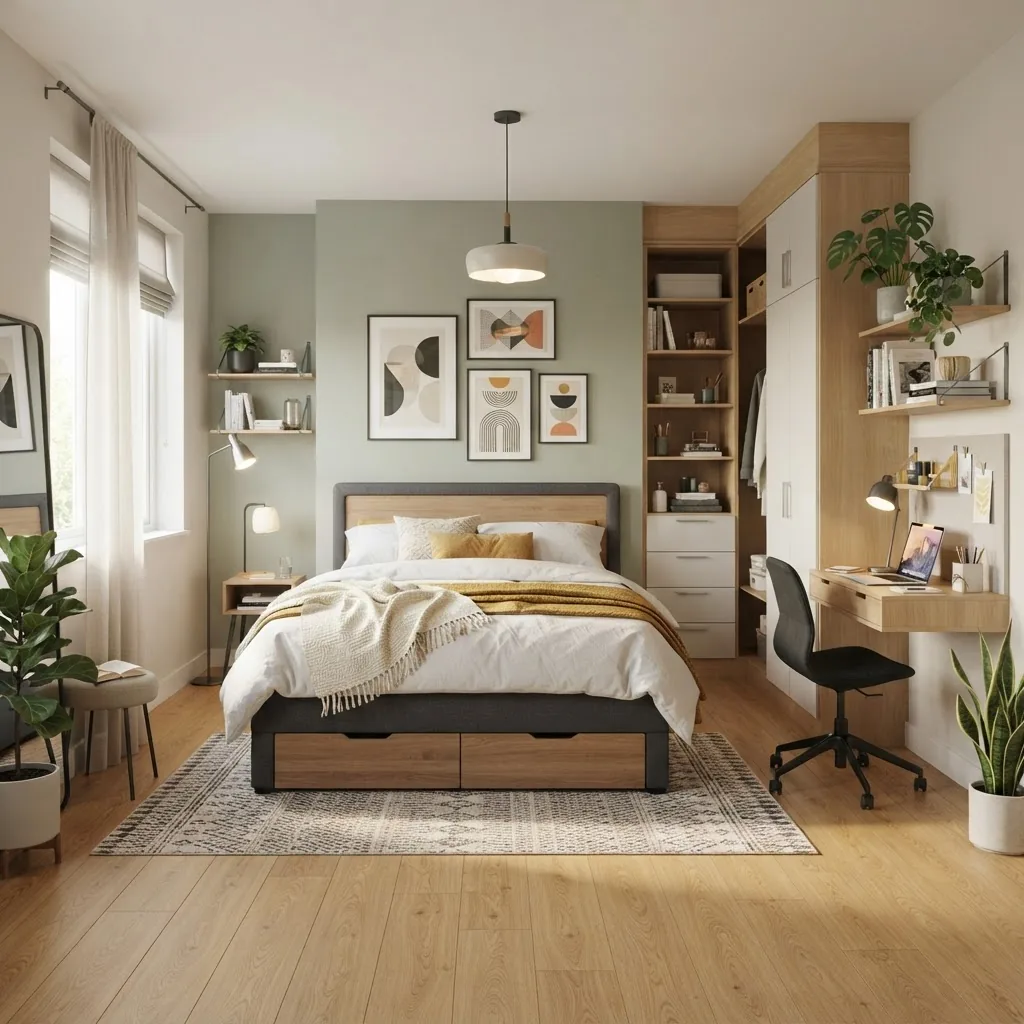
Cross-references for furniture selection and setup: furniture selection tips, choosing ideal furniture pieces, and elegant room design concepts.
Also consider functional multi-room concepts when bedrooms double as living or workspaces: functional multi-room design and shared space design tips.
-
Integrate storage early and test organization:
Maximizing Storage and Organization in Bedroom Arrangements
Storage choices determine whether a layout is functional. Start by listing items to store and frequency of use. Prioritize closet, under-bed and vertical storage before adding bulky furniture.
Step-by-step practical approach:
- Audit belongings: categorize into daily, seasonal and archive piles. Target a 30% reduction of nonessential items before buying new storage.
- Design closet zones: allocate hanging (short/long), shelving and drawer space—leave 24 inches clear in front of closet doors. If adding a dresser, ensure 36 inches clearance between its front and other furniture.
- Use under-bed storage: drawers or boxes should be at least 6–9 inches tall; allow 2–3 inches of clearance so drawers slide without obstruction.
- Mount open shelving: keep shelves at least 6–12 inches above dressers to avoid collisions; locate frequently used shelves at 48–60 inches height for ergonomic access.
- Choose multifunctional furniture: ottomans with storage, headboards with shelving and beds with drawers reduce duplication of pieces.
Practical placements to avoid clutter:
- Never place a dresser directly opposite the bed if it blocks the walkway—shift it to an adjacent wall or use a slimmer profile piece.
- Avoid deep, tall wardrobes in narrow walkways; prefer shallow depth (18–22 inches) wardrobes with more vertical organization.
- Use built-ins where possible—built-in wardrobes or drawers reclaim lost nooks and maintain clean circulation.
Cross-application tip: seating strategies from small living rooms can be repurposed for bedroom storage seating—see space optimization techniques.
-
Layer light and place accessories to support zones:
Lighting and Accessories Placement for Enhancing Bedroom Layouts
Lighting is a functional and spatial tool—place it to support zones and to optimize perceived space. Natural light placement guides seating and workspace location; avoid placing a desk in direct glare. Use three layers: ambient, task and accent.
Key placement rules:
- Bedside lighting: wall-mounted swing arms or sconces save surface area. Aim for 12–20 inches from the mattress edge to the center of the fixture and 36–42 inches above the floor to keep light at eye level when seated.
- Overhead lighting: a dimmable central fixture with a soft 2700–3000K temperature creates a restful base; add localized task lights for reading or dressing.
- Ambient zones: layer floor lamps behind seating and LED strip under bed rails for low-level navigation lighting—keep intensity under 100 lux for night lighting.
- Mirror placement: place a full-length mirror opposite or adjacent to a light source to amplify natural daylight, but avoid glare into the bed.
Numbered tips:
- Position bedside switches within reach from a seated position—within 18 inches of the mattress edge.
- Use warm light (2700–3000K) for bedside and accent lighting; reserve cooler beams for task areas (4000K max).
- Install dimmers on main circuits to adapt scenes for wake, read and sleep.
Research-backed note: According to a 2023 sleep-environment review by the National Sleep Foundation, warmer, lower-intensity light in bedroom environments improves sleep onset and quality.
-
Identify and fix layout problems before moving furniture:
Common Bedroom Layout Mistakes and How to Fix Them
Below are recurring mistakes and direct fixes — quick, actionable corrections you can test today.
- Blocked pathways: mistake — bedside tables or chests obstruct door swing. Fix: swap to narrower tables (16″ or less) or use wall-mounted nightstands.
- Overcrowding with furniture: mistake — too many pieces of similar scale. Fix: remove one large item; prioritize storage pieces that double as surfaces.
- Poor bed orientation: mistake — bed aligned with a door or window causing drafts or glare. Fix: reorient bed to a long wall; use blackout curtains and headboard shielding.
- Unbalanced design: mistake — visual weight concentrated on one side. Fix: balance with a tall plant, lamp or vertical shelving opposite the heavy piece.
- Ignoring clearance standards: mistake — insufficient walking space. Fix: aim for the ergonomic clearances noted earlier; use mock-up tape to test.
If you’re dealing with unusual geometry, review strategies for handling awkward layouts in large rooms, or learn from dramatic rearrangements in before and after layout transformations.
-
Create a relaxing, ergonomic plan with finishes and acoustics:
Tips for Designing a Relaxing and Functional Bedroom Layout
Design for rest and function simultaneously. Use calming color zones, arrange furniture to control sightlines, and mitigate noise with soft materials. Below are strategic, actionable tips with quantities and thresholds.
Zoning and color:
- Assign wall colors by zone: sleep (soft neutrals), dressing (slightly brighter accent) and relaxation (muted pastels). Use less than 20% high-contrast accent area to avoid overstimulation.
- Place the bed so the headboard faces the room entrance where feasible — this aids a sense of control and reduces stress.
Ergonomics and accessibility:
- Maintain 30–36 inches clearance on primary routes; bedside item heights should be 24–30 inches above floor for easy reach from a sitting position.
- For accessibility, provide a 36-inch wide clear path to major elements and at least 5 feet turning diameter near the bed for mobility devices.
Noise reduction strategies (specific):
- Use rugs with 0.25–0.5 inch thick padding to absorb sound and cushion footsteps.
- Install weatherstripping on doors and use heavy curtains (3–5 lb/yard fabric) to blunt external noise if street-facing.
Privacy and light control:
- Install blackout curtains or blinds with a minimum of 95% opacity for bedrooms used for daytime sleep.
- Place bedside controls for lighting within 18 inches of the bed edge to avoid nighttime trips.
For shared bedrooms or dual-function spaces, consult shared space design tips for layout tricks that separate function while maintaining openness.
-
Mock-up and test designs, then finalize selections:
Case Studies: Sample Bedroom Layouts for Efficient Room Arrangements
Two real-life mini case studies (before/after and rationale) and a practical drawing reference:
Case study A — Small urban bedroom (9′ x 10′)
Before: Queen bed centered with large dresser opposite; walkway limited to 18″ at foot of bed causing daily bumping. After: swapped to a full-size bed (54″ wide), installed under-bed drawers (2 x 8″ drawers), moved dresser to adjacent wall and mounted a fold-down desk above the dresser. Result: 30–36″ clear path restored, hourly convenience improved, storage increased by 20%. Project time: 6 hours of planning and moving.
Case study B — Master bedroom with multi-zones (14′ x 16′)
Before: King bed centered, seating clustered next to closet making dressing awkward. After: bed repositioned to the longest wall, created a dressing alcove with a 48″ wide wardrobe and vanity, added a 60″ chaise near the window to form a lounge. Clearance maintained at 36″ between zones; lighting layered with dimmers. Result: functions separated; dressing time reduced by 40% and the room felt visually larger. Project time: 2 weekend days with one carpenter for built-ins.
Practical drawing help: if you want to sketch these layouts to scale, see drawing effective bedroom layouts.
Decisions and trade-offs explained (bullet points):
- Small room trade-off: choosing a slightly smaller bed improved circulation and increased storage—prioritize daily movement over maximal bed size.
- Large room trade-off: dedicating floor space for a seating zone required built-in storage to avoid clutter—trade visual openness for functional zones.
- Lighting trade-off: more layered lighting requires additional circuits and dimmers; allocate 1–2 hours to plan wiring or hire an electrician.
For layout visualization techniques and templates see space planning methodologies.
-
Finalize, stage and maintain your layout:
Principles of Effective Bedroom Layout
(Short recap and finalization step) Before locking in purchases, stage the room for at least 24–48 hours with temporary mock-ups using tape and boxes. Re-measure clearances at real-life use times (morning and evening) and adjust. Label storage zones and adopt a 6-month review to catch evolving needs.
Common mistakes and how to avoid them (practitioner notes)
I once placed a dresser opposite a narrow bed and repeatedly stubbed toes; I learned to test mock-ups with tape and live use for 48 hours. I often see designers overload a room with same-scale furniture—now I remove one item before buying another. When in doubt, increase walkway clearances by 6 inches and retest.
Common Bedroom Layout Mistakes and How to Fix Them
- Awkward furniture placement: Reposition big pieces against longer walls and anchor with rugs.
- Blocked pathways: Remove or slim tables and prefer wall-mounts to free circulation.
- Overcrowding: Pare down furniture and use multifunctional pieces.
- Poor bed orientation: Reorient to the best available sightline and shield from drafts or glare.
- Unbalanced design: Add vertical elements opposite heavy furniture to balance visual weight.
For more on handling awkward-shaped rooms and large spaces, review handling awkward layouts in large rooms and see practical transformations at before and after layout transformations.
Maximizing Storage and Organization in Bedroom Arrangements
(Detailed how-to recap)
Use integrated storage first: built-in wardrobes, recessed shelving and headboard cabinetry preserve circulation. For under-bed storage pick drawers at least 6–9″ tall; leave a 2–3″ floor clearance to protect finish. Use closet dividers: 60% hanging, 30% shelving, 10% drawers as a starter allocation for mixed wardrobes.
For small rooms, cross-apply seating and storage combos used in living rooms—see efficient furniture layouts for small spaces and sectional options at sectional furniture options.
Lighting and Accessories Placement for Enhancing Bedroom Layouts
(Expanded reminders)
Layer lights, use dimmers, and position switches and bedside lamps for reachability. Keep bedside switch within 18 inches of mattress edge; use warm color temperatures (2700–3000K) around beds for sleep-friendly ambiance.
Tips for Designing a Relaxing and Functional Bedroom Layout
(Hands-on design recommendations)
Plan zones with intention: leave 30–36 inches for main circulation, use rugs (5′ x 8′ or larger) to anchor the bed, and keep high-traffic routes clear. For bedrooms that share uses (work/sleep), adopt transparent separation like a low bookcase or slim screen; see shared space design tips.
Case Studies: Sample Bedroom Layouts for Efficient Room Arrangements
Short illustrated examples and rationales (additional to the two mini case studies above):
- Studio bedroom (11′ x 13′): combined sleep and work with a fold-down desk; used twin Murphy bed to free daytime floor area — trade-off: slightly higher initial cost for daily flexibility.
- Guest room (10′ x 12′): used daybed with trundle and wall-mounted shelves—result: flexible sleeping for two and ample shelf storage.
Want to visualize or print plans? Use the techniques in drawing effective bedroom layouts.
Common mistakes and how to avoid them — practitioner checklist
Below is a short verification checklist before you finalize the room.
- Walkways: minimum 24–36 inches clear
- Bed clearances: 24 inches each side for singles, 30–36 inches for larger beds
- Closet clearance: at least 24 inches in front of hanging storage
- Lighting controls within 18 inches of bed edge
- Storage sufficient for 6 months of seasonal rotation
When to call a professional
Hire a professional when you need electrical changes (new circuits, recessed lighting), structural modifications (moving windows or doors), custom built-ins, or if you require formal accessibility compliance. Expect an electrician for a lighting overhaul to take 4–8 hours; carpentry for built-ins typically estimates 1–3 days depending on scope.
Principles of Effective Bedroom Layout
(Final recap) Apply the ergonomic clearances, place the bed as the focal point, integrate storage into the initial layout, and layer lighting—then live-test with temporary mock-ups for at least 48 hours before committing to major purchases.
Bedroom Furniture Layout Ideas for Different Styles and Functions
Summary of main layout recipes: choose multifunctional furniture for small bedrooms; emphasize symmetry and clearance for traditional rooms; use low-profile furniture and vertical storage for contemporary spaces. For seating ideas applicable to bedrooms, see comfortable seating options, and for furniture choice guidance examine furniture selection tips.
How to Choose the Best Bedroom Layout Based on Room Size and Shape
Quick how-to recap: measure, prioritize circulation and functions, and choose bed orientation that preserves sightlines and daylight. For measurement methodology see accurate bedroom dimensions. For adaptable layouts in open homes refer to integrated floor plan layouts and flexible layout strategies.
Maximizing Storage and Organization in Bedroom Arrangements
For practical storage layouts and cross-application of seating-to-storage solutions see space optimization techniques.
Lighting and Accessories Placement for Enhancing Bedroom Layouts
Use lighting to sculpt zones and prioritize warm bedside illumination (2700–3000K). For sleep-related lighting recommendations see the National Sleep Foundation.
Common Bedroom Layout Mistakes and How to Fix Them
Review earlier troubleshooting steps and consult layout transformations and awkward-room resources for dramatic improvements: before and after layout transformations.
Tips for Designing a Relaxing and Functional Bedroom Layout
For shared-space specifics consult shared space design tips and for multi-function planning techniques see multi-functional space planning.
Case Studies: Sample Bedroom Layouts for Efficient Room Arrangements
Two earlier case studies illustrate before/after rationale. If you want to draw or print layout plans, use the guide here: drawing effective bedroom layouts.
Conclusion
Key takeaways: measure precisely, place the bed first, maintain 24–36 inches of clearance for circulation, prioritize integrated storage, and use layered lighting to support zones. Test layouts with tape and live mock-ups for 48 hours before final purchases. Ready to start? Draft your room plan using the checklist above and, if you want professional help for electrical or structural changes, contact a licensed contractor.
Next step: print your measurements, tape out proposed clearances, and try the bed-first orientation for 48 hours to confirm flow before buying new furniture.


