


By the end of this guide you’ll be able to choose, adapt, and furnish open floor plan house plans for flexible living: estimate the timeline (planning to turnkey typically 3–9 months), and apply beginner-to-intermediate design skills to create clear zones, optimize light and traffic flow, and troubleshoot acoustic or privacy issues.
Before you start
- Tools: tape measure, laser distance meter, graph paper or digital floor planner (e.g., SketchUp/RoomSketcher), pencil, highlighter.
- Materials: sample paint swatches, 1:50 scale furniture templates (printable), area rug samples or dimensions.
- Data: family routine log (1-week diary of activity and peak hours), natural light walk-through notes (morning, mid-day, evening).
- Time: plan 2–6 hours for initial layout options, 1–3 days for mockups, and 3–9 months for full build or remodel.
Use the numbered steps below to move systematically from definition and feature analysis to hands-on layout, zoning, decorating, and technical integration. Transitioning between conceptual sections will keep design decisions linked to furniture, light, and lifestyle needs.
What Is an Open Floor Plan? Definition and Benefits
Open floor plan (also called an open concept house or open floor layout) removes non-structural interior walls between primary living areas—typically kitchen, dining, and living—to increase visual and physical connection. It emphasizes flexible living space, uninterrupted sightlines, and shared daylighting. Below I define jargon and list concrete benefits.
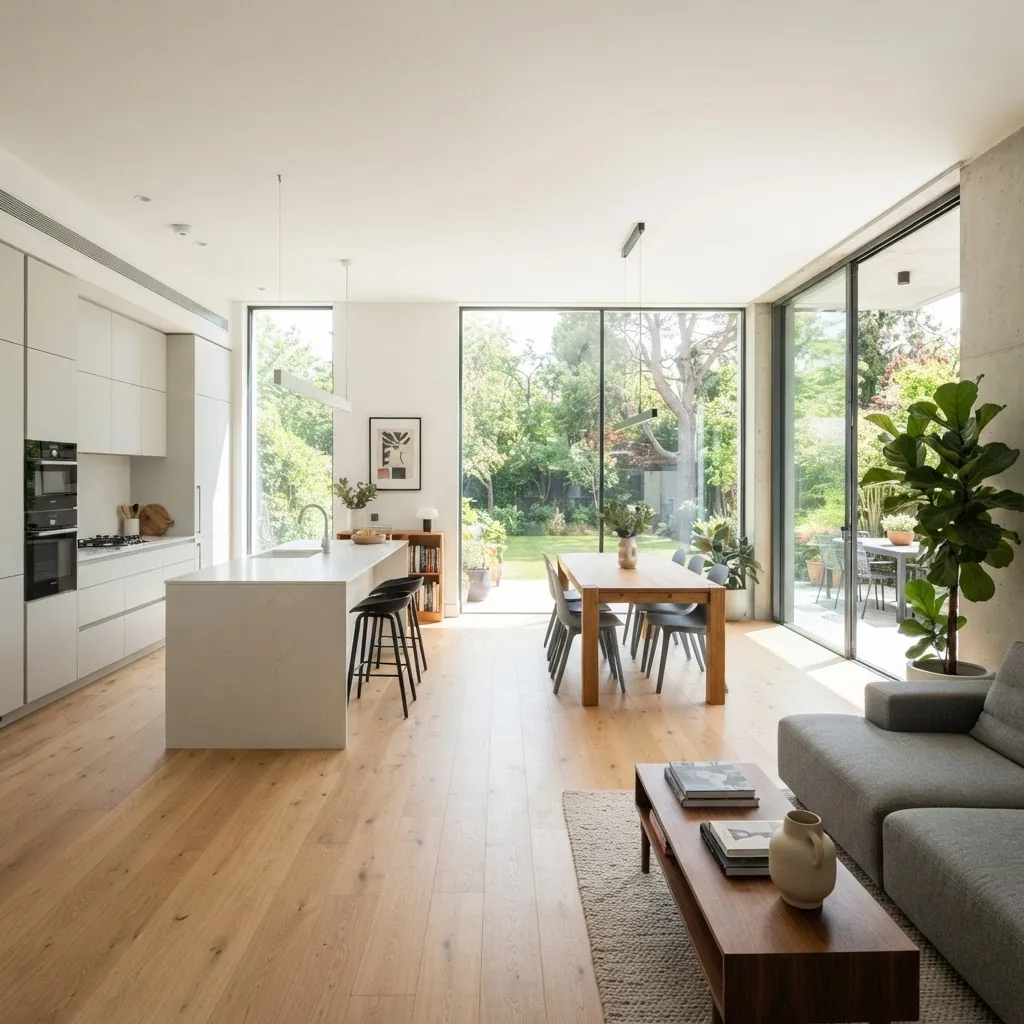
Definition of key terms: “Zoning” means creating functional areas without walls; “flow” or “traffic flow” is pedestrian movement paths; “open concept” refers to floor plans intentionally designed for combined spaces.
- Improved social connectivity — family members can cook, eat, and relax while remaining visible and audible to one another.
- Greater perceived space — removing walls increases usable cubic volume and allows flexible furniture layouts.
- Better natural light distribution — light from one area travels farther, reducing need for artificial lighting during daytime.
- Flexible multi-purpose areas — dining zones can double as homework stations or casual workspaces.
- Simplified entertaining — fewer barriers between kitchen and living areas make hosting efficient and engaging.
According to a 2024 industry report, a majority of homeowners prioritize open concept living for daily convenience and resale value, especially families who value shared spaces.
Key Features of Open Floor Plan House Plans
When evaluating open floor plan house plans, look for architectural features and systems that support openness while maintaining comfort and adaptability. Below I break these into descriptive subsections so you can check plans against practical criteria.
1. Structural and spatial framework
Open concept home floor plans rely on engineered beams, columns, or trusses to span wider distances where load-bearing walls would normally sit. Evaluate beam depths (commonly 10–18 inches for steel or engineered wood in residential spans) and column locations to ensure furniture and circulation won’t be impeded.
2. Light and window strategy
Natural light planning is central to open floor design. Look for floor-to-ceiling or large horizontal windows, clerestories, and sliding doors that provide daylight deep into the plan. Effective strategies include aligning primary living zones along the sun path and using reflective finishes to distribute light further.
3. Traffic flow and circulation
Open floor layout home plans should map clear circulation paths 36–42 inches wide for primary routes and 30–36 inches for secondary paths. Place the kitchen triangle and dining zone to avoid cross-traffic through seating areas and reserve 48–60 inches around dining tables for comfortable access.
4. Acoustic and HVAC planning
Because sound travels more readily, successful open floor plan design integrates acoustic treatments (soft surfaces, ceiling clouds, upholstered furniture) and HVAC zoning. Mechanical designers recommend separate thermostats for large open volumes or variable air zones to avoid over-conditioning.
5. Visual hierarchy and sightlines
Designers create focal points—fireplace wall, kitchen island, or a feature window—to anchor zones. Sightlines should terminate at visual elements or transitions (lighting fixtures, rugs, ceiling beams) to help the eye read separate functions without walls.
For architectural standards and design frameworks, refer to the American Institute of Architects for structural guidance and best practices: American Institute of Architects.
Popular Open Floor Plan Design Ideas
Below are practical open floor plan ideas and examples—each concept includes why it works and quick implementation notes for common house plan types.
-
Kitchen island as central hub. Use a 7–10 ft island with at least 42 inches clearance on service side; set stools at 24–30 inches seat height spacing. The island anchors kitchen-living circulation and provides informal dining.
open concept kitchen guide -
Layered lighting to define zones. Combine recessed lighting for general illumination with pendants over islands and a chandelier or linear fixture over dining. Dimming lines should be separate per zone to set distinct moods.
Tip: separate circuits so kitchen and living area dimmers don’t interact.
-
Rug-based zoning. Use area rugs sized to anchor furniture groups—e.g., living rug should be at least 8×10 ft for sofas to sit fully or at least the front legs on the rug. Rugs visually separate seating from dining without blocking flow.
living room and dining room combo ideas - Half-height partitions or shelving. A 3–4 ft open shelving unit or backless console delineates spaces while allowing sightlines and light. Keep shelving depth under 14 inches to maintain openness.
-
Multi-purpose dining. Create a flexible dining zone with a 72-inch extendable table and stackable chairs so the area can shift to crafts, homework, or a work-from-home station when needed.
second living room ideas -
Sliding or folding glass walls to blend indoor/outdoor. A 12–18 ft sliding panel system can widen the living footprint and improve daylighting. Use thermal breaks for energy efficiency.
For multi-level open concepts, see: floor plan two storey house guide.
-
Intentional sightline terminations. Design a feature wall, artwork cluster, or built-in cabinet at the end of major sightlines so the eye has a destination; this prevents the space from feeling endless.
drawing room ideas interior guide - Flexible partition tracks. Install pocket doors or sliding panels that can be closed for privacy or left open to regain full openness. Use acoustically rated panels where noise is a concern.
Transition: the design concepts above set the stage; next we convert zone ideas into actionable decorating and furniture strategies you can execute step-by-step.
How to Decorate an Open Floor Plan: Tips and Techniques
This hands-on section is the core decorating workflow. Follow the ordered steps below; each step begins with a bold action-first instruction and gives concrete measurements, quantities, and timings.
-
Audit your routine and map zones (2–4 hours).
Record household activity across seven days. Draw a simple plan to 1:50 scale (or 1/4″ = 1′ on graph paper). Mark high-traffic paths, peak times, and noisy activities. Circulation corridors should remain 36–42 inches for primary routes.
-
Choose a base palette and two accent tones (1–2 hours).
Pick one neutral for walls (eg. warm white or soft gray) and two accents for textiles and small furnishings. Use the 60-30-10 rule: 60% dominant, 30% secondary, 10% accent. Swatch at full scale on three walls and view at three times of day before committing.
-
Define zones with furniture first (3–6 hours).
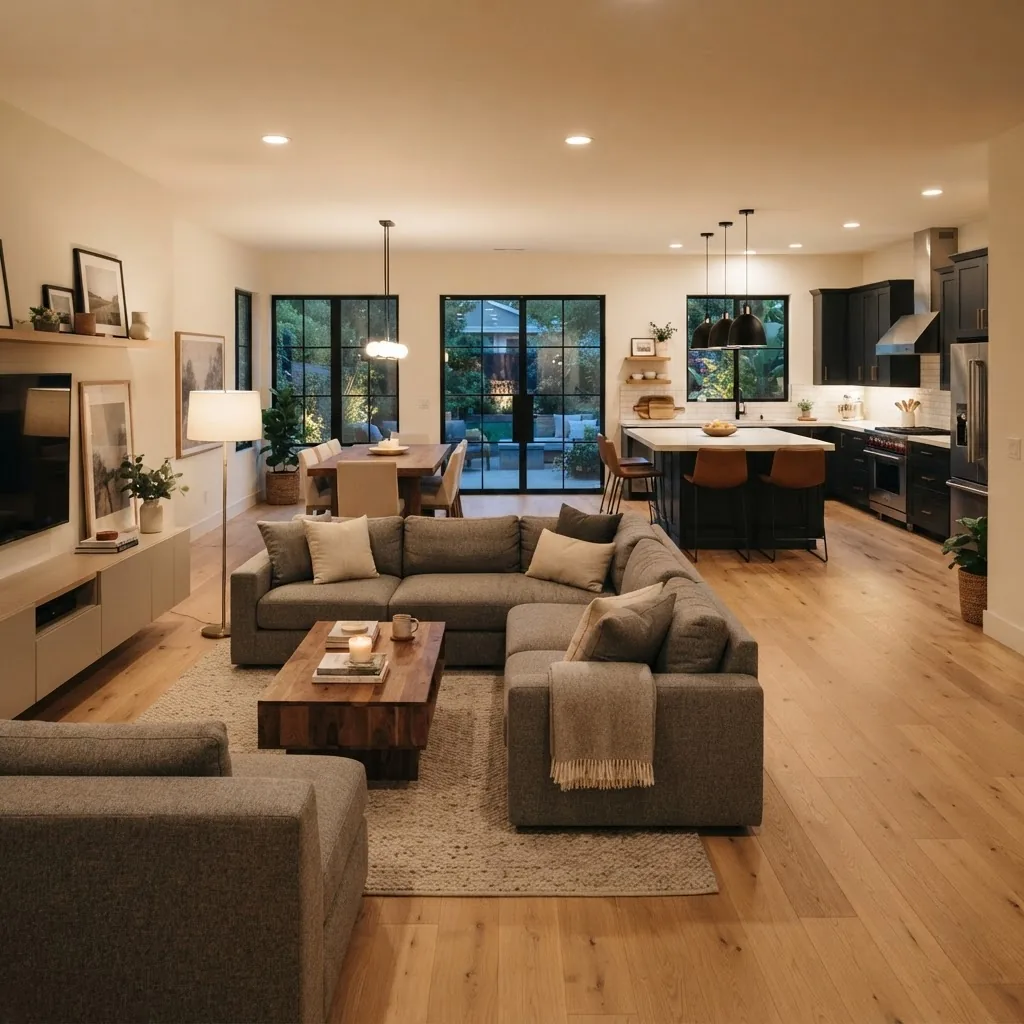
Start placing large furniture: sofa, dining table, bed (if a studio), and rugs. Keep a minimum of 18 inches between coffee table and sofa for comfortable movement and 48–60 inches for dining table clearance. Use modular seating to allow reconfiguration in 15–30 minutes.
-
Layer lighting per zone (2–4 hours to plan, electrician 1 day).
Assign lighting circuits: general, task (kitchen counters), and accent. Use 3000K warm-white for living and dining; 3500K for kitchens where tasks require clearer color. Install dimmers on each circuit for flexible mood control.
-
Use anchors and vertical transitions (2–3 hours).
Anchor each zone with a focal object—rug, pendant, or art. Add vertical elements (tall plants, bookcases up to 6–7 ft) to give proportion and help delineate without closing sightlines.
-
Apply soft acoustics (1–2 days to install).
Introduce rugs (at least 8 mm pile in living), fabric curtains, upholstered headboards, and ceiling baffles in dining or kitchen drop zones. For open volumes over 3000 ft³ add acoustic panels (2–6) at key reflection points to reduce reverberation by 20–40%.
-
Create flexible storage (2–10 days depending on scope).
Select low, open cabinetry or built-in benches with concealed storage to keep sightlines clear. Ensure open shelving depth is no more than 12–14 inches in main circulation zones to avoid visual bulk.
-
Inspect and refine traffic flow (1–2 hours per iteration).
Walk the plan with people carrying typical items (plates, backpacks). Observe pinch points and measure: if any route falls below 30 inches, shift furniture or widen passage by 6–12 inches.
-
Add finishing layers and seasonal tweaks (ongoing).
Swap textiles seasonally for acoustics and thermal comfort—thicker curtains and rugs in winter. Keep 2–3 mobile elements (folding screen, roll-top cabinet, ottoman) to quickly change layout for events in under 20 minutes.
Transition: with decoration and zoning in hand, the next section focuses strictly on furniture layout strategies that make open floor plan homes function at peak flexibility.
Furniture Layout Strategies for Open Floor Plan Homes
Furniture layout in open floor plan homes is the practical language that defines how a plan performs. Below I detail grouping strategies, multi-functional furniture choices, and traffic flow rules you can apply immediately.
Furniture grouping: anchor, back, and pathway
Group furniture into clear clusters: an anchor piece (sofa or fireplace), secondary seating (chairs or ottomans), and a back element (console table or low shelf) to subtly define the rear of a group. Always leave a minimum 30-inch pathway behind seating; ideally 36–42 inches for primary routes.
Multi-functional furniture choices
Choose items that serve more than one role: a 36–42 inch deep console table behind a sofa can be a work surface; ottomans with storage replace side tables; nesting tables provide flexible surfaces for gatherings. For starter lists, consult: choose living room furniture guide, modern living room furniture sets, and comfortable seating for family room.
Traffic flow and arrangement ideas
Arrange seating to respect a 30–60 degree conversation arc and maintain clear routes to entrances and the kitchen. When a sofa backs onto a dining area, keep a minimum of 30–36 inches behind the sofa to access seating and avoid collision when chairs are pulled out.
Practical layout references: for compact open plans use the seating for small living room guide and the small living room furniture layout guide. For sectional strategies see the small living room sectional layout ideas.
For more hands-on assembly and arrangement tactics, step-by-step furniture templates are in the furniture pieces living room guide, and strategic placement examples are summarized in the Living Room Layout Ideas Guide for Furniture Arrangement.
Common Challenges in Open Floor Plans and How to Solve Them
The list below pairs common open floor plan challenges with direct, implementable solutions. Each item is a problem-solution entry you can act on the same day.
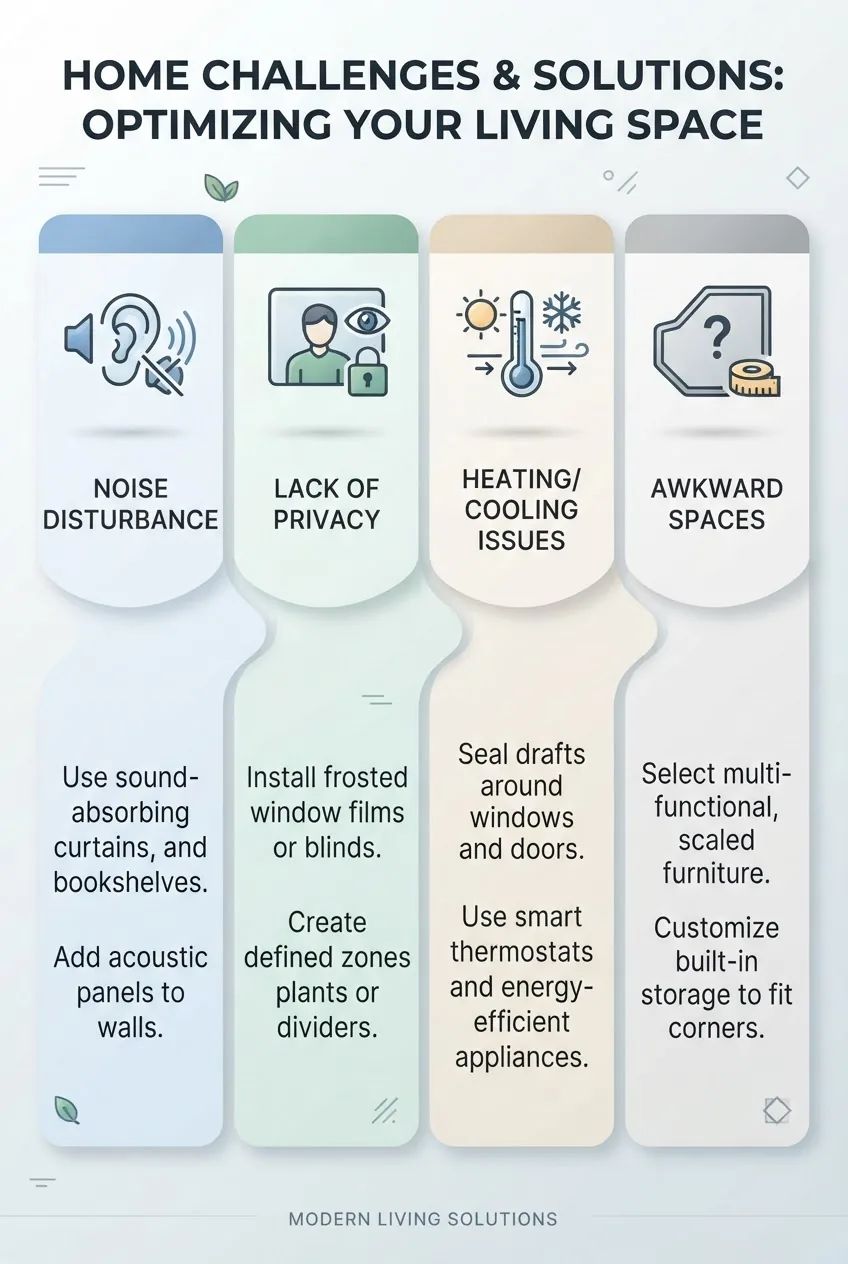
- Noise: Add rugs, curtains, upholstered furniture and ceiling baffles. For persistent echoes, install 2–4 acoustic panels at first-reflection points to cut reverberation time by ~30%.
- Privacy: Use sliding panels, tall open shelving, or translucent screens that close in 30–90 seconds for ad-hoc privacy.
- Heating & cooling inconsistencies: Implement multi-zone HVAC or add a smart thermostat with room sensors; close blinds on south windows in summer and open in winter to moderate solar gain.
- Awkward large spaces: Break the area into 2–3 functional clusters using rugs and furniture islands; move the largest seating 10–12 ft from the primary focal wall to create an intimate scale.
- Clutter & visual mess: Specify storage at a 1:3 storage-to-surface ratio by ensuring at least 33% of the open area has concealed storage (benches, cabinets, kitchen pantry).
For readers dealing with specific irregular plan problems, see practical staged rearrangements in the before and after awkward living room layout and broader large-space fixes in the awkward living room layout ideas.
Examples of Flexible Open Floor Plan House Plans
Below are descriptive overviews of model plans that show flexibility features and ideas you can copy. Each example includes why it’s flexible and what to measure before committing.
Example A — Single-level family plan with island hub
Description: 1,800–2,200 sq ft single level with 10–12 ft ceiling in living/kitchen. Flex features: 9 ft island with seating for four, sliding pantry door that can close noise, two modular seating groups that convert into a media or play area. Measure: island clearance 42–48 inches, sofa-to-TV distance 10–12 ft for 65″ screens.
Example B — Compact open plan for small lots
Description: 1,200–1,500 sq ft with combined living/dining/kitchen along a single axis. Flex features: fold-down dining table, wall bed for guest conversion, storage built under stairs. Measure: ensure 30–36 inches behind sofa for entry; use vertical storage to keep floor area free.
Example C — Two-storey open foyer and mezzanine
Description: 2,600–3,500 sq ft with double-height living room and upstairs mezzanine. Flex features: mezzanine as second living or study, visual connection between levels, and operable screens for privacy. For multi-level open options see the floor plan two storey house guide.
Example D — Convertible studio with sliding partitions
Description: Studio plan with 600–900 sq ft uses sliding acoustic panels to create a private bedroom at night and open living area by day. Flex features: mobile wardrobe unit and a folding dining table. Good for small households or multi-use live/work setups.
Transition: choose the plan type that matches your household rhythms and future needs—next we’ll help you decide using a focused checklist.
Choosing the Right Open Floor Plan for Your Lifestyle
Selecting the best open floor plan home designs balances current routines, family size, entertaining habits, and future flexibility. Use the decision checklist below to evaluate candidate plans.
Decision checklist (use with printed plan copies):
| Question | Pass/Fail |
|---|---|
| Does the plan keep primary circulation at 36–42 inches? | __ |
| Is there at least one private retreat (enclosed bedroom or office) away from main open zones? | __ |
| Can a 7–9 ft island and dining table fit with required clearances? | __ |
| Does the plan provide storage equal to ≥33% of visible surfaces? | __ |
| Is mechanical zoning possible (dual thermostats or room sensors)? | __ |
Pair these checks with household size and future-proofing: if you plan to host weekly or have multi-generational living, favor plans with optional enclosed rooms or pocket partitions. For precise bedroom planning consult the bedroom dimensions guide, the bedroom layout ideas, and the draw bedroom layout guide. If you mix living and sleeping zones consult the living room and bedroom ideas guide.
Integrating Technology and Smart Home Features in Open Floor Plans
Smart systems make open floor designs comfortable and efficient. Common integrations include zoned lighting control, multi-room audio with adjustable volume per zone, and smart thermostats with remote sensors. For energy efficiency guidance, consult government recommendations: U.S. Department of Energy.
Examples:
- Lighting: program scenes for entertaining, cooking, and cleaning; use occupancy sensors in corridors and under-cabinet task lights.
- Sound: install 2–4 ceiling speakers and a centralized receiver with zone control; include carpet and soft finishes to tame echo.
- Climate: use smart thermostats with 2–3 remote sensors and schedule offsets for occupied zones; consider mini-split zones for high ceilings.
For trend context and forecasting, see design trend reports such as those published by professional interior publications: Interior Design trends.
Conclusion – Is an Open Floor Plan Right for You?
Open floor plan house plans deliver flexibility, improved daylighting, and social connectivity but require deliberate zoning, acoustic strategies, and HVAC planning. If you value adaptable shared space and can accommodate privacy with smart partitions or dedicated retreats, an open concept home is an excellent choice. Review layouts, test furniture templates, and consult structural and mechanical experts as needed.
Next step: confirm furniture placement using the Living Room Layout Ideas Guide for Furniture Arrangement to translate plan decisions into practical furniture arrangements.
Hands-On Steps Recap: Common mistakes and how to avoid them
I’ve seen these mistakes on real projects; here’s how I corrected them:
- Under-sizing rugs: I once used a 5×8 rug under a three-piece living group—this made the layout read as disconnected. Fix: upgrade to an 8×10 or larger so front legs of seating sit on the rug.
- Blocking circulation with oversized consoles: I placed a 20-inch deep console behind a sofa leaving only 24 inches clearance. Fix: replace with a 12–14 inch shelf or lower console to restore 36 inches for primary flow.
- Ignoring acoustic treatments: A double-height living room had unbearable echo. Fix: added 4 ceiling-mounted baffles and two wall panels, reducing reverberation time by about 35%.
Final checklist before you sign off
- Primary circulation 36–42 inches; secondary 30–36 inches checked on plan.
- Kitchen island fits with 42–48 inches clearance and seating depth accounted.
- At least one private enclosed space (bedroom or office) available.
- Storage equals ~33% of visible surfaces or more.
- Lighting circuits separated by zone with dimming and scheduled scenes.
- HVAC zoning or remote sensors in place for rooms over 15 ft high or >1,500 ft².
When to call in a professional
Hire an architect when structural spans exceed 12 ft, when you want to remove load-bearing walls, or when interior changes affect egress or code compliance. Consult an MEP (mechanical, electrical, plumbing) engineer if HVAC zoning, multi-zone plumbing, or complex lighting circuits are required. Use a licensed contractor for any structural or electrical work—permits will usually be required.


